
SearchBlox for Amazon OpenSearch Service
SearchBlox for Amazon OpenSearch Serviceit is an enterprise search platform for the AWS Cloud that uses Amazon OpenSearch Service, a fully managed and scalable search service on Amazon Web Services. SearchBlox for Amazon OpenSearch Service can crawl, index, and search content from multiple data sources, including file systems, websites, databases, and applications.
Architecture
This service provides two types of SearchBlox servers available on the AWS Marketplace: SearchBlox IndexServer and SearchBlox SearchServer. The SearchBlox IndexServer can crawl and index content in more than 40 file formats, including PDF, HTML, and Microsoft Word, Excel, and PowerPoint, directly into Amazon OpenSearch Service. The SearchBlox SearchServer provides ready-to-use and customizable search interfaces, including faceted search, for the indexes created by the IndexServer in Amazon OpenSearch Service.

Setup
AWS Region
Please make sure to select the same AWS Region in all the following steps mentioned. For example, we have chosen "us-east-1" for creating opensearch, SearchBlox IndexServer , SearchBlox SearchServer, etc.
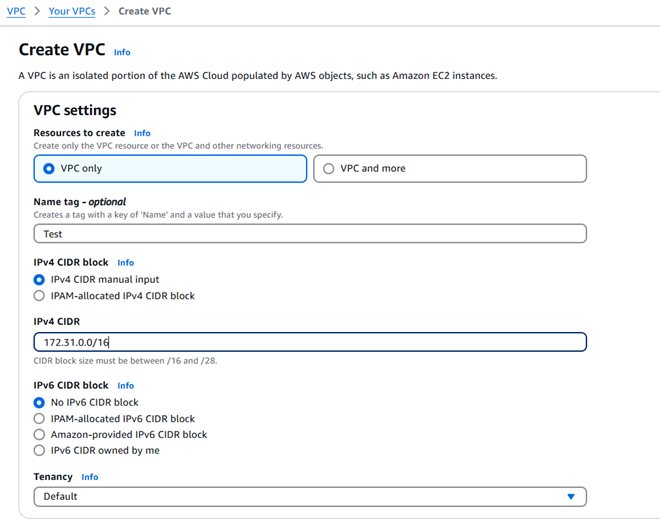
1. Create VPC
Create a VPC that will be used while setting up a SearchBlox IndexServer from the AWS Marketplace.
Instructions:
- Log in to your AWS Console.
- Go to the VPC Dashboard.
- Click Create VPC.
- Select VPC only.
- Enter a name tag (for example, SearchBloxVPC).
- Choose an IPv4 CIDR block (for example, 10.0.0.0/16).
- Keep the other settings as default unless you have specific requirements.
- Click Create VPC.

2. Create KeyPair
Create a Key Pair and store it safely. This will be used to access your AWS instance.
Instructions:
- Go to the EC2 Dashboard.
- In the left menu, click Key Pairs.
- Click Create key pair.
- Enter a name (for example, SearchBloxKey).
- Click Create key pair and download the file.

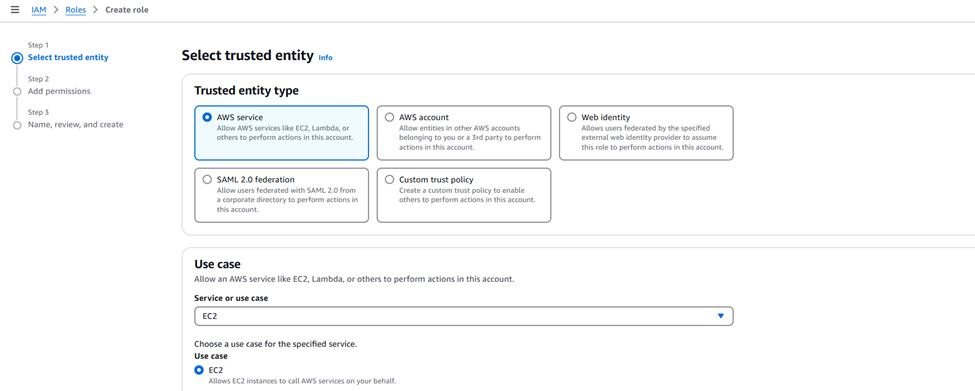
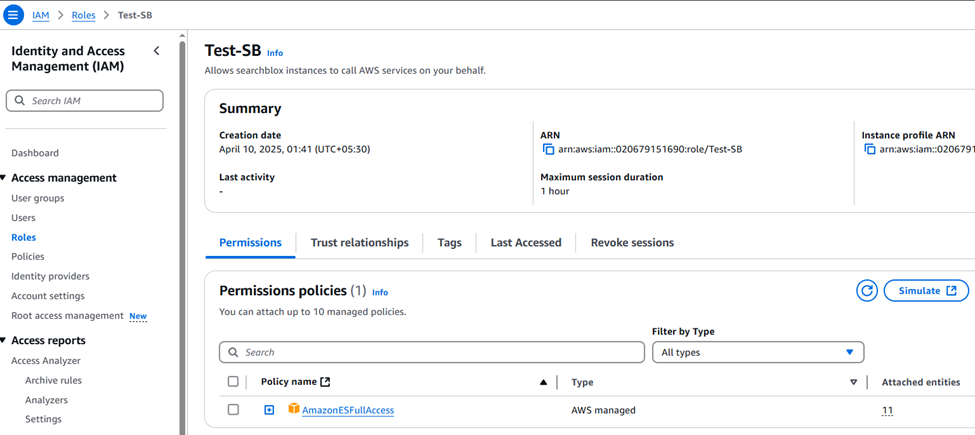
3. Create IAM Role
Create an IAM role named SearchBlox_AmazonES and attach the AmazonESFullAccess policy to it in Amazon Web Services. This role must be created after launching the SearchBlox IndexServer (and SearchServer, if used) from the AWS Marketplace. It allows the SearchBlox instance to communicate with Amazon OpenSearch Service.
Instructions:
• Go to the IAM Console.
• Click Roles → Create role.
• Choose:
o Trusted entity type: AWS service
o Use case: EC2
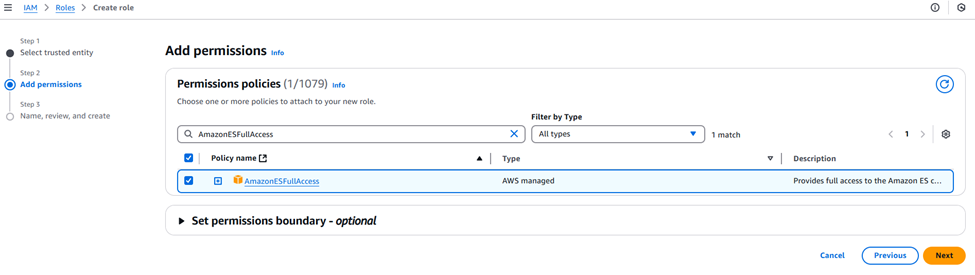
• Click Next to attach permissions.
•Search for and select the AmazonESFullAccess policy in Amazon Web Services.
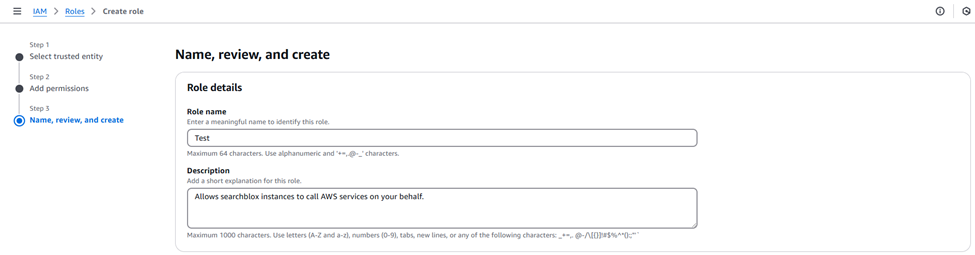
Click Next, then enter the role name SearchBlox_AmazonES.
Click Create role to finish creating the role for SearchBlox.
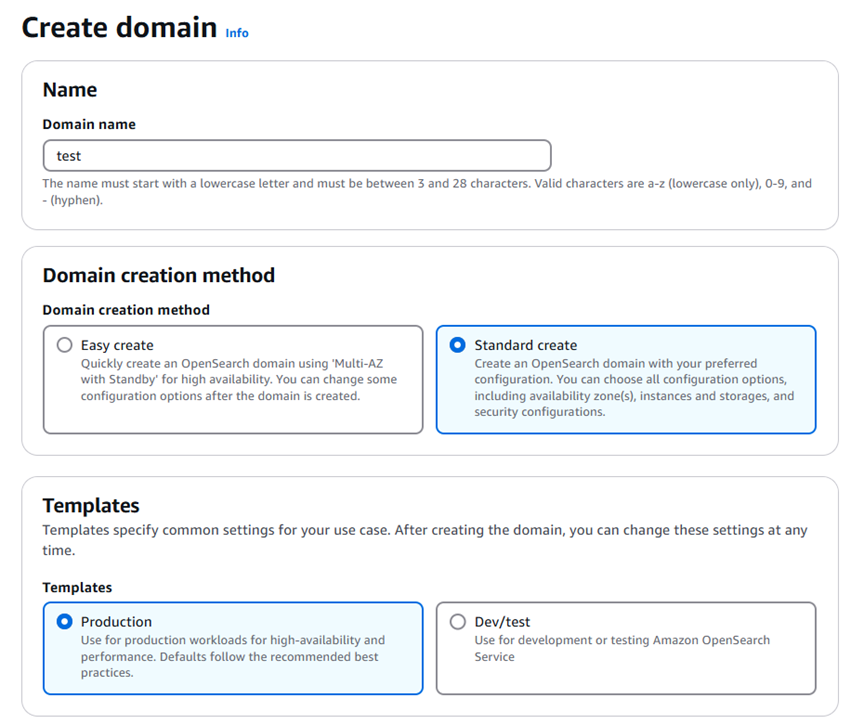
4. Create AWS Opensearch Domain
Instructions:
- Go to the AWS Management Console.
- Search for and open Amazon OpenSearch Service.
- Click Create domain on the dashboard.
Enter a domain name.
- Choose a Domain Creation Method:
- Standard create – Default option with manual step-by-step configuration.
- Quick create – Uses preconfigured settings for faster setup.
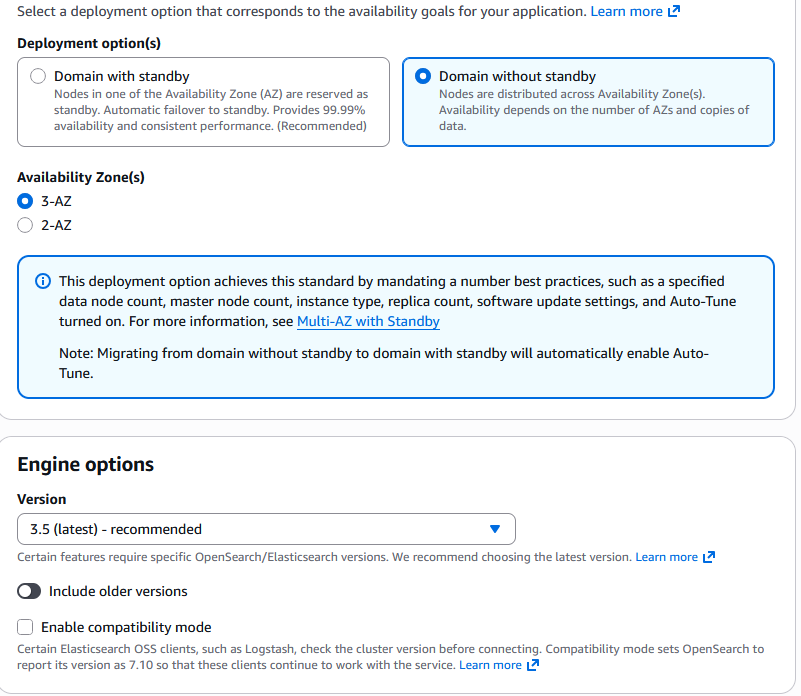
Deployment Option:
- Domain with standby – Keeps additional standby nodes ready. If a problem occurs, it automatically switches to these nodes, providing higher availability (99.99%) and better reliability.
- Domain without standby – Distributes nodes across availability zones without standby nodes. This option is more cost-effective but offers lower availability.
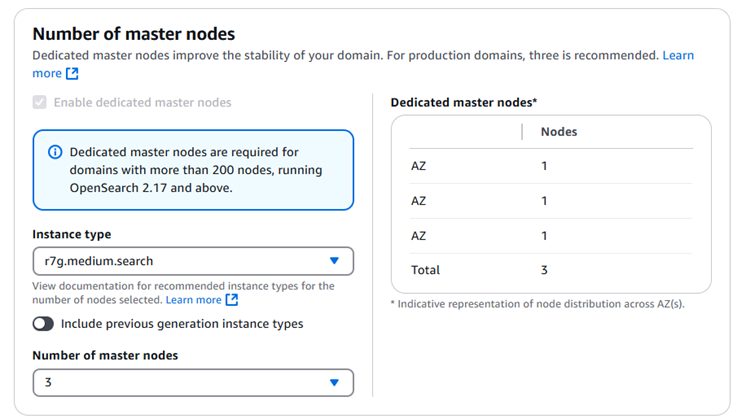
• Select the instance type for your nodes, specify the number of nodes, and configure storage settings, including storage type, size, and IOPS.

• Select the instance type for the master nodes and specify the number of master nodes.
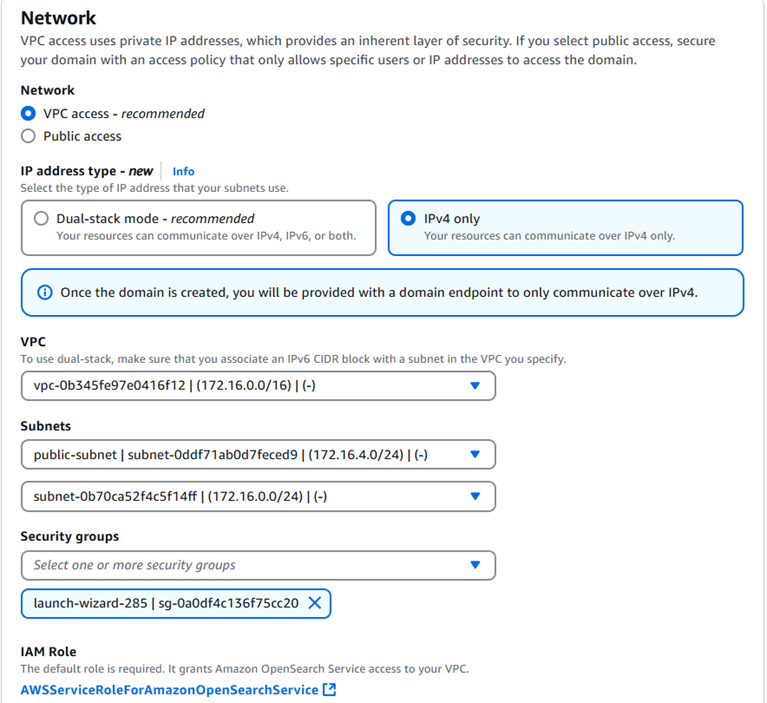
- Choose the access type for your OpenSearch domain. Use VPC access for private network access (more secure) or Public access if you want it to be reachable over the internet.
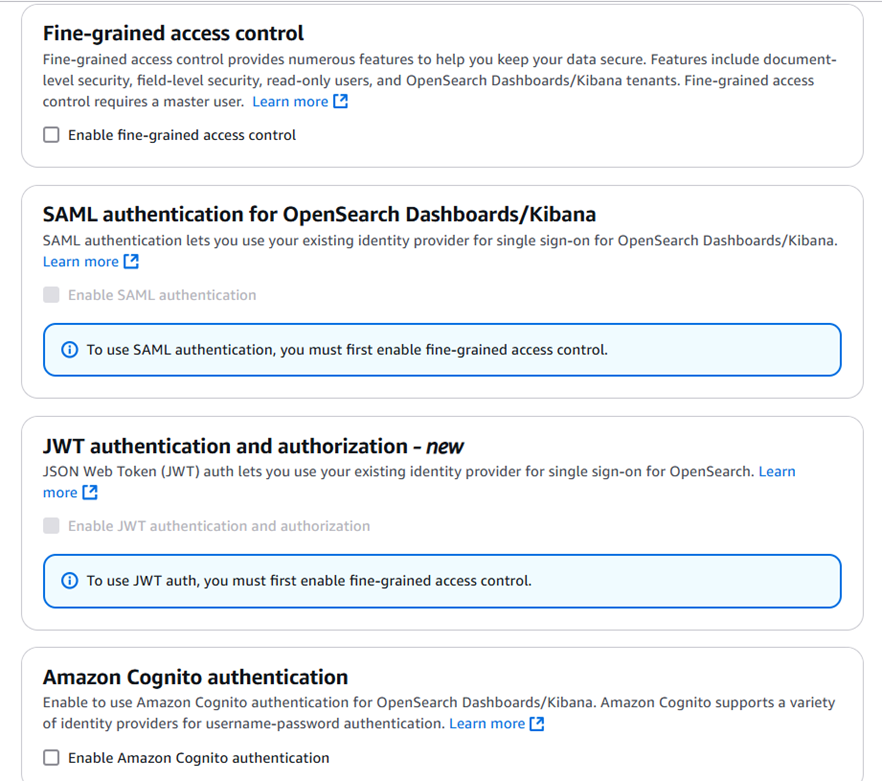
• Choose an authentication method from the options below, if needed.

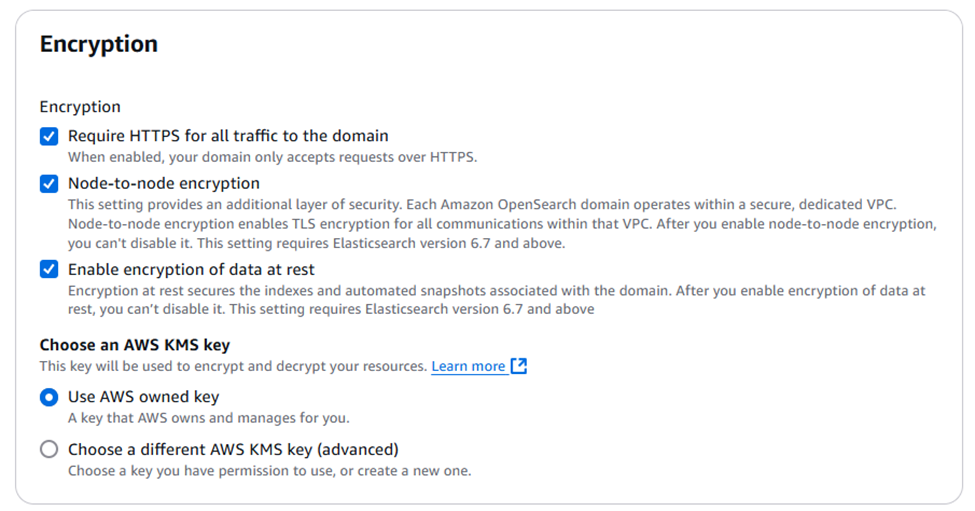
• Enable all encryption options to protect your data and secure communication, both while it is being transmitted (in transit) and when it is stored (at rest).
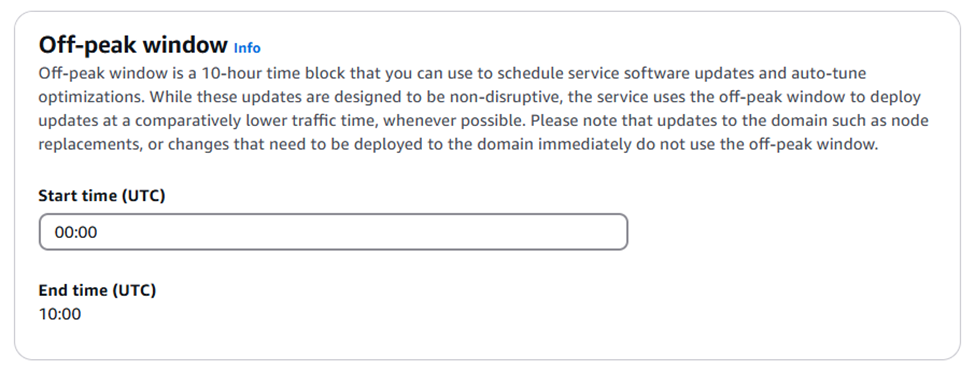
• Set an off-peak maintenance window so that AWS can perform updates and maintenance during periods of low traffic.
• Enable Auto-Tune so Amazon OpenSearch can automatically adjust and optimize your cluster’s performance based on workload patterns.

- After configuring all settings, click Create to start provisioning the OpenSearch domain.
- In about 10–15 minutes, the OpenSearch Service Dashboard will show your new domain. When it’s ready, you should see these status indicators:
- Domain processing status: Active
- Configuration change status: Completed
- Cluster health: Green
These indicators mean the domain is fully operational and healthy.
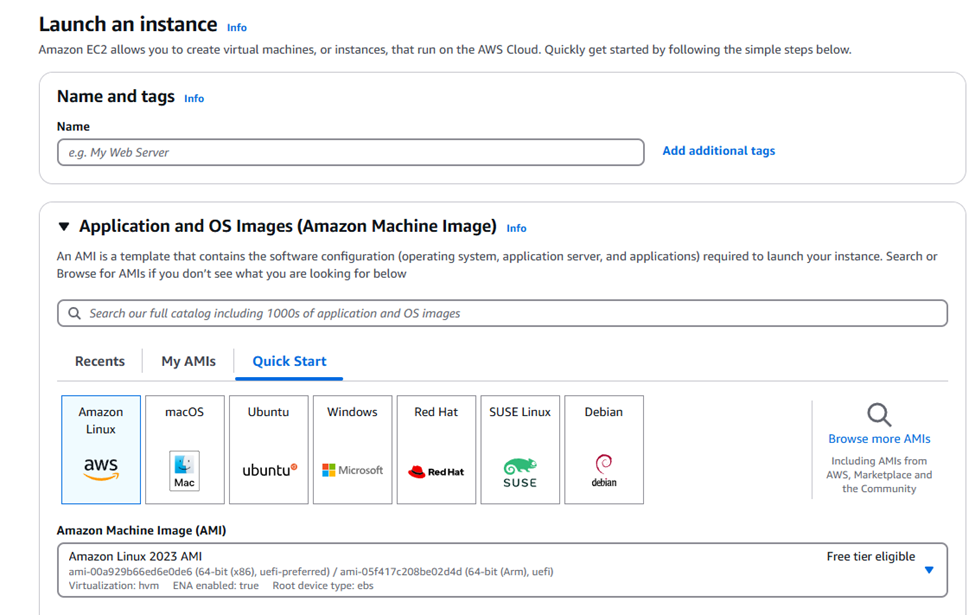
5.Launch SearchBlox IndexServer
•In the AWS Management Console, go to the EC2 service.
• Click Launch Instance to start creating a new EC2 instance.
• In the Amazon Machine Image (AMI) section, click Browse more AMIs.
•Go to the AWS Marketplace AMIs tab.
In the search bar, type “SearchBlox Enterprise Search”.
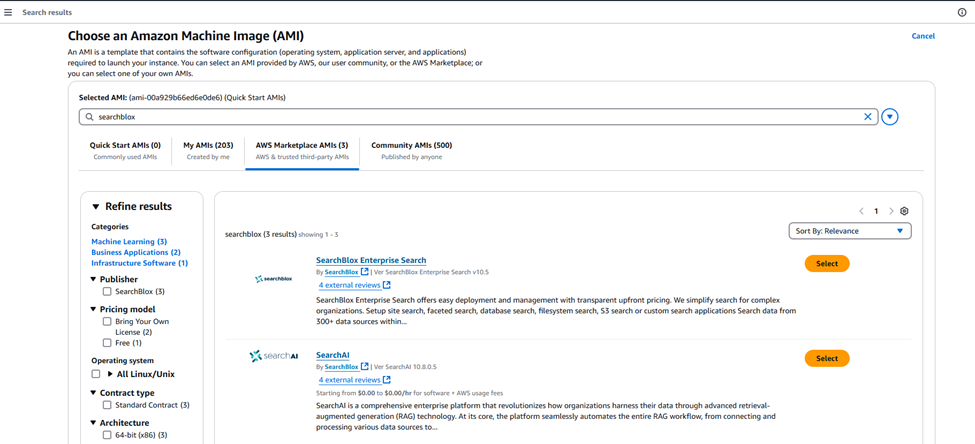
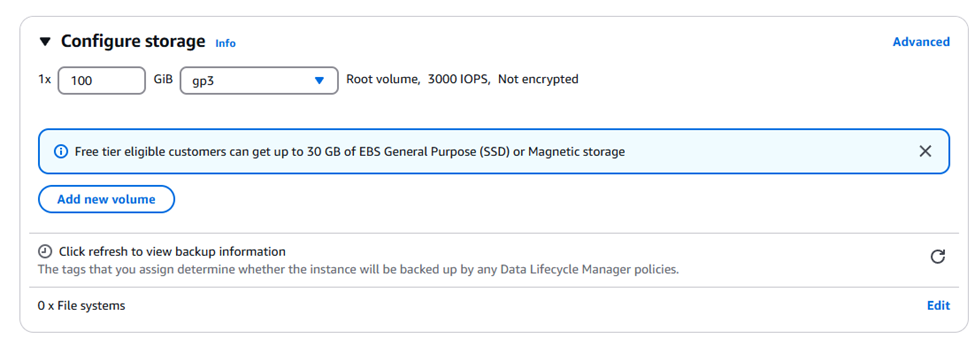
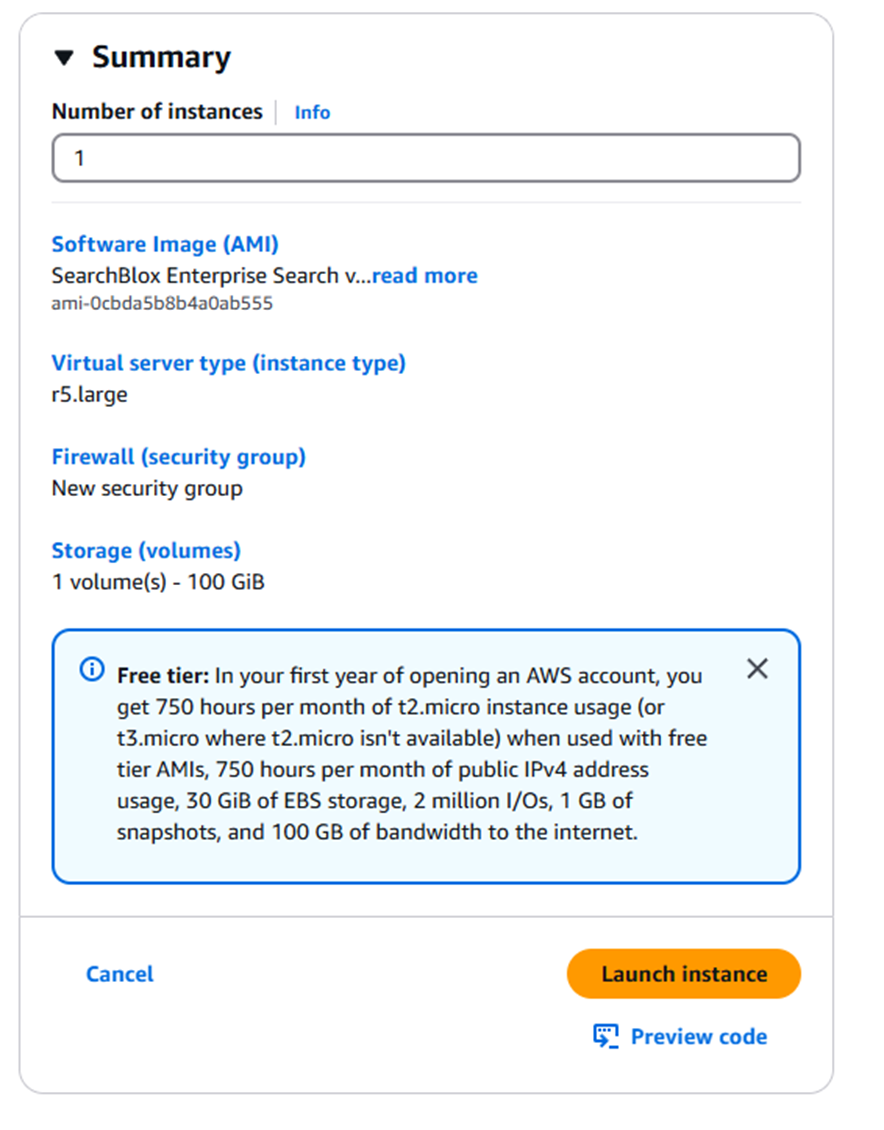
Once you find the SearchBlox Enterprise Search AMI, click on it to select it. Then configure the instance details, including instance type, network settings, and storage.
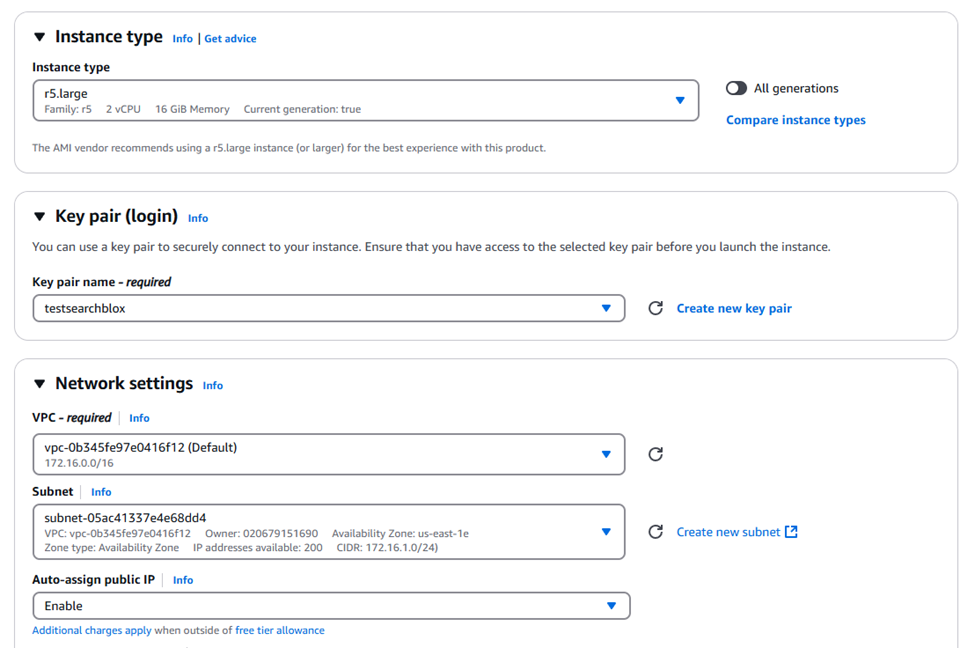
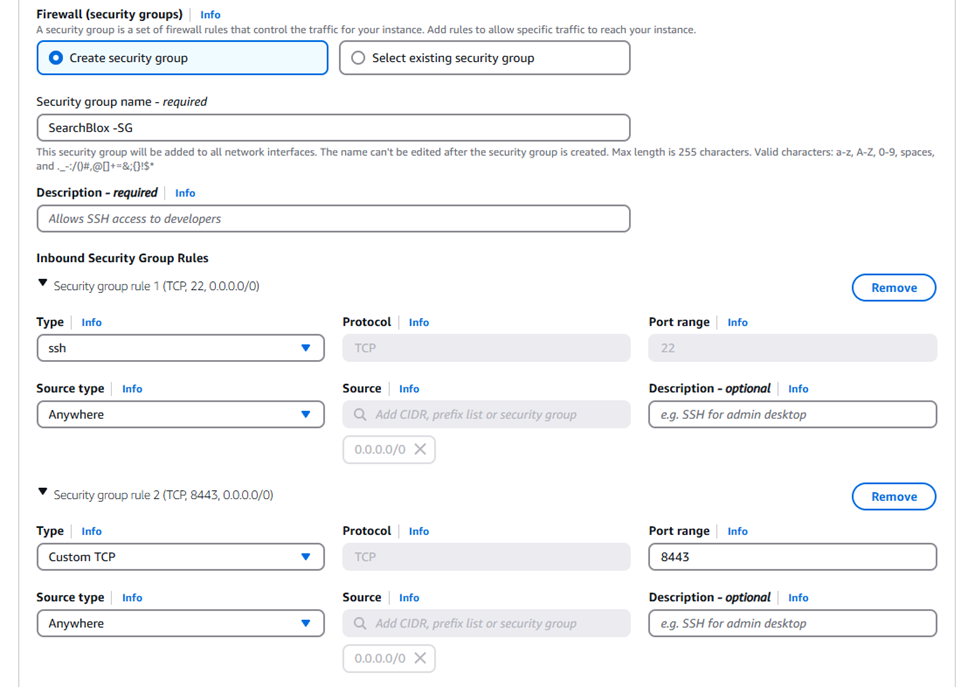
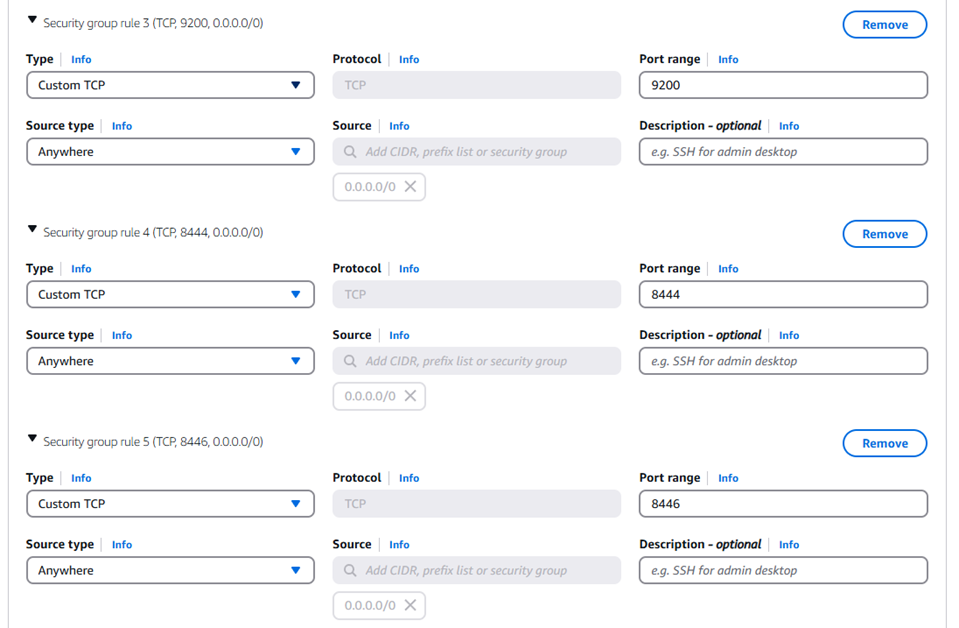
- Ensure your security group allows inbound TCP traffic on ports 8443, 8444, 8446, and 9200.
- After configuring the instance, proceed to Review and Launch it.
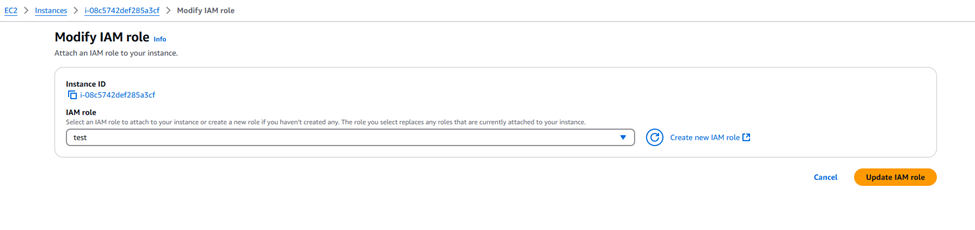
Integrate IAM Role for SearchBlox Server
To allow the EC2 instance to access Amazon OpenSearch:
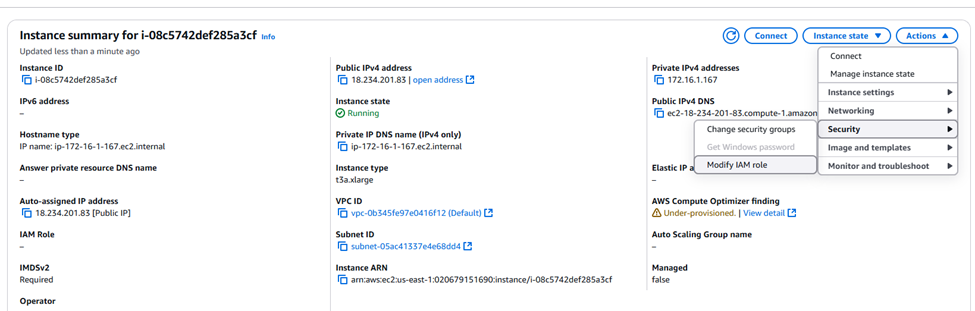
- Go to the EC2 Dashboard and locate your SearchBlox IndexServer instance.
- Right-click the instance (or select it and click Actions).

• Choose Instance Settings →Security→ Modify IAM Role.
•Select the IAM role you created earlier.
• Click Update IAM Role to attach the role.
SSH into the SearchBlox IndexServer
• Connect to the SearchBlox Server instance using SSH with the ec2-user and your .pem or .ppk key file.
• Switch to the SearchBlox user account:
sudo su – SearchBlox
• Open the awssettings.yml file to update the OpenSearch domain details:
/opt/searchblox/webapps/ROOT/WEB-INF/awssettings.yml
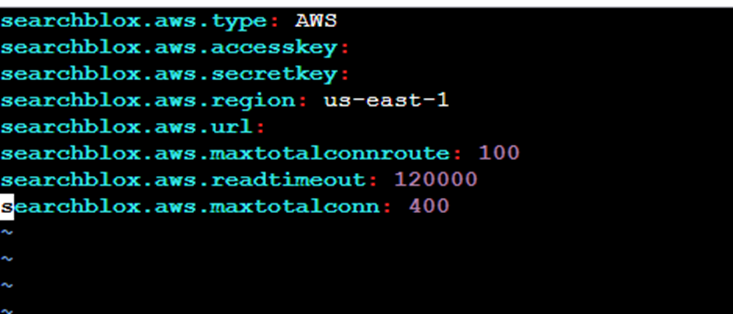
•Set aws.region to match the region where your SearchBlox IndexServer and OpenSearch instance were created.
Set aws.url to the OpenSearch domain endpoint shown in the AWS OpenSearch dashboard.
Update searchblox.yml:
• Open the file:
o /opt/searchblox/webapps/ROOT/WEB-INF/searchblox.yml
o Modify the deployment type line:
o searchblox.deployment.type: AWS

• Save the file after making the changes.
Restart SearchBlox.
Access the SearchBlox Admin Console at https://xxxx:8443/console where xxxx is the Public DNS of the SearchBlox IndexServer instance.
• Access the SearchBlox Search URL at:
SearchBlox Search url : https://xxxx:8443/search
where xxxx is the Public DNS of the SearchBlox SearchServer instance.
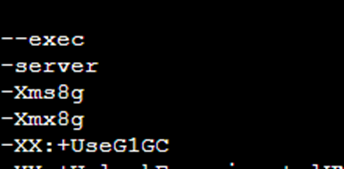
Increase RAM memory for SearchBlox in AWS.
• To allocate or modify RAM for SearchBlox, edit the JVM configuration file located at:
/opt/searchblox/start.d/jvm.ini
• Adjust Values (e.g., -Xms16g -Xmx16g) based on your EC2 instance’s total RAM.
Kibana and Amazon OpenSearch Service
- All indexed data and logs are stored in the OpenSearch domain. To view the logs, map the sbindexlog index in Kibana and search for the entries. The Kibana link is available on the OpenSearch domain dashboard.

- Click the link and access Kibana.

- Adding log indices in Kibana:
The two logs you can add are sbindexlog and sbstatuslog. Both logs can be included in a single index pattern.

Alternatively, you can create a separate index pattern for each log.


You can also query the logs using filters like URL, timestamp, and more.

- You can also delete indices via Kibana. Go to Dev Tools in the left-hand menu, and then click Get to Work to delete the OpenSearch indices.


Updated 19 days ago