
Generate Titles, Descriptions and Keywords For Text
Generating Titles, Descriptions, and Keywords with LLM (Llama-2)
SearchBlox uses a Llama-2–based Large Language Model (LLM) to automatically generate relevant titles, descriptions, and keywords for textual content. This functionality can be implemented using two main methods:
- Python Implementation:
Use the SearchBlox Python client to integrate LLM-powered content generation directly into your applications. - Using Google Colab Notebook
Use a preconfigured Google Colab notebook for a simple and interactive setup. This method is ideal for quick testing and prototyping.
Using Python
Prerequisite:
- Python Source Code:
Download the required Python source code from the following link:
Python codeIDEto execute the Python source-code.
An IDE (e.g., VS Code, PyCharm, etc.) is necessary to execute and modify the downloaded Python source code.
Steps to Execute Python
Follow these steps to run the Python code for generating Titles, Descriptions, and Keywords:
-
Set up a Virtual Environment:
- Open the downloaded source code in your IDE.
In the IDE's terminal, create a virtual environment:python -m venv .venv - Activate the virtual environment:
(Windows).venv\Scripts\activate - Install the required Python libraries from the requirements.txt file:
pip install -r requirements.txt
- Open the downloaded source code in your IDE.
-
Start the FastAPI Application:
Run the FastAPI application within the activated virtual environment:
uvicorn main:app --reload -
Confirmation of Successful Startup:
Upon successful execution, the terminal will display a message indicating that the FastAPI server is running.
-
Access the FastAPI UI:
Open your web browser and navigate to the IP address or link displayed in the terminal
(e.g., http://127.0.0.1:8000). -
Navigate to the Documentation:
Append /docs to the URL in your browser's address bar (e.g., http://127.0.0.1:8000/docs) to access the interactive FastAPI documentation.

-
Initiate the
pretext_updateAPI:
Locate the POST method for the pretext_update API within the FastAPI UI.
Click the "Try it out" button to enable interactive testing. -
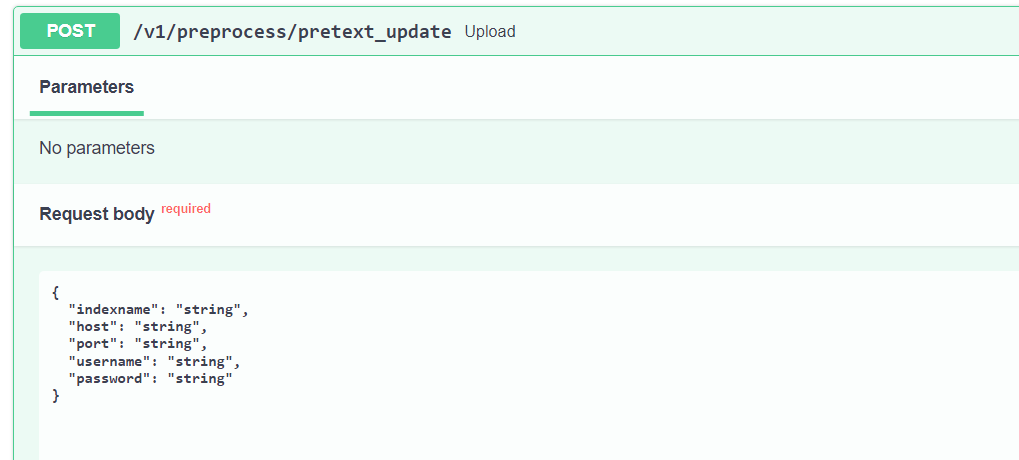
Configure the Request Body:
Within the "Request body" section, you will find placeholders for the following parameters:indexname:Replace with the name of your SearchBlox index. Ensure that you prefix the collection ID with idx. If the collection ID has only two digits, prepend a 0. For example, if the collection ID is 56, use idx056.host(IP Address): Enter the IP address of your SearchBlox server.port:Specify the port number used by your SearchBlox server.username:Provide the username for your SearchBlox server authentication.password:Enter the password for your SearchBlox server authentication.
Replace these placeholders with the appropriate credentials for your SearchBlox server.
-
-
Execute the POST Request:
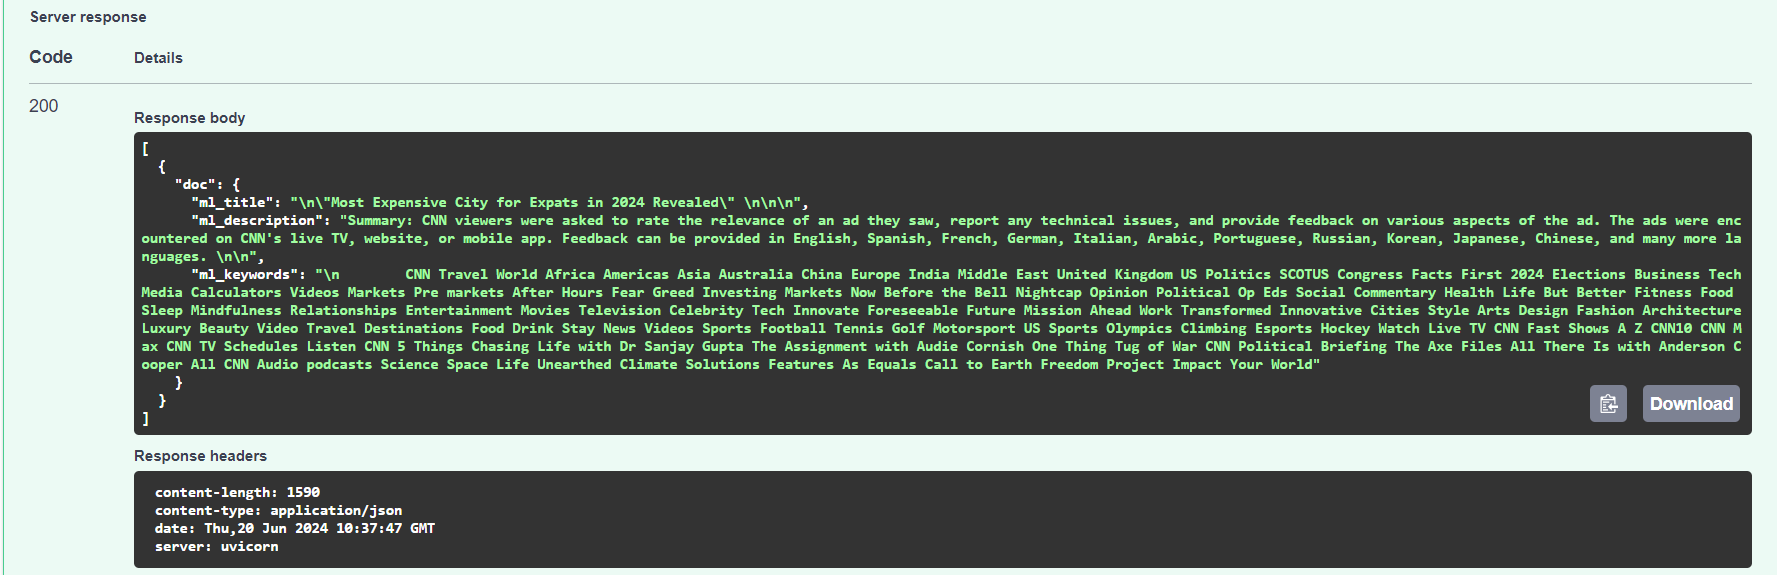
Click the Execute button in the FastAPI UI to send the POST request. Check the terminal logs to monitor the entity generation process and view the results. -
Review the JSON Output:
After successful execution, the API will return a list of JSON objects containing the generated title, description, and keywords. -
-
Access the SearchBlox Collection:
Open the SearchBlox Console and navigate to "Manage Collection."
Locate the collection used in step 7 (remember the idx prefix).
Click the search icon associated with that collection.
-
Log in to the Search Page:
Log in to the SearchBlox search page using your credentials.
-
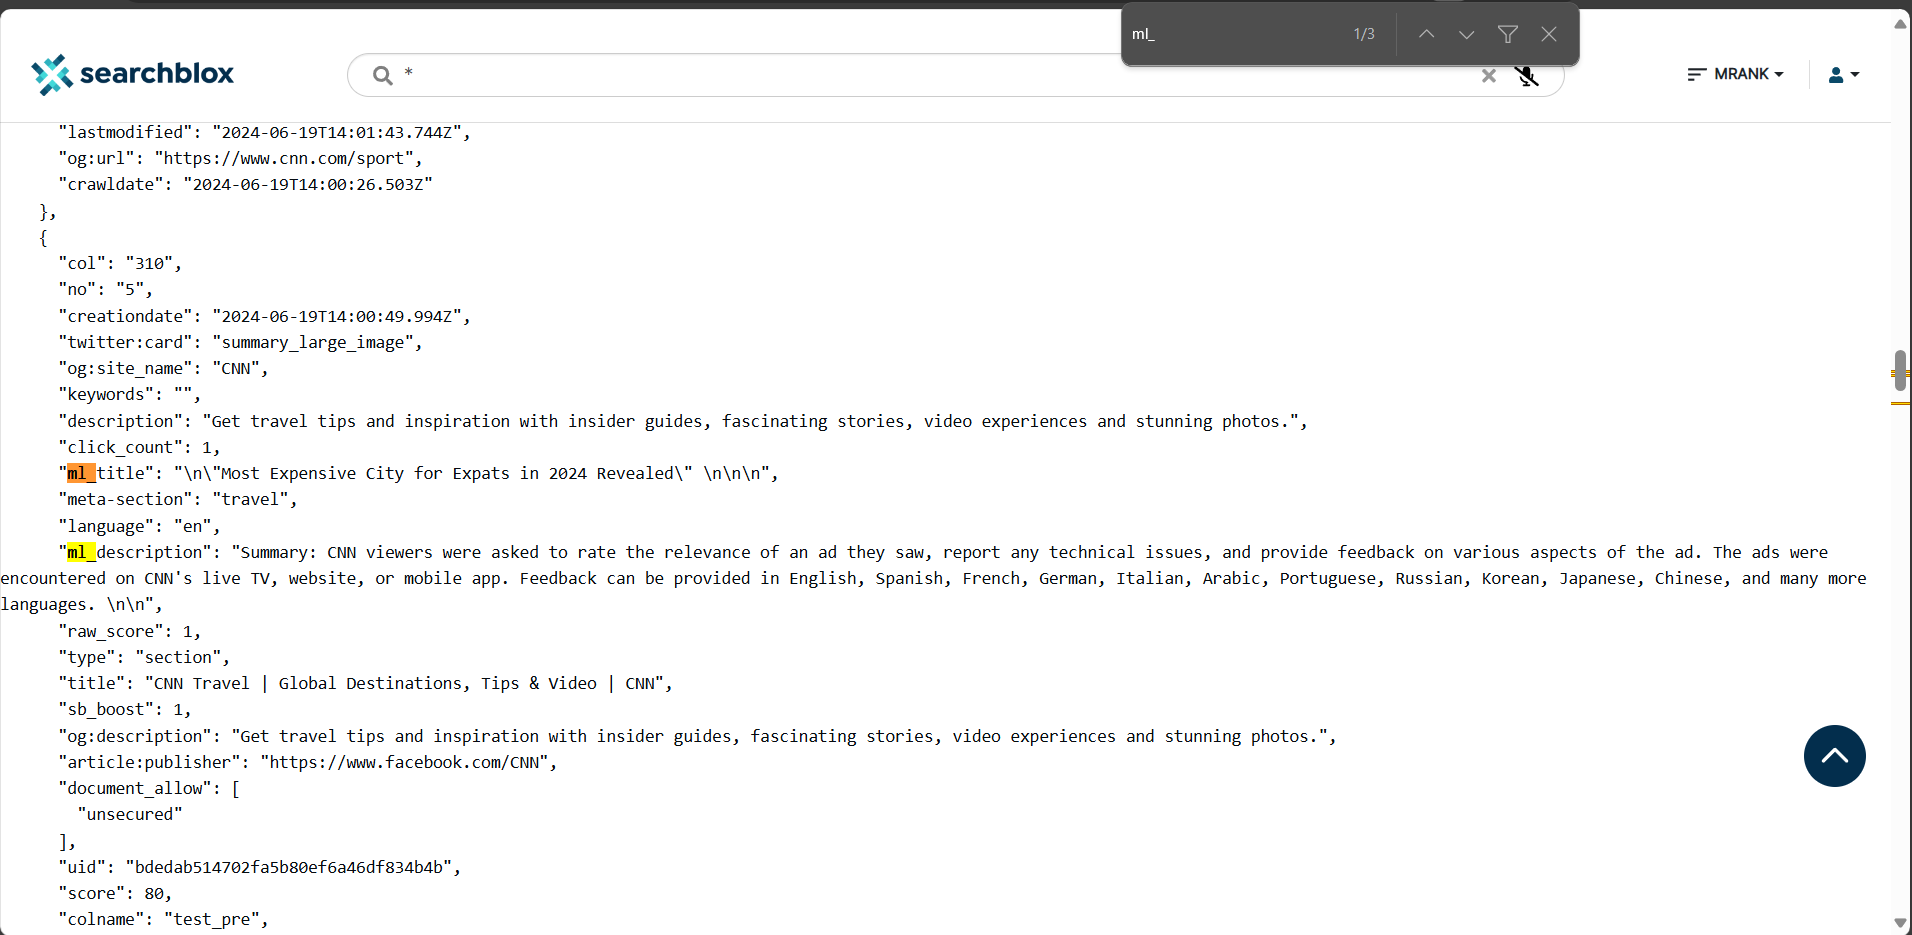
Enable Debug Mode:
Append &debug=TRUE to the end of the search URL in your browser's address bar. This will enable the display of metadata. -
Search for Generated Metadata:
In the search bar, enter ml. You should see the generated Title, Description, and Keywords, prefixed with ml, displayed in the metadata section.
Using Google Colab Notebook
To use Google Colab Notebook click on the following link:
SearchBlox_LLM
Steps to run the Google Colab Notebook
Follow these steps to execute the Google Colab notebook for generating Titles, Descriptions, and Keywords:
-
Connect to a Runtime:
In the upper-right corner of the Colab notebook, click the "Connect" button.
-
Select Runtime Type:
Navigate to "Runtime" > "Change runtime type."
Choose your preferred runtime: CPU (normal) or GPU.
Runtime Selection:- Normal Runtime (CPU): This option is free and uses minimal Google resources.
- GPU-accelerated Runtime: This option can significantly speed up processing but may have limitations and time restrictions in the free Colab version.
-
Run the first code block under the
install the required librariessection, by clicking theplay buttonmarked in red to execute the code block, as shown in the following screenshot:
-
After selecting your preferred runtime and executing the first code block, there are two options:
-
If
normal runtimeis selected, execute the following code block:
-
If
GPU accelerated runtimeis selected, execute the following code block:
NOTE: Depending on your preferred runtime, you can run only one of these code blocks.
-
-
Using the GPU runtime can decrease the time taken to generate the description, title or keywords.
-
Execute the
import the librariescode block similar to the above. -
Execute the
downloading and loading the modelcode blocks similar to the above. -
Under
user credentialscode block, input yourhost address,port numberandusernameandpasswordinside theauth()variable. Enter the desiredcollection idfor theindex_namevariable as shown in the following example:
-
Execute the
checking cluster healthcode block. -
Execute the
retrieving and cleaning the datacode block. -
Execute the
prompts for the desired outputscode block. -
Execute the
Generating the relevant output and pushing it onto the metadatacode block.
NOTE:
To check the results of the above mentioned code blocks, follow steps 10-13 from the section Using Python .
Updated 3 months ago