
Amazon Elastic Container Service
This guide walks through deploying SearchBlox on Amazon ECS using AWS Fargate and Managed Instances. It covers architecture, IAM role setup, pulling the Docker image, creating task definitions, and launching ECS services for the Index, Search, and Ollama (LLM) components.
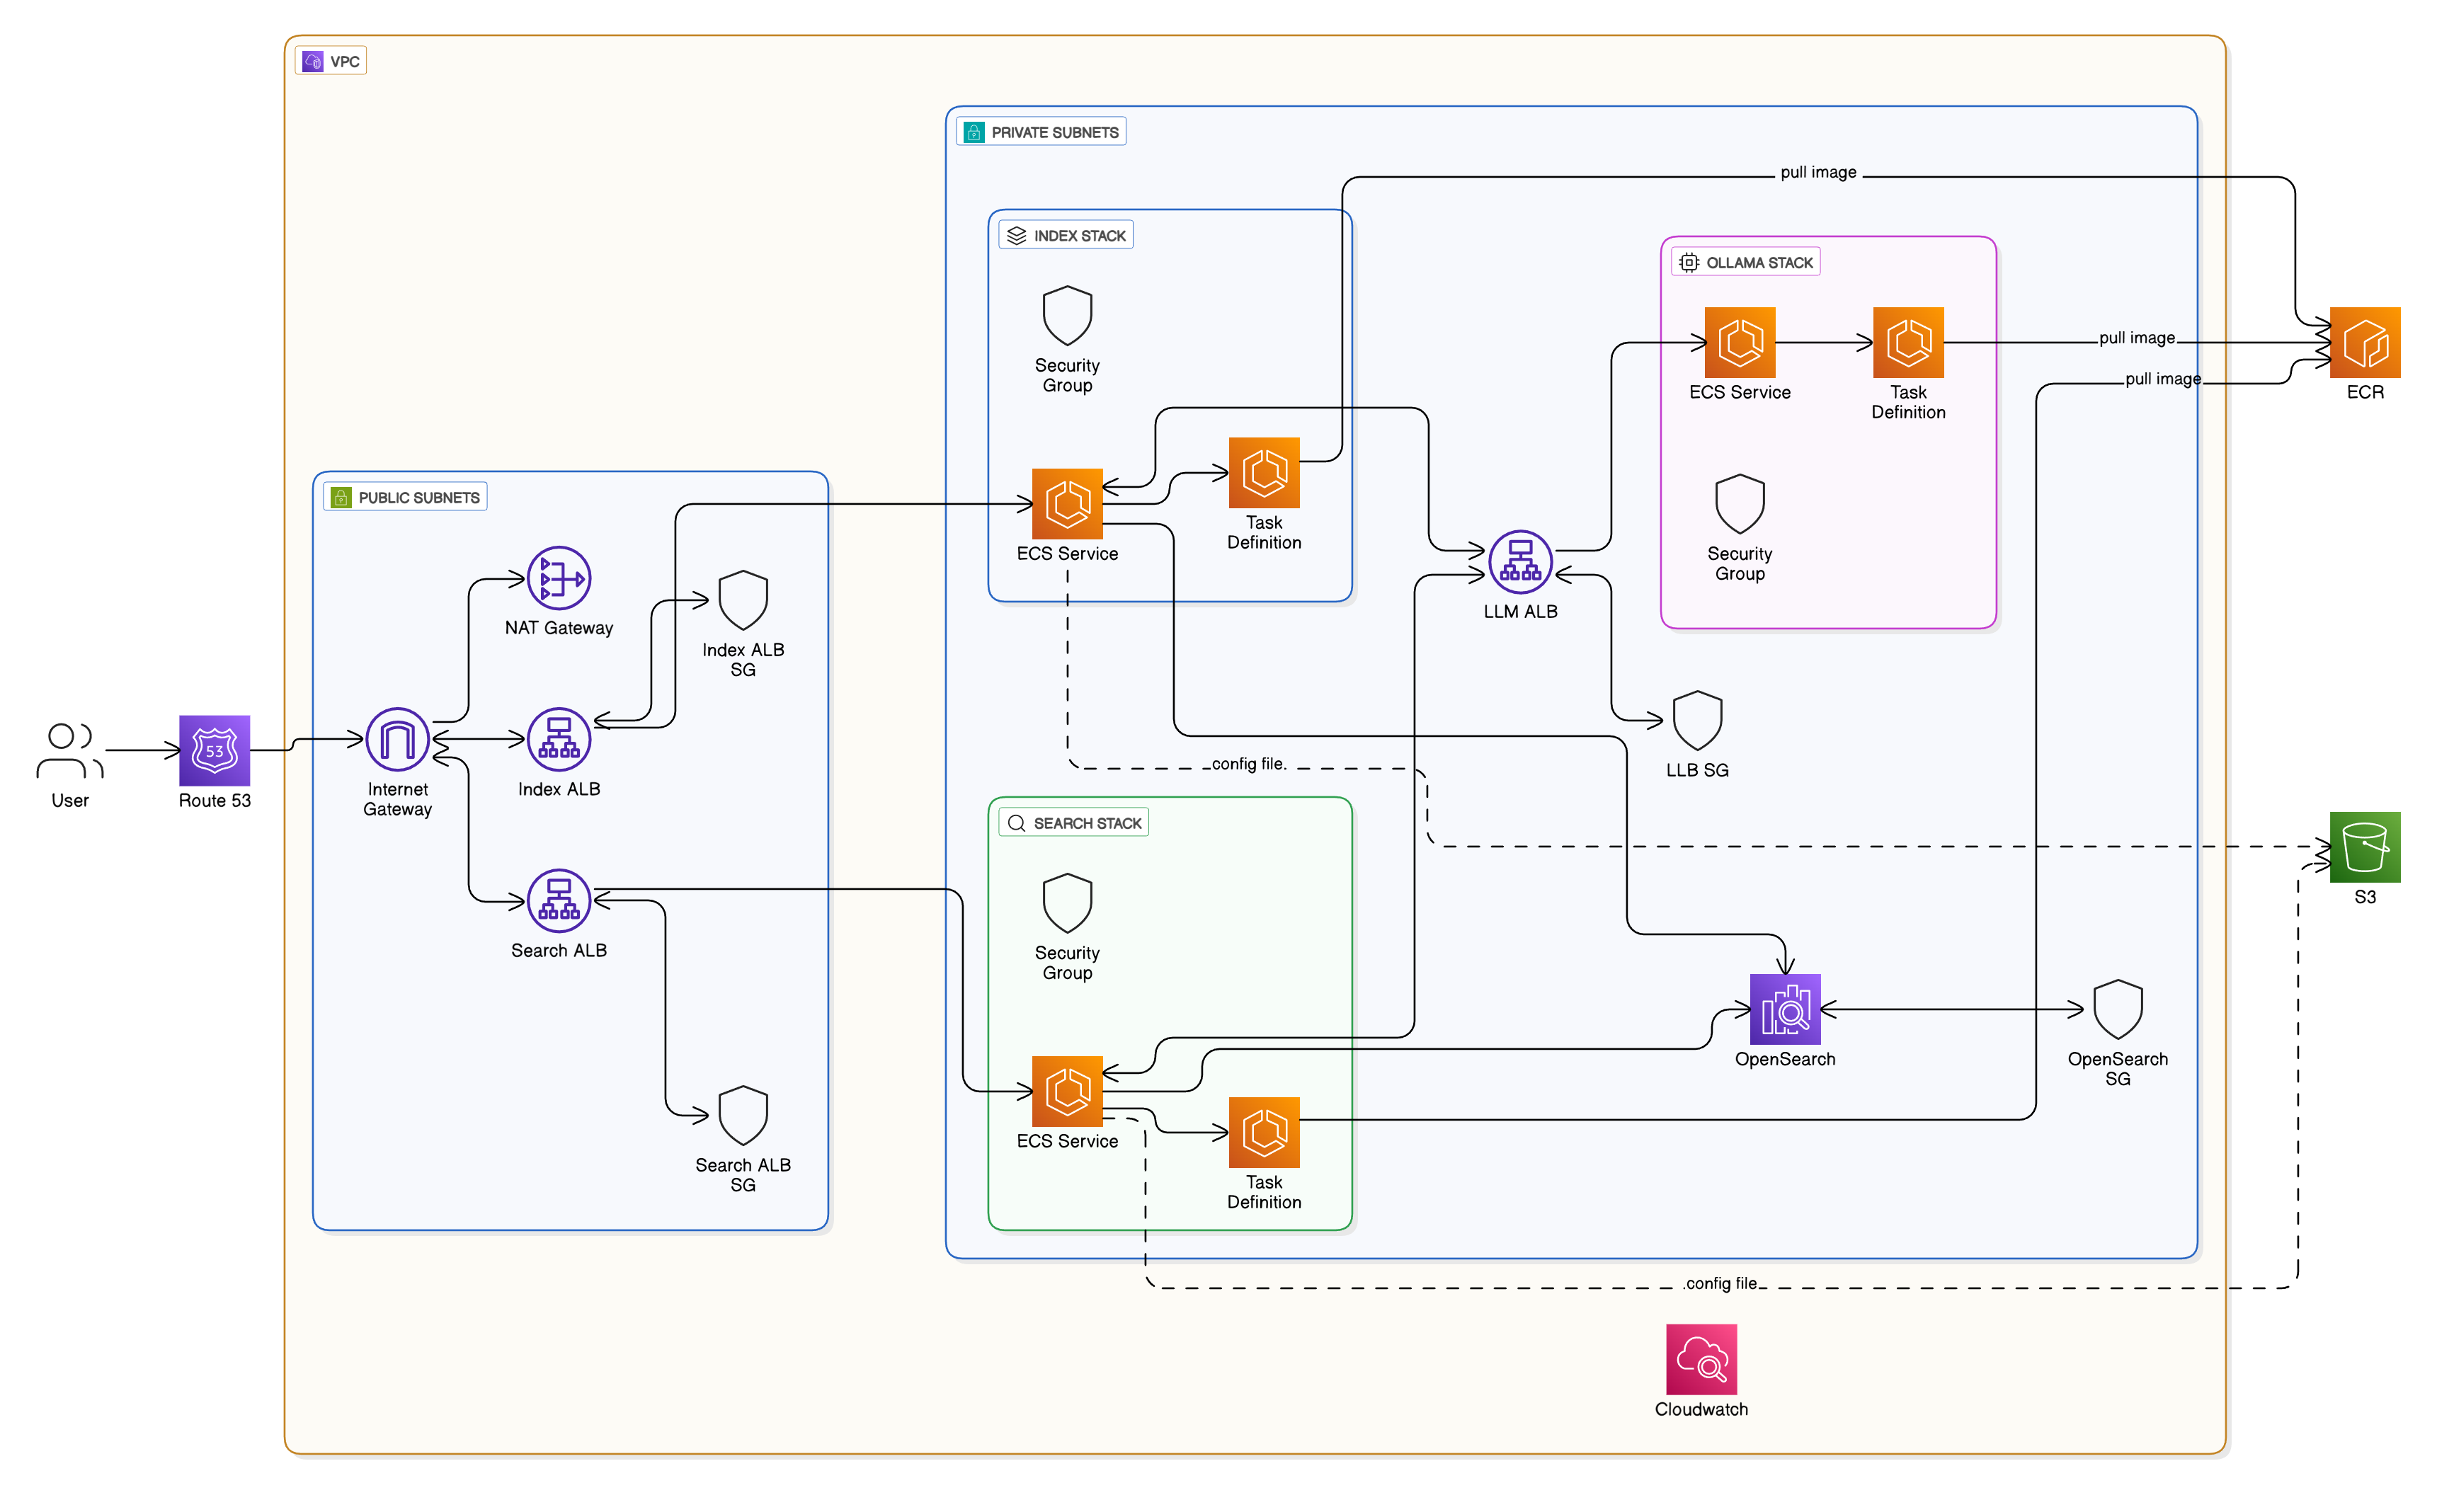
Architecture Overview
This architecture runs containerized services using Amazon ECS (Fargate) within a secure Amazon VPC. It includes Index, Search, and LLM services that process data and interact with Amazon OpenSearch Service.
User requests are routed via Application Load Balancer to the appropriate services. All backend components run in private subnets for security, while only load balancers are publicly accessible.
Container images are stored in Amazon ECR, and data and configurations are persisted in Amazon S3. Monitoring and logging are handled by Amazon CloudWatch, ensuring a scalable and observable deployment.
Important: License Types for Elastic Cloud Server (ECS)
- Single ECS Deployment
IP-based License
Bound to the public IP address of your ECS instance
Suitable for single-node installations
Covers all SearchBlox features for one server- Managed ECS/Cluster Deployment
Unlimited License (Enterprise)
Required for multi-node clusters
Supports auto-scaling environments
Must be obtained directly from SearchBlox support
Includes premium support and maintenance
To use Fargate with ECS to run a series of containerized tasks or steps, follow the below steps:
Important:
- We can get Image URI in two ways:
NOTE: You can follow any one of the above step and Creating a Fargate Cluster is common for both the above steps.
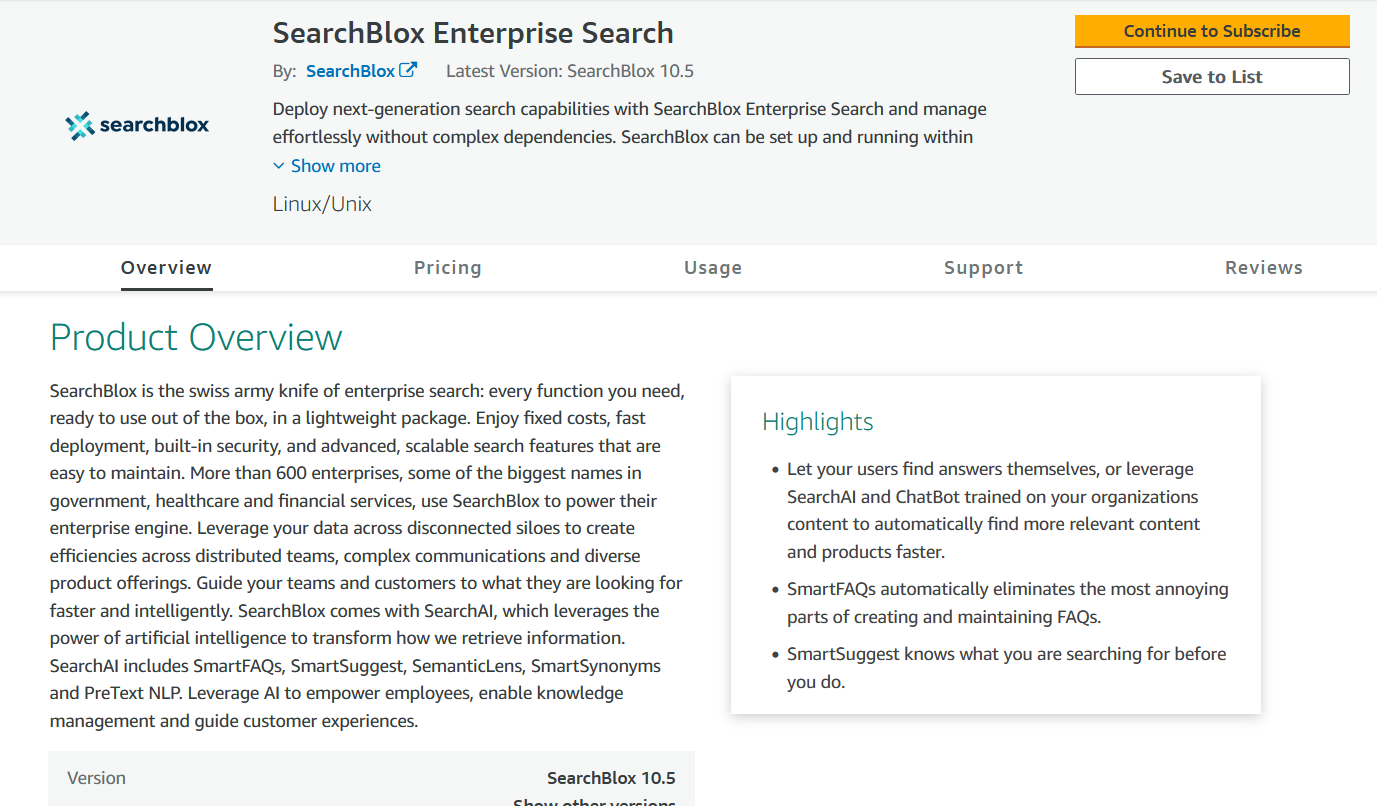
Getting Image URI from AWS Marketplace
- Go to AWS Marketplace and Subcribe to SearchBlox Enterprise Search, by clicking the below link.
- Link to Fargate version
- Click on
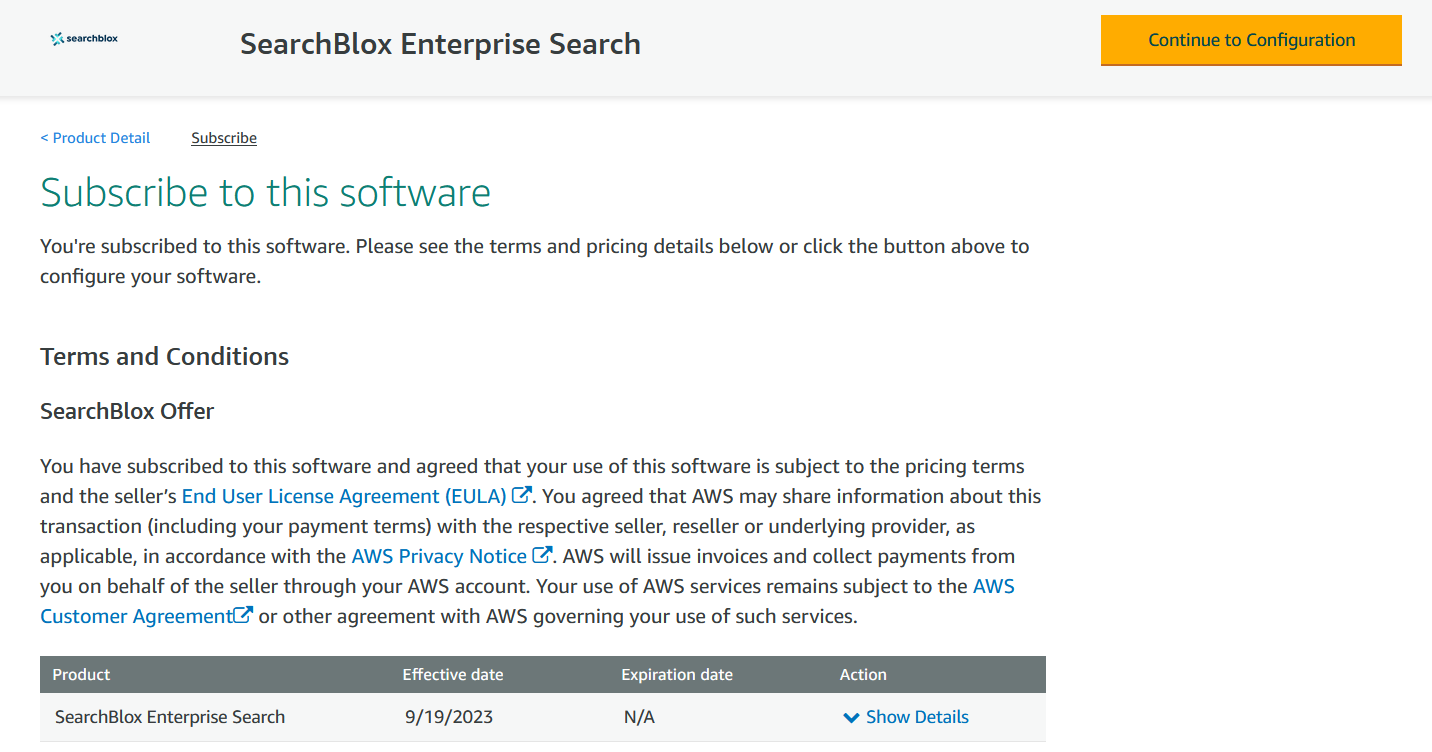
Continue to Subscribe.
- Click on
Continue to Configuration.
- Click on
Continue to Launch
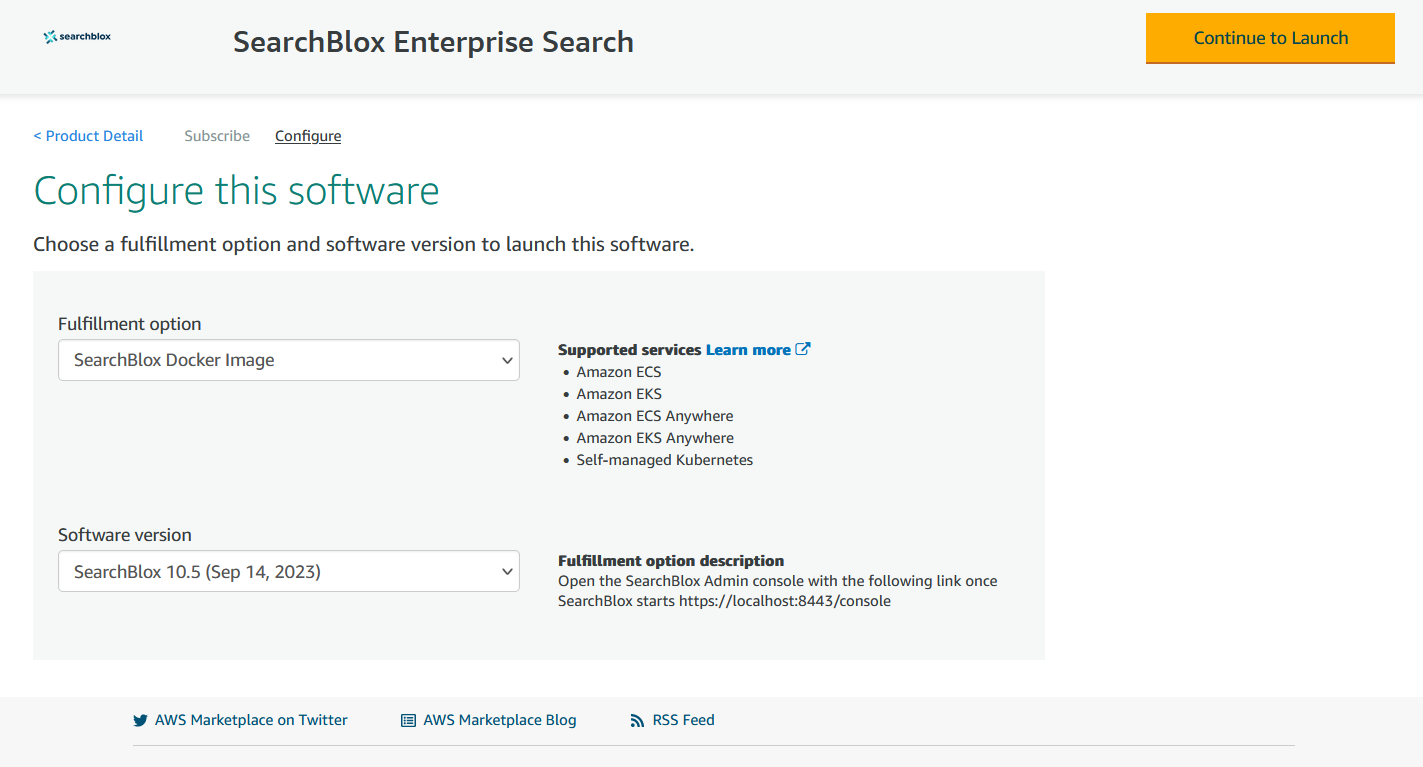
- Scroll down to the
Container imagessection and copy the commands that are shown below as shown in the image.
aws ecr get-login-password
    --region us-east-1 | docker login
    --username AWS
    --password-stdin xxxxxxx.dkr.ecr.us-east-1.amazonaws.com

CONTAINER_IMAGES="xxxxxx.dkr.ecr.us-east-1.amazonaws.com/searchblox/searchblox:v12"

for i in $(echo $CONTAINER_IMAGES | sed "s/,/ /g"); do docker pull $i; done
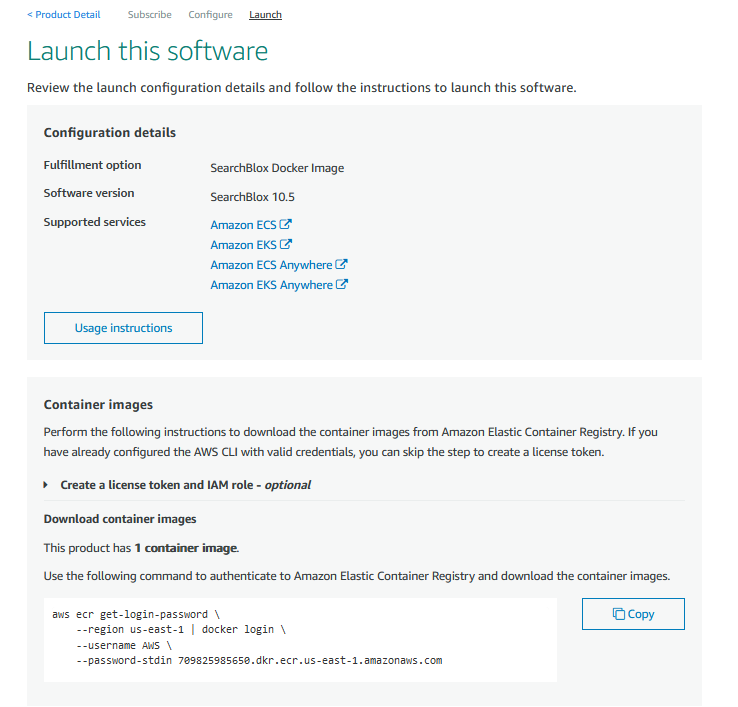
- After executing the above command the below response can be seen and copy the last line, which is the
Image URIused for the next steps.
v10.7: Pulling from searchblox/searchblox
Digest: sha256:a13abcd5f970e253c8be2b7a093c215728046d2f4a0505343710a80bae39801d
Status: Image is up to date for xxxxxx.dkr.ecr.us-east-1.amazonaws.com/searchblox/searchblox:v12.1.0
xxxxxx.dkr.ecr.us-east-1.amazonaws.com/searchblox/searchblox:v12.1.0
IAM Roles
Create the following IAM roles:
- ECS Task Execution Role
Navigate to IAM → Roles → Create role
Select:- Trusted entity type: AWS Service.
- Use case: Elastic Container Service → ECS Task
Trusted entities
{
  "Version": "2008-10-17",
  "Statement": [
    {
      "Sid": "",
      "Effect": "Allow",
      "Principal": {
        "Service": "ecs-tasks.amazonaws.com"
      },
      "Action": "sts:AssumeRole"
    }
  ]
}
iii. Attach the following AWS managed policies
- AmazonECSTaskExecutionRolePolicy
- AmazonSSMFullAccess
iv. Click Create role
- ECS Task Role
i. Go to IAM → Roles → Create role
ii. Select AWS Service → ECS Task as the trusted entity
Trusted entities
{
  "Version": "2012-10-17",
  "Statement": \[
    {
      "Effect": "Allow",
      "Principal": {
        "Service": [
          "opensearchservice.amazonaws.com",
          "ecs-tasks.amazonaws.com"
        ]
      },
      "Action": "sts:AssumeRole"
    }
  ]
}
iii. Attach the following AWS managed policies:
- AmazonOpenSearchServiceFullAccess
- AmazonSSMFullAccess
- AmazonS3FullAccess
iv. Click Create role
- Instance Profile Role
Attach the following AWS managed policy:
- AmazonECSInstanceRolePolicyForManagedInstances
- Infrastructure Role
Attach the following AWS managed policies:
-
AmazonEC2FullAccess
-
AmazonSSMFullAccess
-
IAMReadOnlyAccess
Additionally, create and attach:
Create inline policy: AmazonECSInfrastructureRolePolicy
{
  "Version": "2012-10-17",
  "Statement": [
    {
      "Effect": "Allow",
      "Action": [
        "ec2:RunInstances",
        "ec2:TerminateInstances",
        "ec2:CreateLaunchTemplateVersion",
        "ec2:DeleteLaunchTemplateVersions",
        "ec2:DescribeLaunchTemplates",
        "ec2:DescribeLaunchTemplateVersions",
        "ec2:DescribeInstanceTypes",
        "ec2:DescribeSubnets",
        "ec2:DescribeSecurityGroups",
        "ec2:DescribeImages",
        "ec2:DescribeInstances",
        "ec2:DescribeAvailabilityZones",
        "ec2:CreateTags",
        "ec2:DescribeTags",
        "autoscaling:*"
      ],
      "Resource": "*"
    }
  ]
}
Create inline policy: iam:PassRole
{
  "Version": "2012-10-17",
  "Statement": [
    {
      "Effect": "Allow",
      "Action": "iam:PassRole",
      "Resource": "arn:aws:iam::<ACCOUNT_ID>:role/<EC2_INSTANCE_PROFILE_ROLE>"
    }
  ]
}
Note: The listed IAM roles and policies were validated in an AWS test account with full access. Actual permission requirements may vary based on your environment, security constraints, and organizational policies.
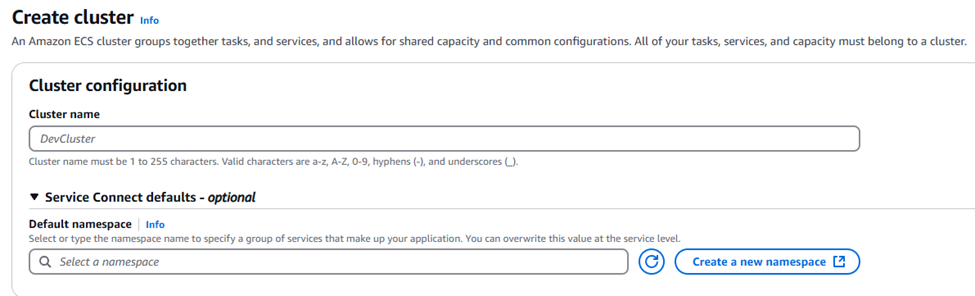
Creating Fargate Cluster
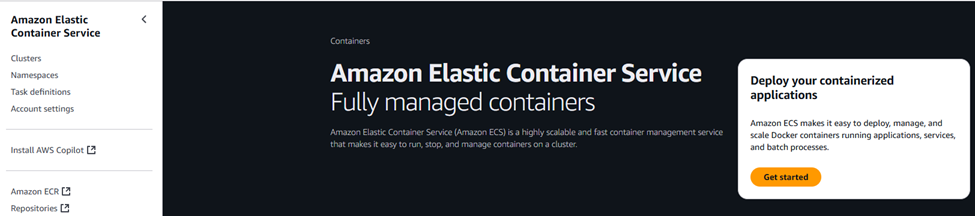
• Navigate to the ECS Console.
• Select Clusters to create a new cluster.
• Select Create cluster.

• Enter the Cluster name.
• Under Infrastructure, Select AWS Fargate and Managed Instance.
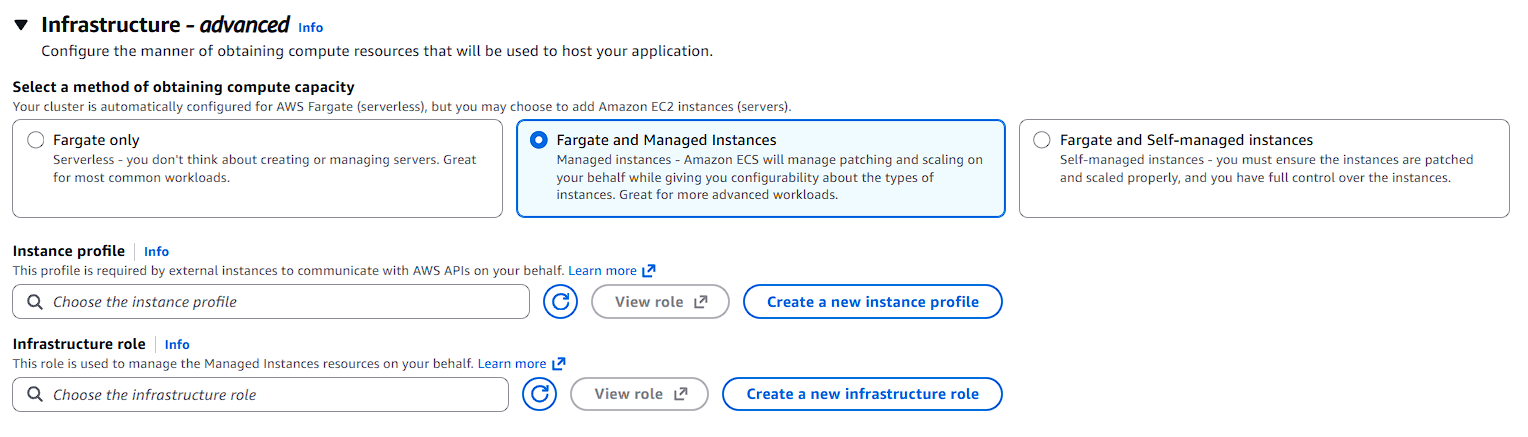
-
Select the instance profile and infrastructure role that were created earlier.
-
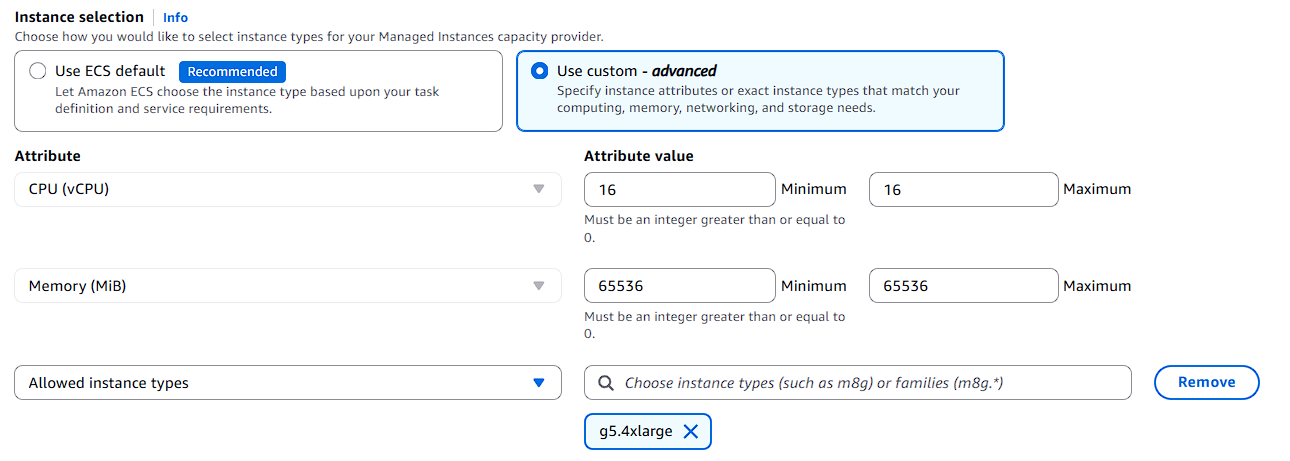
Instance Selection
Choose Use custom – Advanced.
Under Instance attributes, configure the following:
-
Allowed instance types: Select Example : g5.4xlarge
-
CPU (vCPU):
-- Minimum: 16
-- Maximum: 16
-
Memory (MiB):
-- Minimum: 65536
-- Maximum: 65536
Choose the instance type based on your requirements.
- Under Networking, choose your VPC and Subnets
- Configure a Security Group.
- Allow TCP (port 11434) from SG-Index and SG-Search to enable internal communication with the LLM service.
- Click Create to create the cluster.
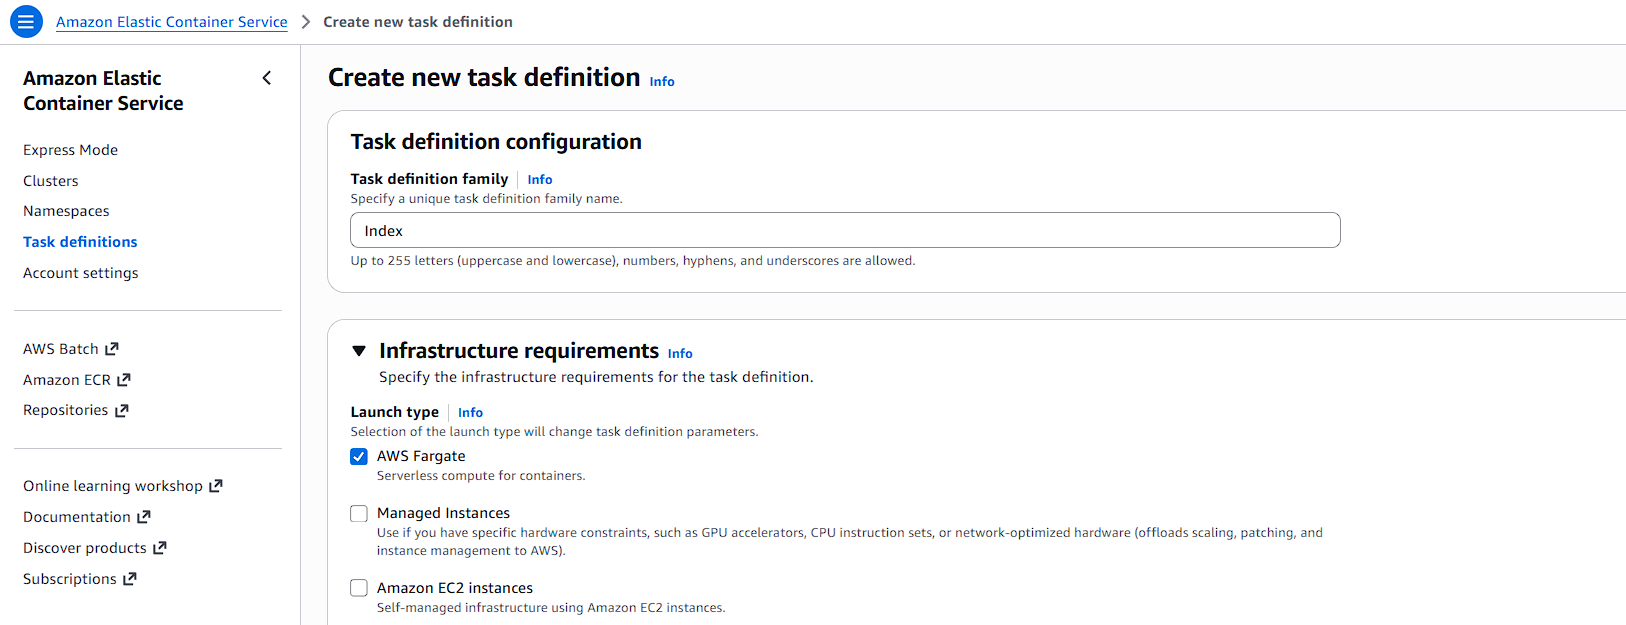
Create ECS Task Definition
Create three separate task definitions:
- Index Task Definition
- Search Task Definition
- Ollama Task Definition
Index Task Definition
Go to ECS → Task Definitions → Create new Task Definition.
Configuration
- Launch type: FARGATE
- Operating system: Linux / x86_64
- Task Role: Select the Task Role
- Execution Role: Select the Execution Role
- CPU: 16 vCPU
- Memory: 32 GB
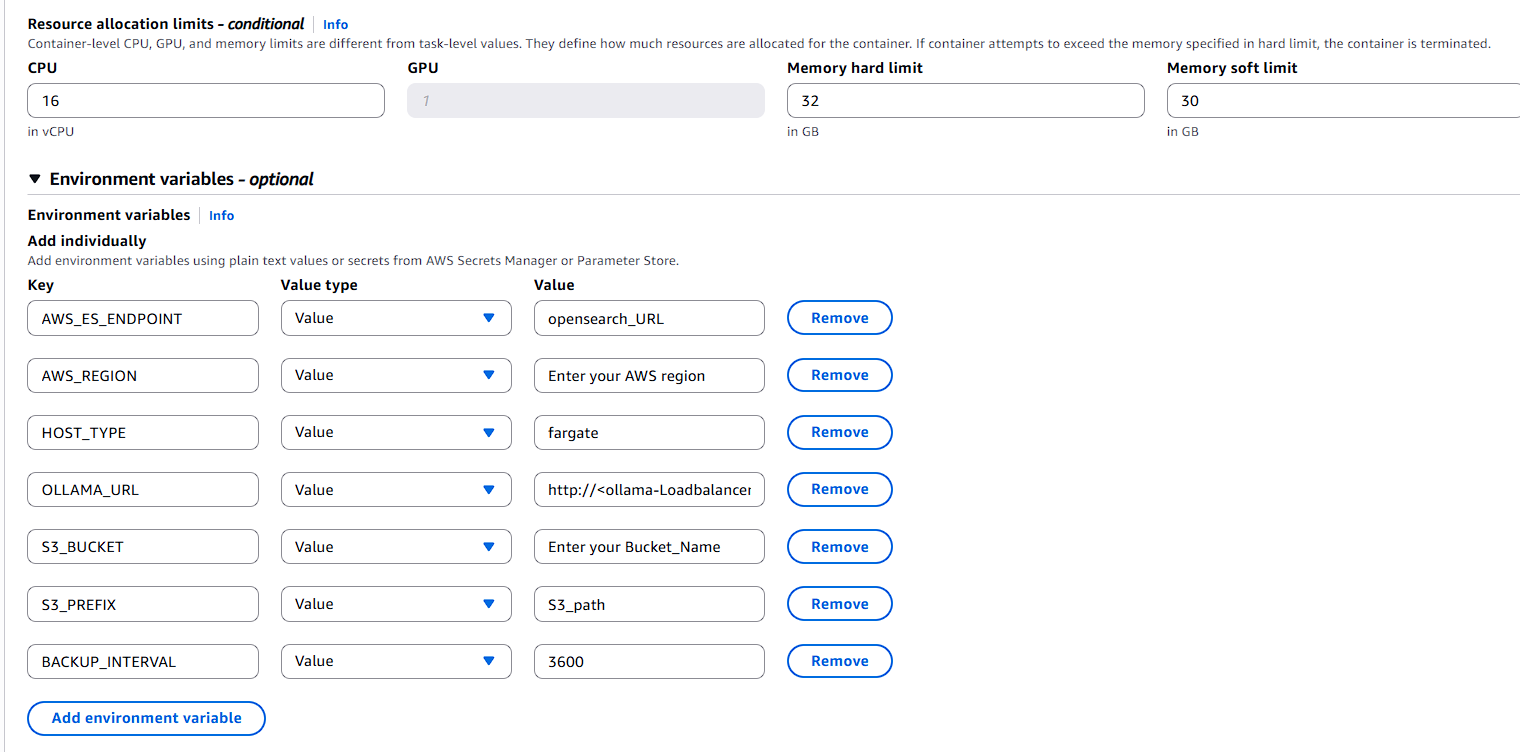
Container Settings
- Image URI: Use Index Image
- Task Definition: 8443
- Memory soft limit: 30 GB
- Memory hard limit: 32 GB
- CPU: 16 vCPU
- Storgae:100GB
Environment Variables for Index Service
- AWS_ES_ENDPOINT: Enter your opensearch_URL
- AWS_REGION: Enter your AWS region
- HOST_TYPE: fargate
- OLLAMA_URL: http://:11434 (Will be created in the upcoming steps.)
- S3_BUCKET: Enter your Bucket_Name
- S3_PREFIX: S3_path
- BACKUP_INTERVAL: 3600
Search Task Definition
Go to ECS → Task Definitions → Create new Task Definition.
Configuration
- Launch type: FARGATE
- Operating system: Linux / x86_64
- Task Role: Select the Task Role
- Execution Role: Select the Execution Role
- CPU: 16 vCPU
- Memory: 32 GB
- Storage:100GB
Choose the CPU and memory based on your requirements and expected workload.
Container Settings
- Image URI: Use Search Image
- Port mappings: 8443
- Memory soft limit: 30 GB
- Memory hard limit: 32 GB
- CPU: 16 vCPU
Environment Variables for Search Service
- AWS_ES_ENDPOINT: https://
- AWS_REGION: region
- HOST_TYPE: fargate
- Click Create.
Ollama Task Definition
Go to ECS → Task Definitions → Create new Task Definition.
Configuration
- Launch type: Managed Instance
- Operating system: Linux / x86_64
- Task Role: None required
- Execution Role: Select the Execution Role
- CPU: 12 vCPU
- Memory: 60 GB
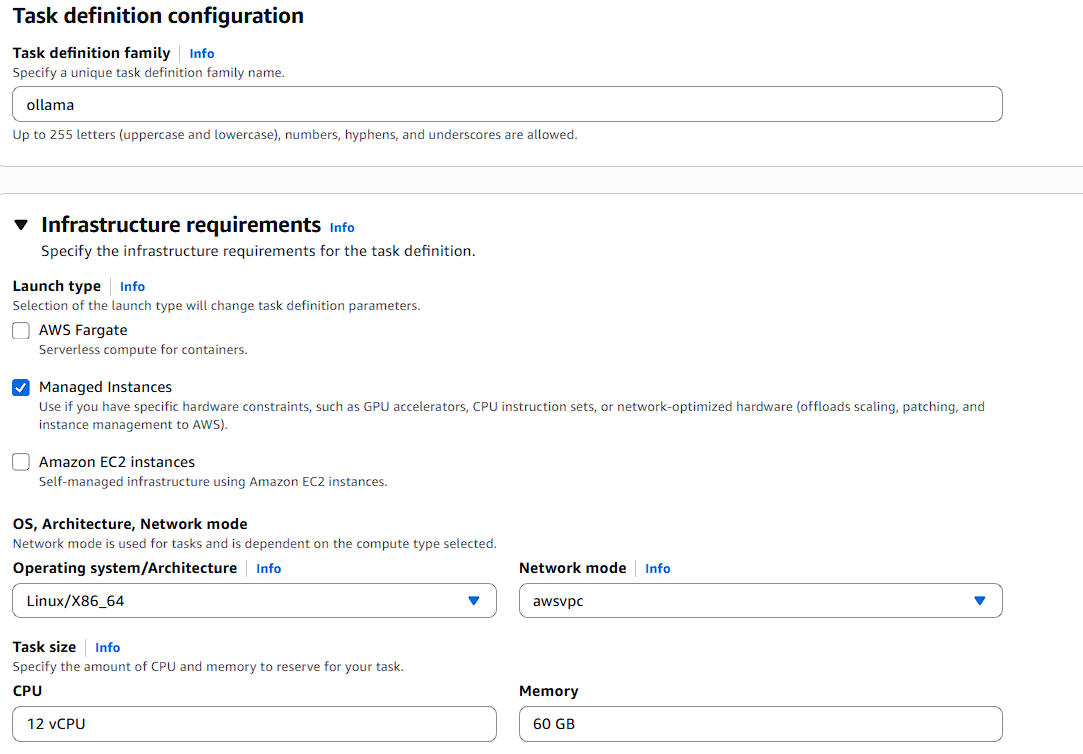
Choose the CPU and memory based on your requirements and expected workload.
Container Settings
- Image URI: ollama Image
- Port mappings: 11434
- Memory soft limit: 40 GB
- Memory hard limit: 50 GB
- CPU: 16 vCPU
- GPU: 1
Choose the CPU and memory based on your requirements and expected workload.
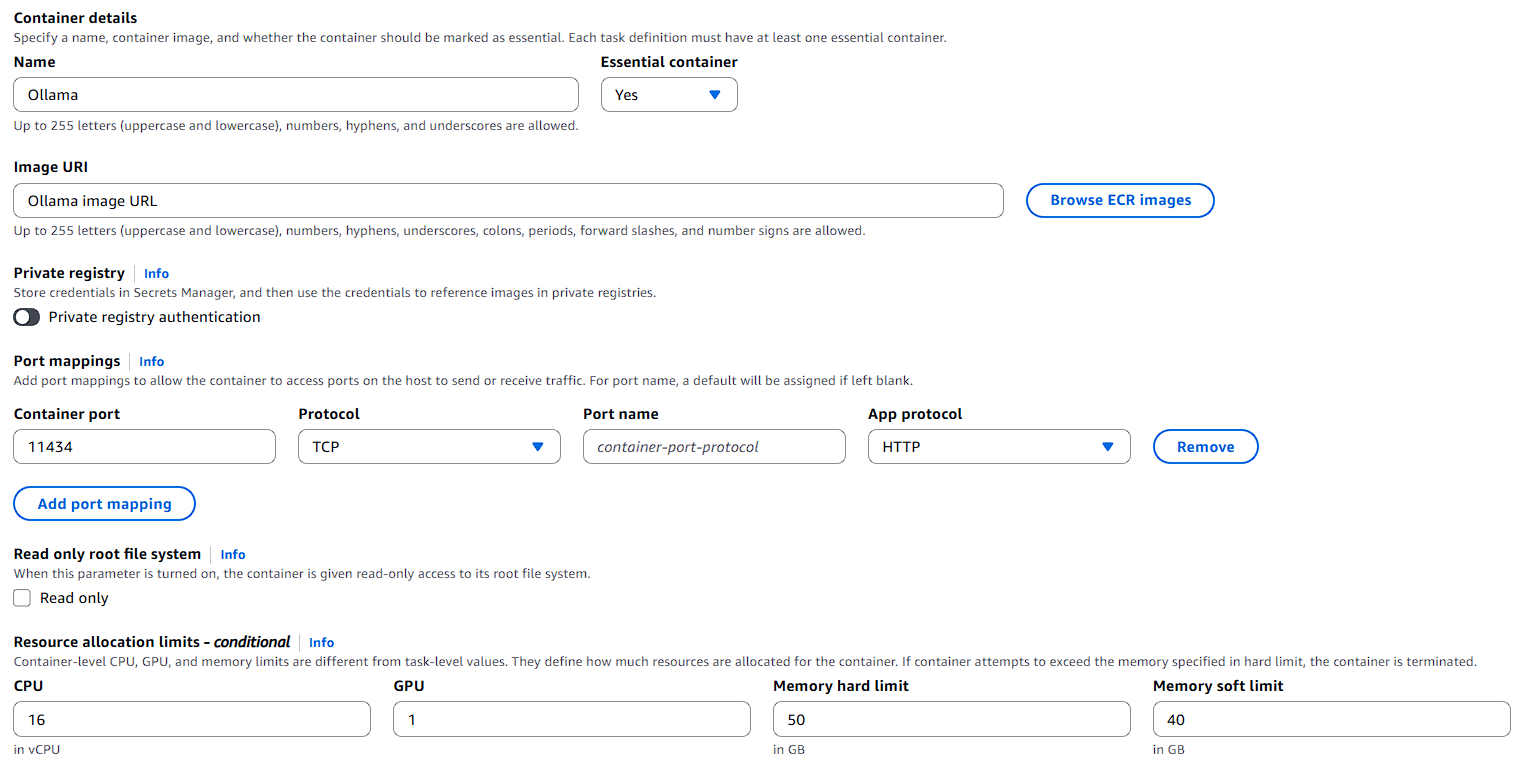
Environment Variables for Ollama Task definition
- NVIDIA_DRIVER_CAPABILITIES : compute,utility
- OLLAMA_HOST : 0.0.0.0
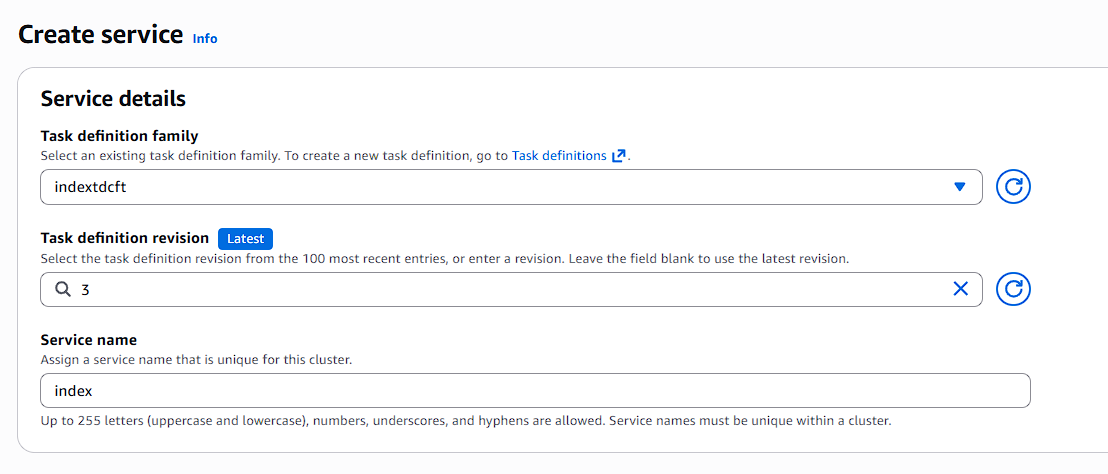
Create ECS Service
Service Configuration for Index and search
Index Service
-
Go to ECS → Clusters
-
Click Create → Create Service
-
Select:
- Launch type: FARGATE
- Task Definition: Choose latest revision (Index)
- Service name: index-service
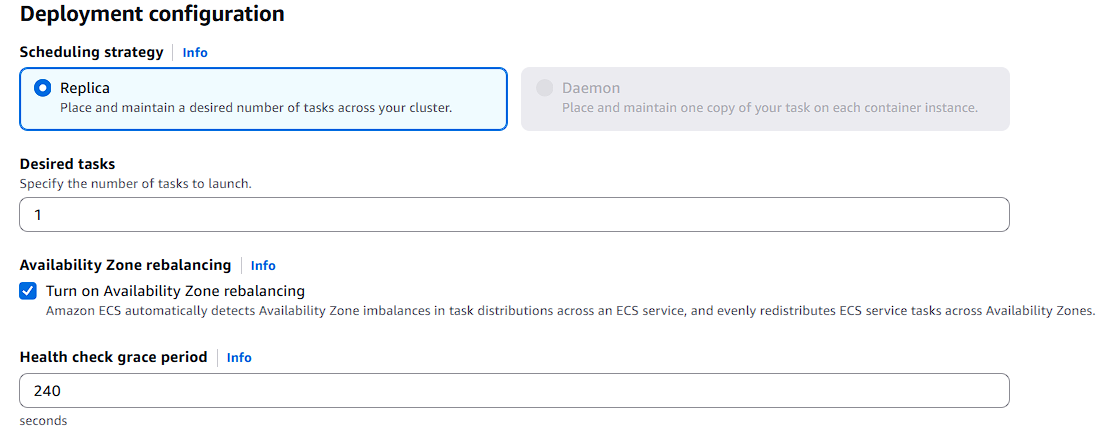
- Desired tasks: 1
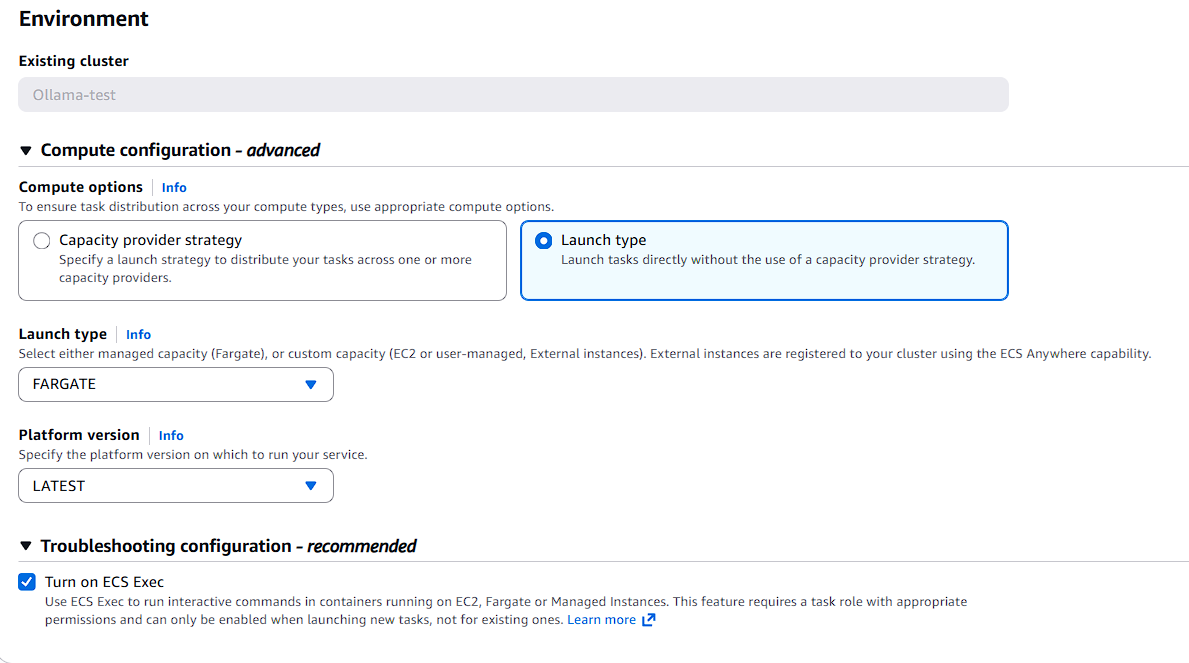
Networking
- Select VPC and Subnets
- Create or select Security Group
- Inbound Rule:
- 8443 → from SG-ALB
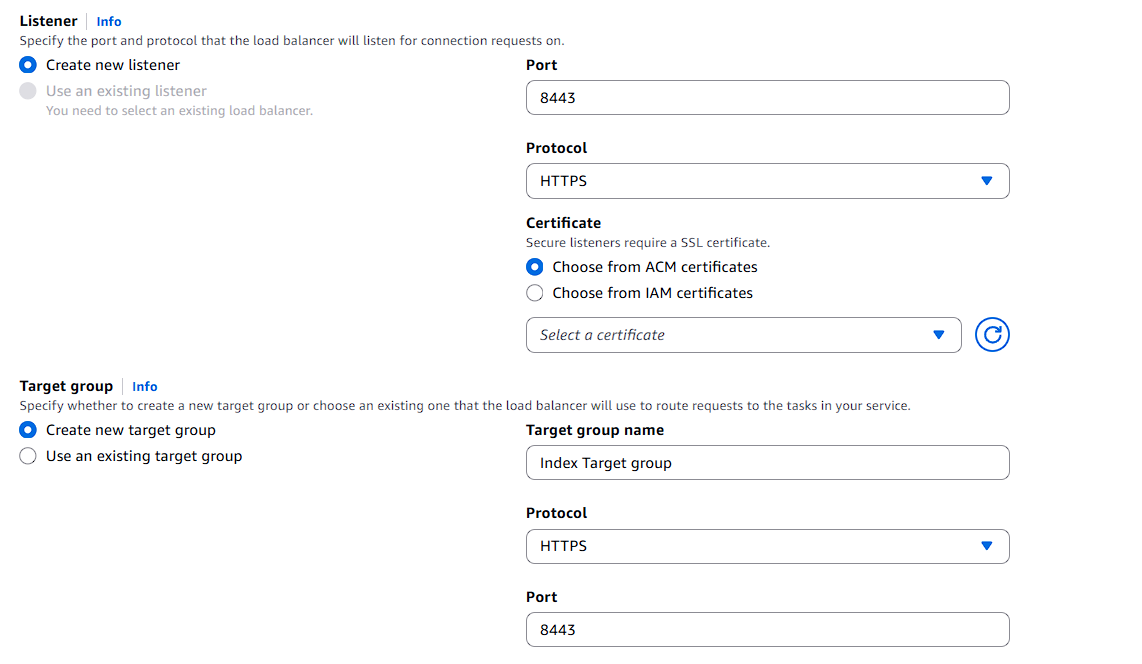
- Load Balancer Settings
- Load Balancer Type: Application Load Balancer
- Listener port : 8443
- Protocol: HTTPS
- Attach to Target Group:
- tg-index (port 8443)
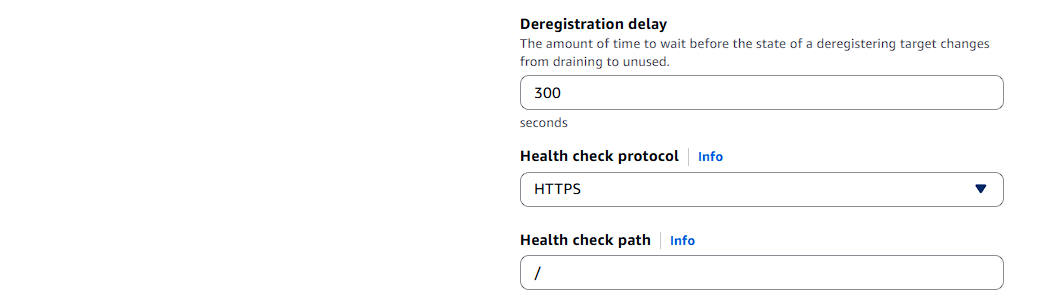
- Health Check Path: /
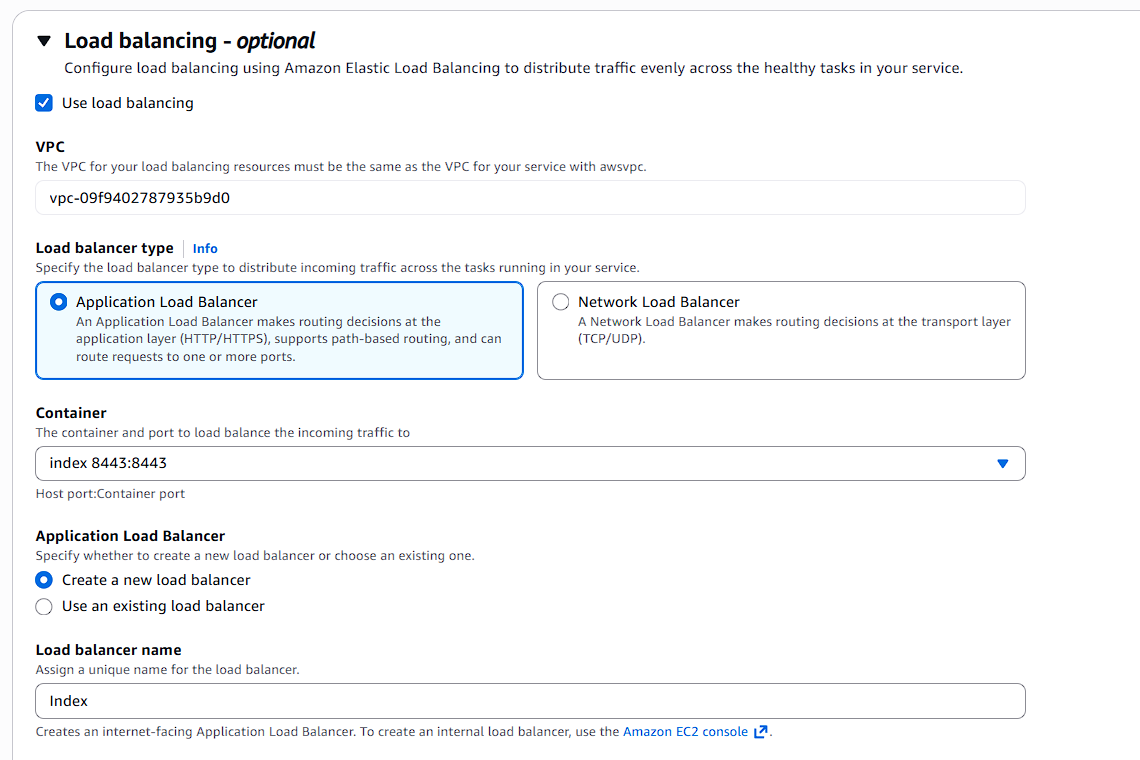
Click Create Service.
Create the Search service in the same way as the Index service.
Search Service
- Go to ECS → Clusters
- Click Create → Create Service
- Select:
- Launch type: FARGATE
- Task Definition: Choose latest revision (Search)
- Service name: search-service
- Desired tasks: 1 (or more)
Networking
- Select VPC and Subnets
- Create or select Security Group
- Inbound Rule:
- 8443 → from SG-ALB
Load Balancer Settings
- Load Balancer Type: Application Load Balancer
- Listener port: 8443
- Protocol: HTTPS
- Attach to Target Group:
- tg-search (port 8443)
- Health Check Path: /
Click Create Service.
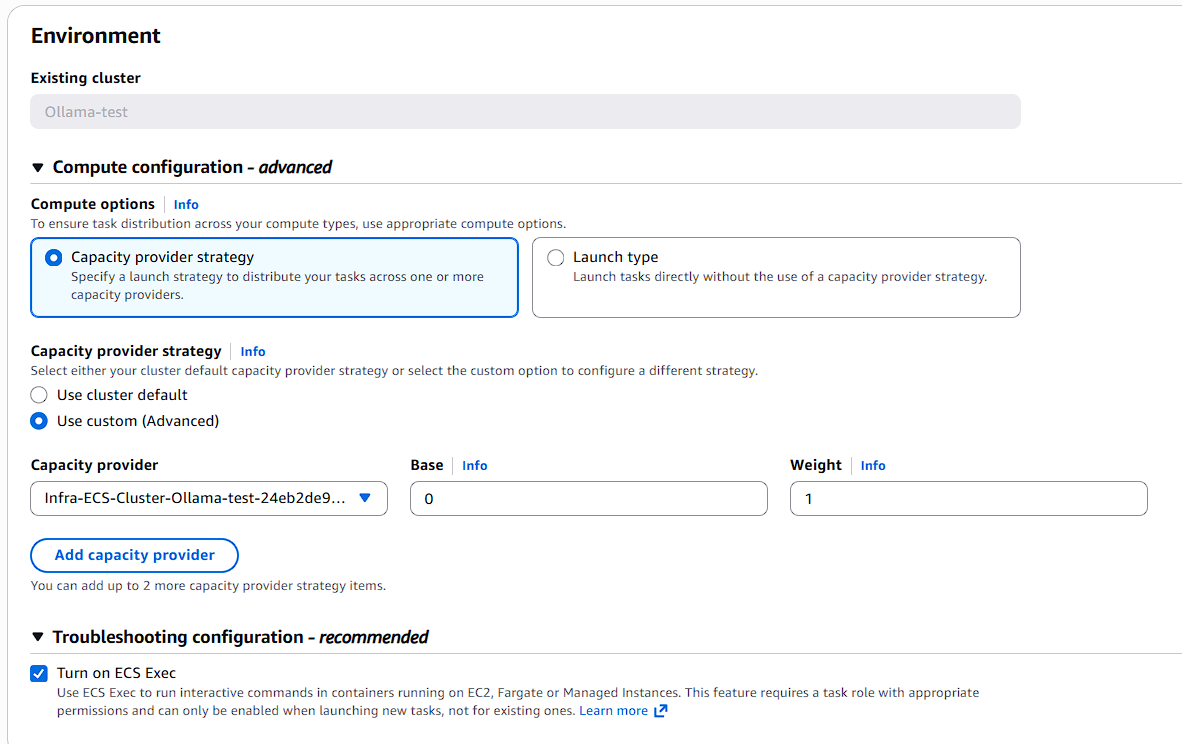
Service Configuration for ollama
- Go to ECS → Clusters
- Click Create → Create Service.
- Select:
- Launch type: Managed Instance
- Task Definition: Choose latest revision
- Service name: Enter service name
- Desired tasks: 1
- Compute options: Capacity provider strategy

Networking
- Select VPC and Subnets
- Assign or create Security Group
- Inbound rules: 11434 → from SG-Index and SG-Search
Load Balancer Settings for Ollama
- Load Balancer Type: ALB
- Listener Configuration:
- Port: 11434
- Protocol: TCP
Create Target Group
- Select Create new target group
- Configure the following:
- Protocol: TCP
- Port: 11434
Click Create Service.
Accessing the Application
After the tasks start running:
- Go to ECS → Cluster → Services.
- Select the Index or Search service.
- Open the Tasks tab and ensure the task is running.
Access the Searchblox console :
Use the Index Application Load Balancer DNS name: https://:8443/console
Use the AWS CloudFormation template below to launch and configure this ECS service.
Important:
- If you are not able to access the SearchBlox Console, check the security group.
Updated about 2 months ago