
Creating a New Chatbot
Step-by-step guide on creating a chatbot based on an existing collection.
Prerequisites
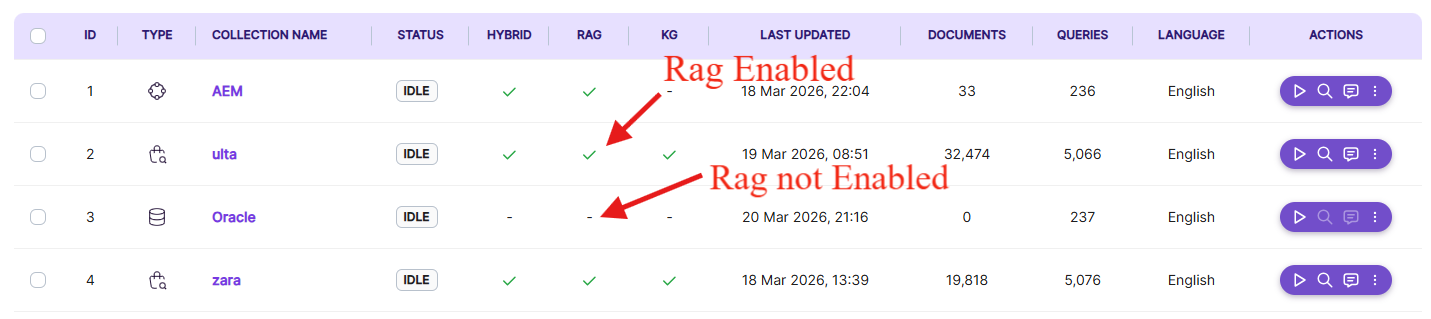
Ensure that the collection intended for chatbot creation is RAG enabled.
Chatbots can be created using two methods.
-
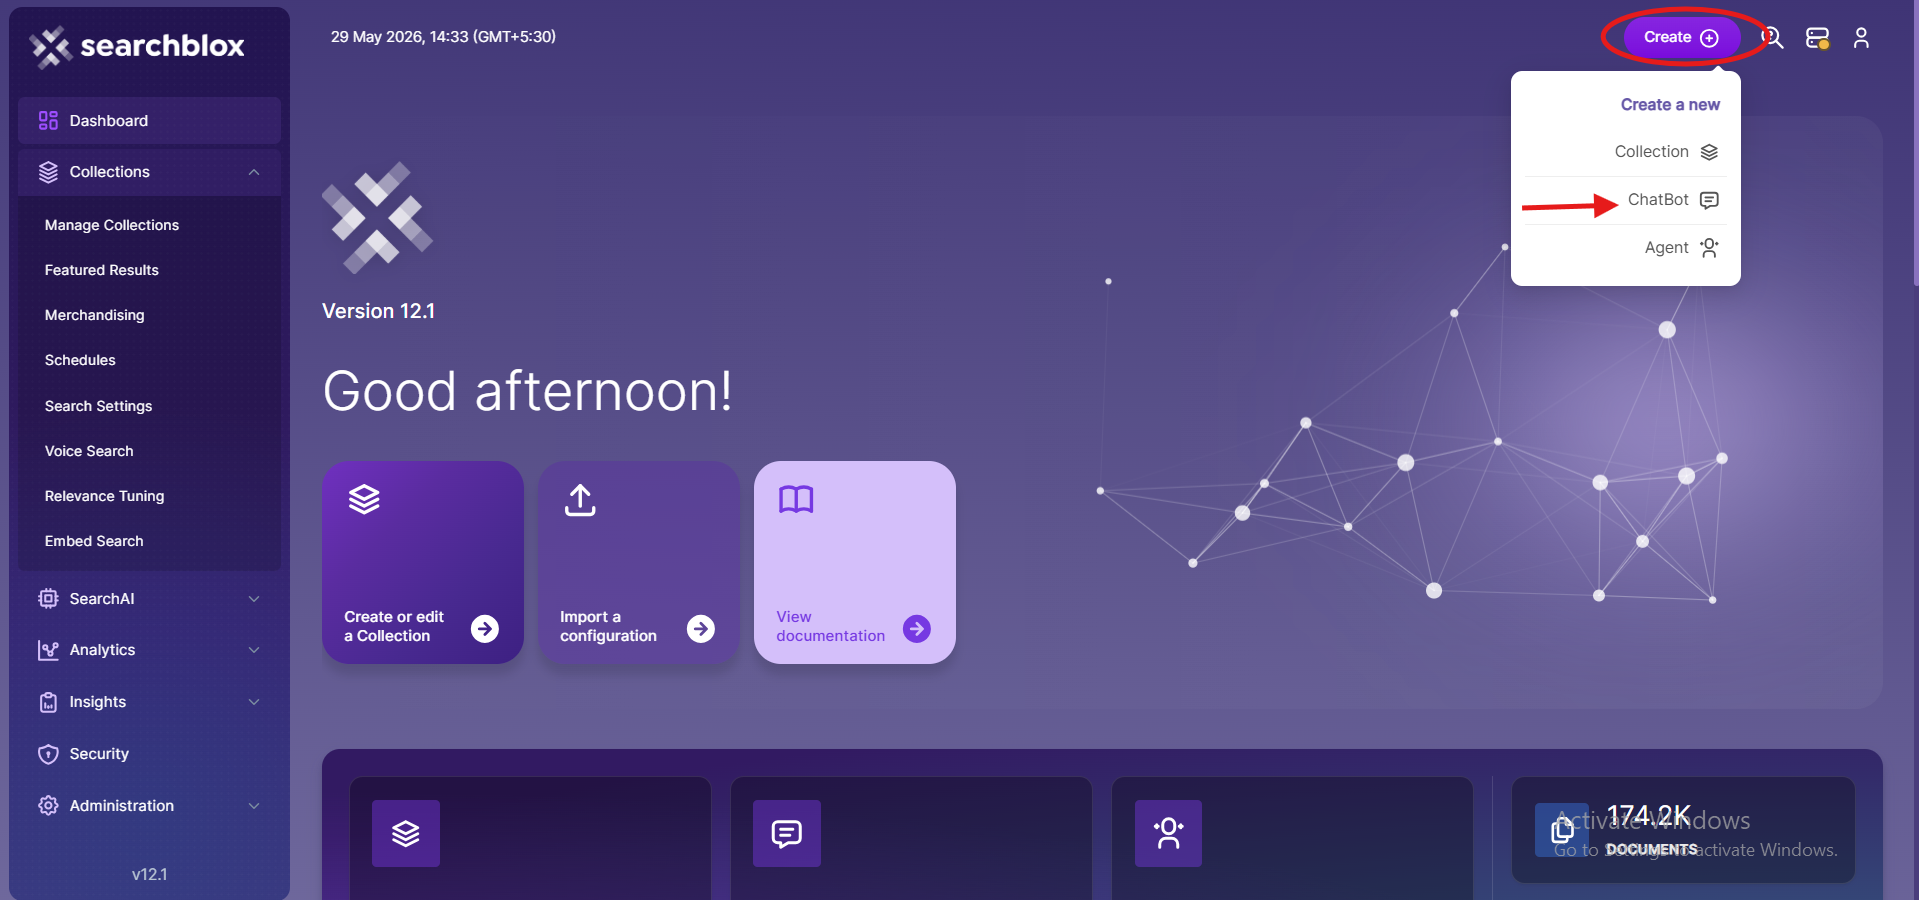
Using the Create button in the header panel
- Click on the Create button located in the header.
- A dropdown menu will appear.
- Select Chatbot from the dropdown list.
-
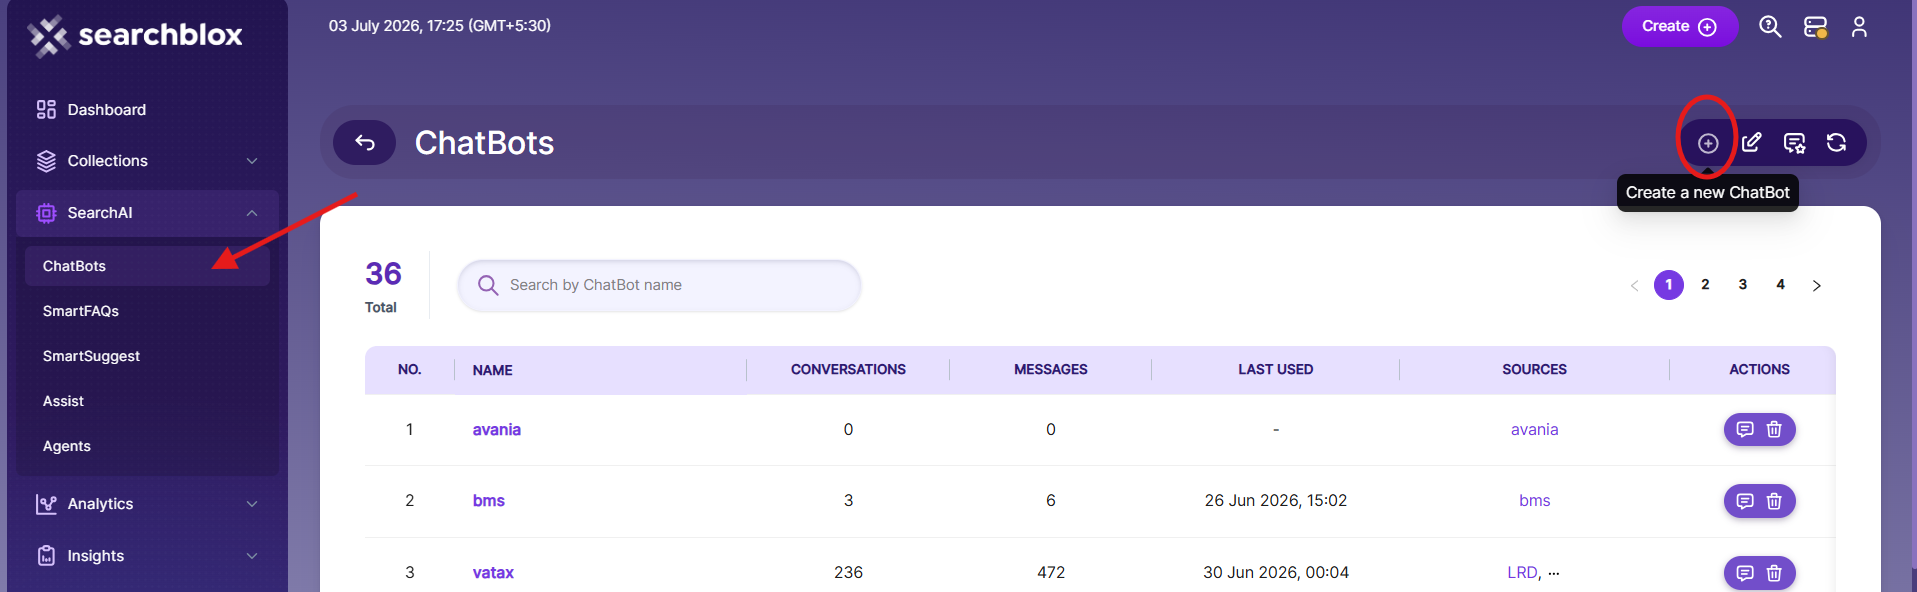
Using the Manage Chatbots Page
- Go to the Left Panel of the platform.
- Select SearchAI from the options listed.
- Click on Chatbot, which will redirect you to the Manage Chatbots page.
- On the top-right of the Manage Chatbots page, locate the list of icons.
- The leftmost icon, represented by a '+' symbol, indicates the create chatbot option. Click on the '+ icon' to initiate the creation process.
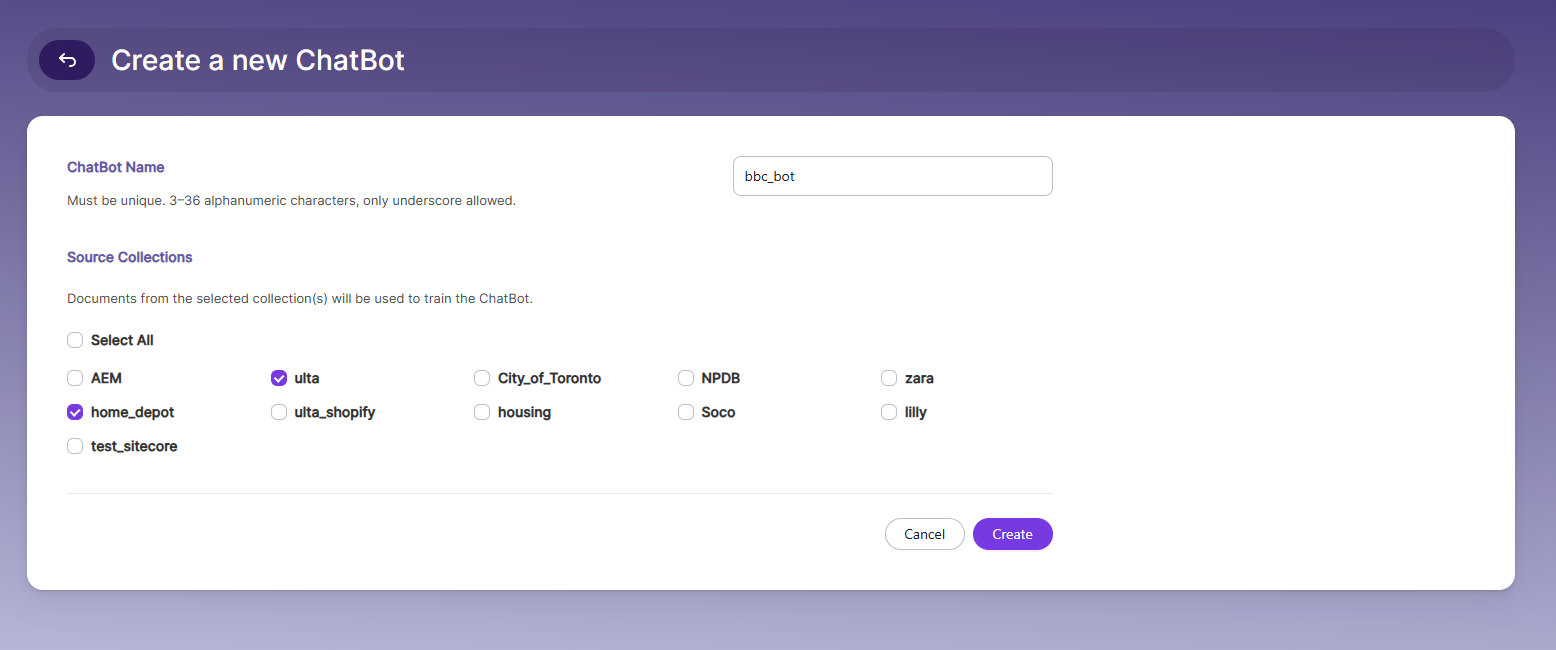
Both methods open the chatbot creation form where you fill in the following details.
- ChatBot Name
Enter a unique name for the ChatBot. This name cannot be changed after creation.
NOTE:
Name must be lowercase, 3 to 36 alphanumeric characters, underscore is the only allowed special character.
- Select Knowledge Sources (Collections)
- Chatbots need data to operate and deliver meaningful responses. Choose the source collections that will be used to train the chatbot.
- Select at least one collection that is relevant to the chatbot’s topic or domain.
- The chatbot learns from documents in the selected collections — make sure they contain enough relevant content for accurate responses.
- After naming the chatbot and selecting the knowledge source collections, click the Create button..
- On clicking the Create button, you will be taken to the main ChatBots interface, where a list of all created chatbots will be displayed.
Updated 21 days ago
Did this page help you?