Opensearch
OpenSearch Integration with SearchBlox 11.0
View status of Opensearch
Version Compatibility
- SearchBlox 11.0 includes OpenSearch 2.18.0 as its embedded search engine
- This version pairing has been specifically tested and optimized for performance
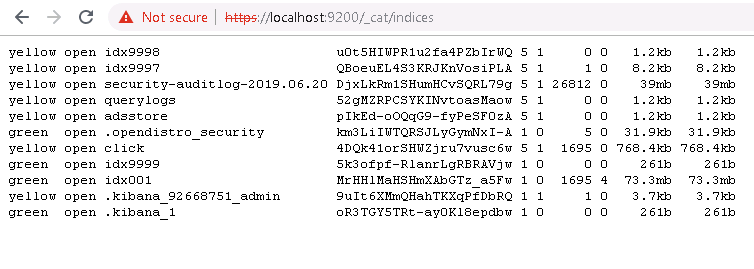
To view the status of Opensearch indices, please go to the following link in your terminal
curl -k -u admin:admin https://localhost:9200/_cat/indices?v
Navigate to this URL in your browser:
https\://localhost:9200/\_cat/indices
Note:
You can find the Elasticsearch login credentials in the searchblox.yml file, found in the following file path:
<SearchBlox-Home-Directory>\webapps\ROOT\WEB-INF
Opensearch Settings in SearchBlox
Opensearch endpoint URL, credentials, and path of Opensearch installation are provided in <SEARCHBLOX_INSTALLATION_PATH>/webapps/ROOT/WEB-INF/searchblox.yml
searchblox.elasticsearch.host: localhost
searchblox.elasticsearch.port: 9200
searchblox.elasticsearch.basic.username: **********
searchblox.elasticsearch.basic.password: ************
es.home: C:\SearchBloxServer\opensearch
Opensearch Settings
Opensearch settings can be managed within Opensearch YAML file available at <SEARCHBLOX_INSTALLATION_PATH>/opensearch/config/opensearch.yml
Bind Opensearch using Network Host
To access opensearch using an IP address, you will need to bind your network IP address by making a change in the file: <SEARCHBLOX_INSTALLATION_PATH>/opensearch/config/opensearch.yml
network.host: 0.0.0.0
discovery.type: single-node
Note: You can also change 0.0.0.0 to the required IP address.
Restart the SearchBlox Server for the changes to take effect and access opensearch if the IP address and port 9200 are allowed.
Disable SSL in Opensearch
To disable SSL please make the changes given as follows: <SEARCHBLOX_INSTALLATION_PATH>/opensearch/config/opensearch.yml
plugins.security.disabled: true
After disabling SSL, it is required to update searchblox.elasticsearch.url in <SEARCHBLOX_INSTALLATION_PATH>/webapps/ROOT/WEB-INF/searchblox.yml
searchblox.elasticsearch.url: http://localhost:9200/
searchblox.basic.username: xxxxxxxxxxxx
searchblox.basic.password: xxxxxxxxxxxxxxx
es.home: C:\SearchBloxServer\elasticsearch
Change Path in Opensearch
To update the Opensearch path for the storage of index data, log files, and backup repo, edit the file: <SEARCHBLOX_INSTALLATION_PATH>/opensearch/config/opensearch.yml
  path.data: C:\SearchBloxServer\opensearch\data
  path.logs: C:\SearchBloxServer\opensearch\logs
  path.repo: C:\SearchBloxServer\backup\data
Change Password for Opensearch
Steps for changing the password in Opensearch in Windows
- Go to
C:\SearchBloxServer\opensearch\plugins\opensearch_security\tools - Run the command
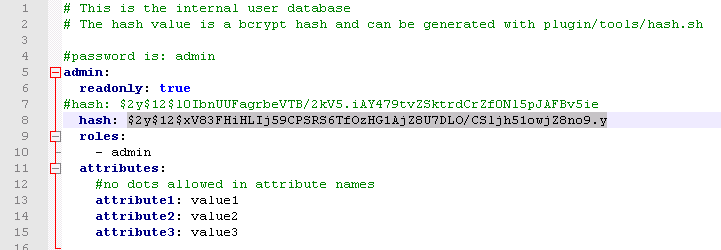
hash - You will get a prompt for a password, enter the password
- You will get the hash value for the password

- Copy the hash value and provide it across hash value for admin user in
C:\SearchBloxServer\opensearch\config\opensearch_security\internal_users.yml
- Go to
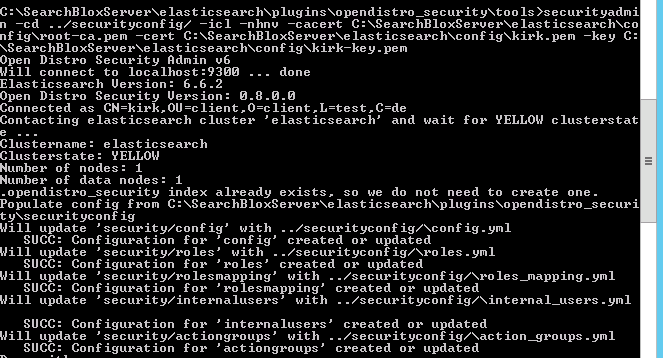
C:\SearchBloxServer\opensearch\plugins\opensearch_security\tools - Run the following command:
securityadmin -cd ../securityconfig/ -icl -nhnv -cacert C:\SearchBloxServer\elasticsearch\config\root-ca.pem -cert C:\SearchBloxServer\elasticsearch\config\kirk.pem -key C:\SearchBloxServer\elasticsearch\config\kirk-key.pem
- After running the command your password for opensearch will be updated, it is not required to restart Opensearch.
- You can check by accessing https://localhost:9200 and using the new password for logging in.
- After completing all the opensearch related steps mentioned above, update the password in
C:\SearchBloxServer\webapps\ROOT\WEB-INF\searchblox.yml
searchblox.basic.password: password@123 - Restart SearchBlox for the changes to take effect.
Steps for changing the password in Opensearch in Linux
- Go to
/opt/opensearch/plugins/opensearch_security/tools - Run the command
./hash - You will get a prompt for a password, enter the password
- You will get the hash value for the password
- Copy the hash value and provide it across hash value for admin user in
/opt/opensearch/config/opensearch_security/internal_users.yml - Go to
/opt/opensearch/plugins/opensearch_security/tools - Run the following command
./securityadmin -cd ../securityconfig/ -icl -nhnv -cacert C:\SearchBloxServer\elasticsearch\config\root-ca.pem -cert C:\SearchBloxServer\elasticsearch\config\kirk.pem -key C:\SearchBloxServer\elasticsearch\config\kirk-key.pem
-
After running the command, your password for opensearch will be updated; it is not required to restart opensearch.
-
You can access https://localhost:9200 and use the new password for logging in.
-
After completing all the opensearch related steps mentioned above, update the password in
/opt/webapps/ROOT/WEB-INF/searchblox.yml
searchblox.basic.password: password@123 -
Restart SearchBlox for the changes to take effect.
Status of Opensearch Indices
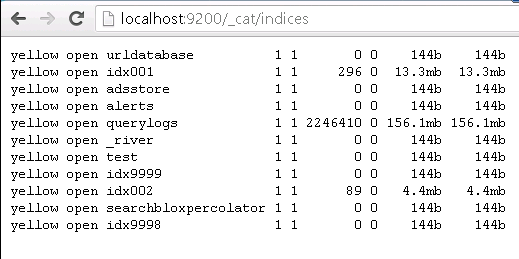
If you have trouble viewing the collections from the Admin Dashboard, please check the Opensearch indices. Check the status of the indices using the URL:
https\://localhost:9200/\_cat/indices
-
The first column represents the status.
-
The status of the indices can be green or yellow.
-
A red status means that the index has crashed. You will need to delete the specific index and restart SearchBlox.
RED or CLOSED Indices
-
If the index status is red or closed, you can restart Opensearch. If a restart does not recover the index and change the status to green or yellow please follow the below options.
-
A red status of index mostly refers to the crashed index. The only solution is to delete the index, restart Opensearch and reindex the collection from SearchBlox.
-
When the status of the index is closed, you can open the index from the developer console in Kibana or using the curl command:
-
If your SearchBlox collection no is 1, that corresponds to is idx001 within Opensearch. If the index is closed then the following request can be sent from Kibana
POST idx001/_openAlternatively, you can use the following curl command:
curl -k -u <username>:<password> -XPOST 'https://localhost:9200/idx001/_open?pretty=true'
-
If the index cannot be reopened, the only option is to delete the index, restart Opensearch and reindex the collection from SearchBlox.
DELETE idx001Alternatively, you can use the following curl command
curl -k -u <username>:<password> -XDELETE 'https://localhost:9200/idx002?pretty=true'
Please refer to the following sections using Kibana to work with Opensearch.
Delete Opensearch Index
You may need to delete the Opensearch index if you have the following problems:
-
You cannot access the index from the Admin Dashboard.
-
You cannot index or delete the collection.
-
Most importantly, if the status of the index is red or if it is not possible to open a closed index.
For example, if collection number 2 has crashed, that status will be shown next to idx002 in the Status of Indices.
Then you need to delete idx002 in Opensearch.
To delete an index directly, follow the steps:
- To delete idx002 or any index that has turned red execute the following statement
DELETE idx002
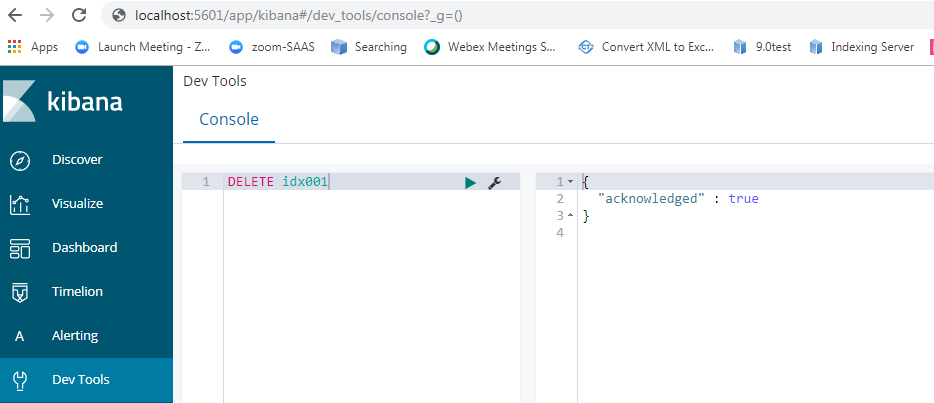
You will get the following response once it is successfully completed:
"acknowledged": "true" - Then, delete all the indices that you want to delete from Opensearch.
- Restart Opensearch.
Using Kibana to access Opensearch
Kibana can be used to create visualizations with Opensearch data. Learn how to start and run Kibana Visualizations
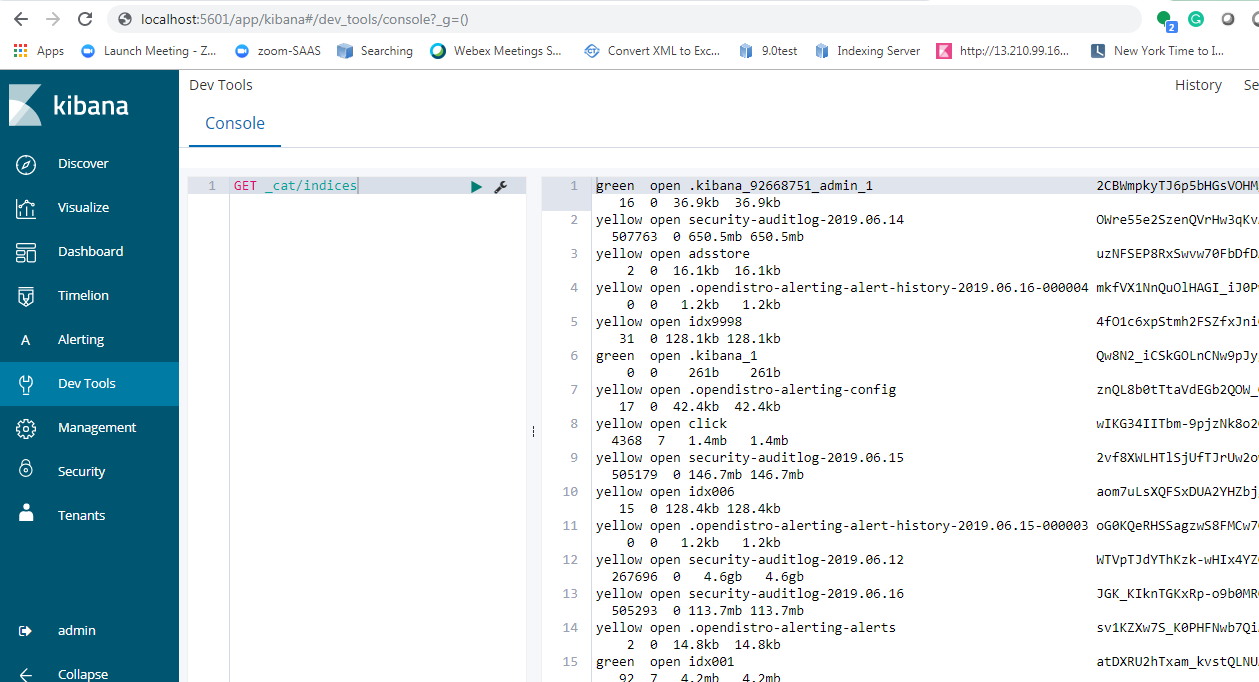
Start Kibana and access Dev Tools from the left menu.
- To view the indices, use the following command:
GET _cat/indices
- To delete an index, use the DELETE command:
DELETE idx001
- If you want to clear index from opensearch that is delete all the data in an index say idx001 use the following command.
Please note that all data in index 1 would be cleared out on using the above which cannot be retrieved again and the collection has to be reindexed.
POST idx009/_delete_by_query
{
    "query": {
    "match_all": {}
  }
}
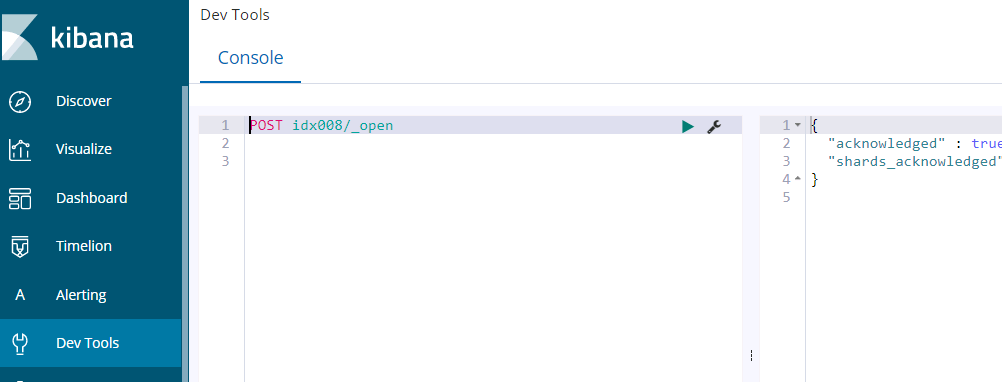
- If you want to close or open indices that is close or open index say idx008 please use the requests:
closing index
POST idx008/_close
opening index
POST idx008/_open
Troubleshooting Oops Error:
Oops. There has been an error.
When the Admin screen can't be accessed please check the status of the Opensearch indices to find out if any index/indices got closed or turned to red status. To rectify such issues, please restart SearchBlox or recreate the Opensearch index/indices.
Updated 10 months ago
