
Search Settings
Control how search results look, what gets shown, and which search interface your users see.
Search result formatting and basic search settings can be configured through the SearchBlox Dashboard. To access these settings, go to Dashboard → Collections → Search Settings.

- The settings on this page are not exhaustive. Use Search Parameters to customize search results in a more detailed and extensive way.
Search Settings

Each Setting describes as follows:
| Setting | Description |
|---|---|
| Results Per Page | Number of search results shown per page (10–500). Default is 10. |
| Featured Results Per Page | Number of featured results per page (1–10). Default is 5. |
| AutoComplete Field | Controls where SearchBlox pulls suggestions from as users type. Choose from past search queries, document titles, or document content. The default is Title. |
| Hit Highlighting | When enabled, the words a user searched for are shown in bold within each result, making it easier to spot why a result matched. The default is Yes. |
| Query Caching | When enabled, repeated searches for the same term load faster because the results are temporarily stored. Useful for high-traffic search pages. The default is No. |
Suppression List
Suppression Terms let you block specific results from appearing when a user searches for a particular word or phrase. For example, if searching for "intern" is returning irrelevant results about "internal servers", you can suppress those results so users only see what's actually useful.
-
By default, the Suppression Term toggle is off. To start using suppression terms, you must enable the toggle.

-
Click on Create a New Suppression Term or the + icon. A pop-up window will open to enter the details.
-
Enter the Query Term and the Suppression Term—the word or phrase you want to hide from search results when the Query Term is used.
After completing both fields, click Add Suppression Term to save it.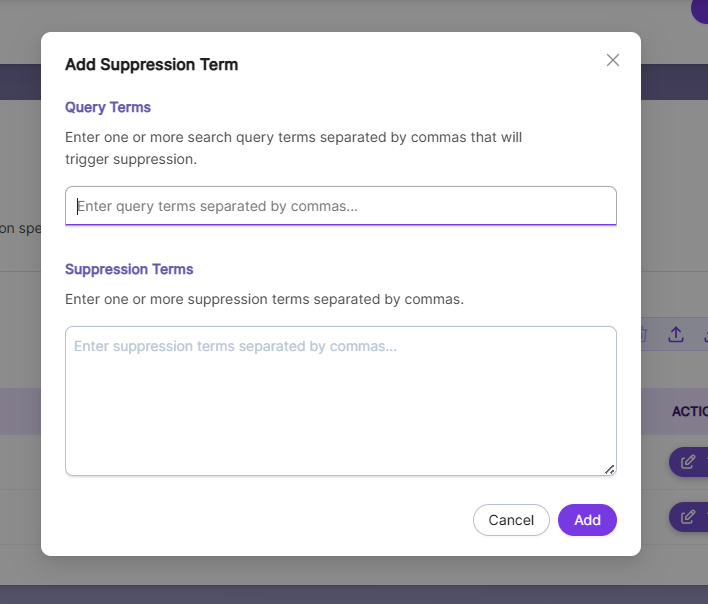
-
After adding you can see the list as shown below:
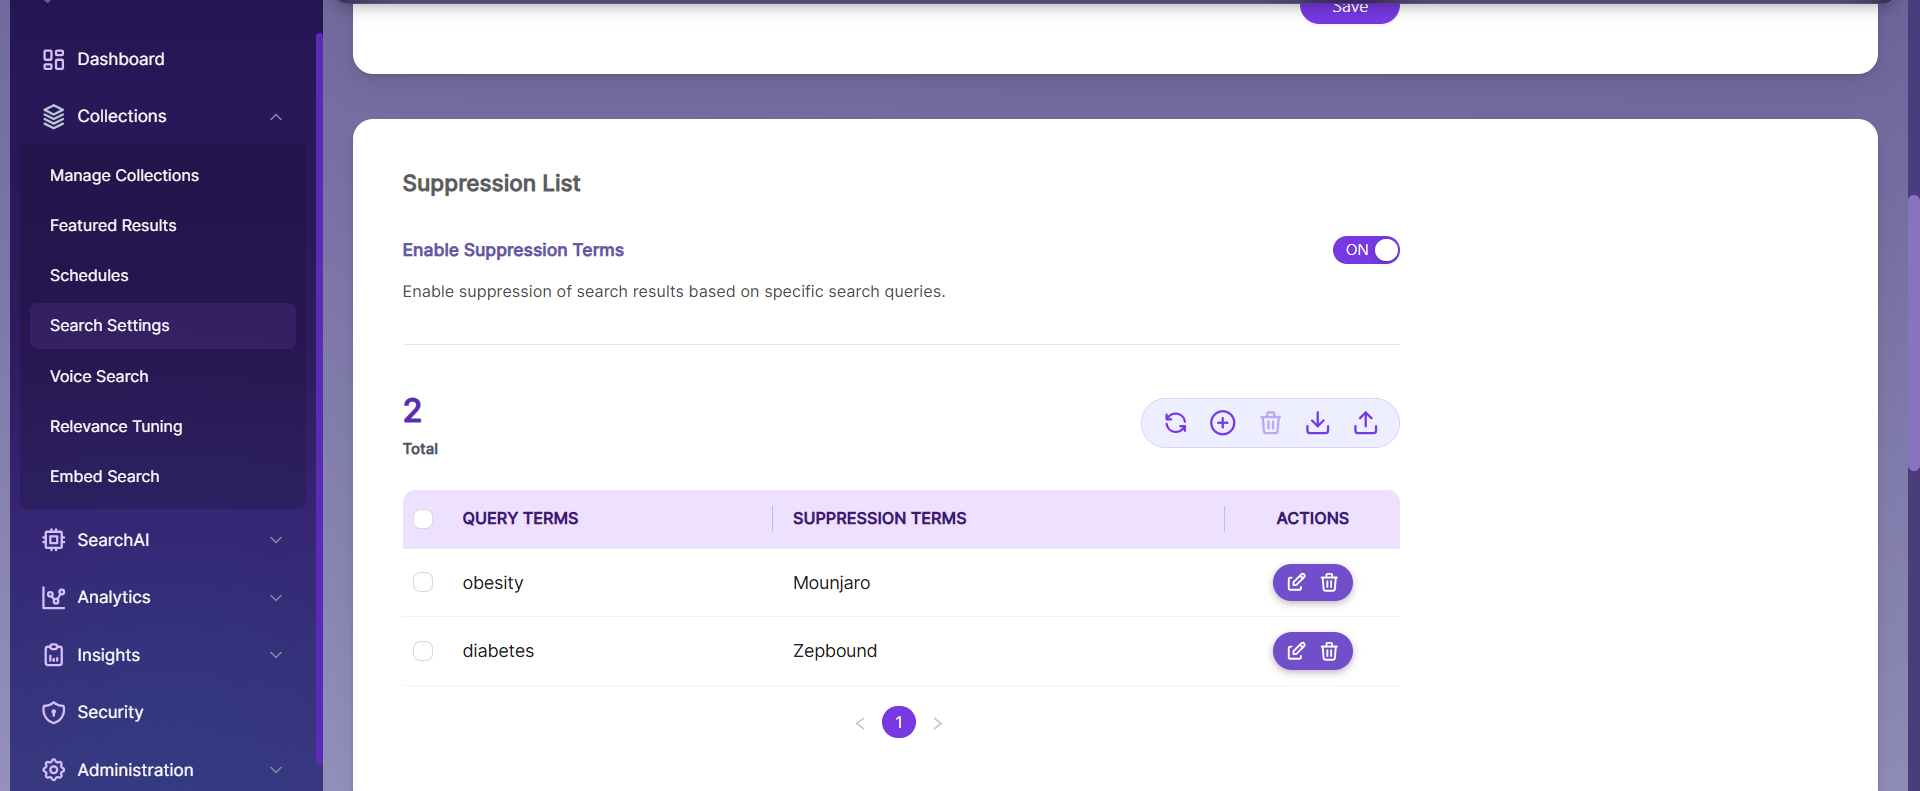
Following actions can be performed on Suppression List:
| Action | Description |
|---|---|
| Refresh Suppression Terms | Click the Refresh icon to update the list after making changes. |
| Create Suppression Terms | Add new suppression terms using the Create button or the + icon. |
| Delete Suppression Terms | Remove suppression terms using the Delete Suppression Term button. |
| Import Suppression Terms | Upload a file to add multiple suppression terms at once—useful for bulk updates. |
| Export Suppression Terms | Download all suppression terms to a file for backup or sharing across systems. |
List of Search UI Templates
SearchBlox offers several Search UI Templates tailored for different industries, use cases, and search experiences. Each template is designed to make it easier for users to find the information they need.
Available Search UI Templates
- Web:
Designed for general website search functionality, making it ideal for content discovery on websites or knowledge bases. - Product Discovery:
Designed to display and explore product details easily, also used to search and explore products with more details like images, prices, and filters. - Conversations:
Search plugin with hybrid search, recent query history, and collection-based filtering. - Data Explorer:
Focused on advanced data exploration and analytics, ideal for users who need to drill down into complex datasets. - Tabbed:
Organizes search results into tabs for better categorization, making it useful for websites with multiple content types or sections. - Email:
Designed for searching email or communication-based content, with features like date filters and thread-based results.

Uploading Custom Search UI Templates
If the built-in templates don’t meet your needs, you can upload a custom Search UI, creating a fully personalized search experience.
Here’s how to upload and manage custom templates:
Prepare the Custom UI Template:
- Ensure the custom UI template is in ZIP format.
- If configuration changes are needed:
a.Unzip the custom UI file.
b.Edit the necessary files (e.g., files in the facet.js folder).
c.Re-zip the folder using the same plugin name.
- Upload the Template:
- Go to the section in the SearchBlox Dashboard for uploading custom UI templates.
- Upload the ZIP file containing your custom UI template.
-
Generate Custom UI URL:
- After a successful upload, a Custom UI URL will be generated.
- This link, based on the plugin name used during upload, allows you to access your custom search interface.
-
Save the Custom UI URL:
- The generated Custom UI URL will expire after a page refresh.
- Be sure to save the link for future access.
Example Workflow:
- Create a custom UI template and zip it with the name my_custom_ui.
- Upload the my_custom_ui.zip file.
- After successful upload, a URL like "http:///plugins/my_custom_ui" will be generated. Save this URL for your application.
Key Notes:
- Unique Template Names:
If you are uploading multiple custom UI templates, make sure each template has a unique name. Uploading a template with the same name as an existing one will overwrite the previous files. - File Location:
Uploaded custom UI templates are stored in the following directory:
<SearchBlox-Installation-Folder>/webapps/ROOT/plugins

Note:
The name you give your custom UI file is case sensitive.
This means Test.zip and test.zip are treated as two completely different custom UI templates.
Updated 26 days ago