
Filesystem Collection
SearchBlox includes a built-in file system crawler to index content from file systems.
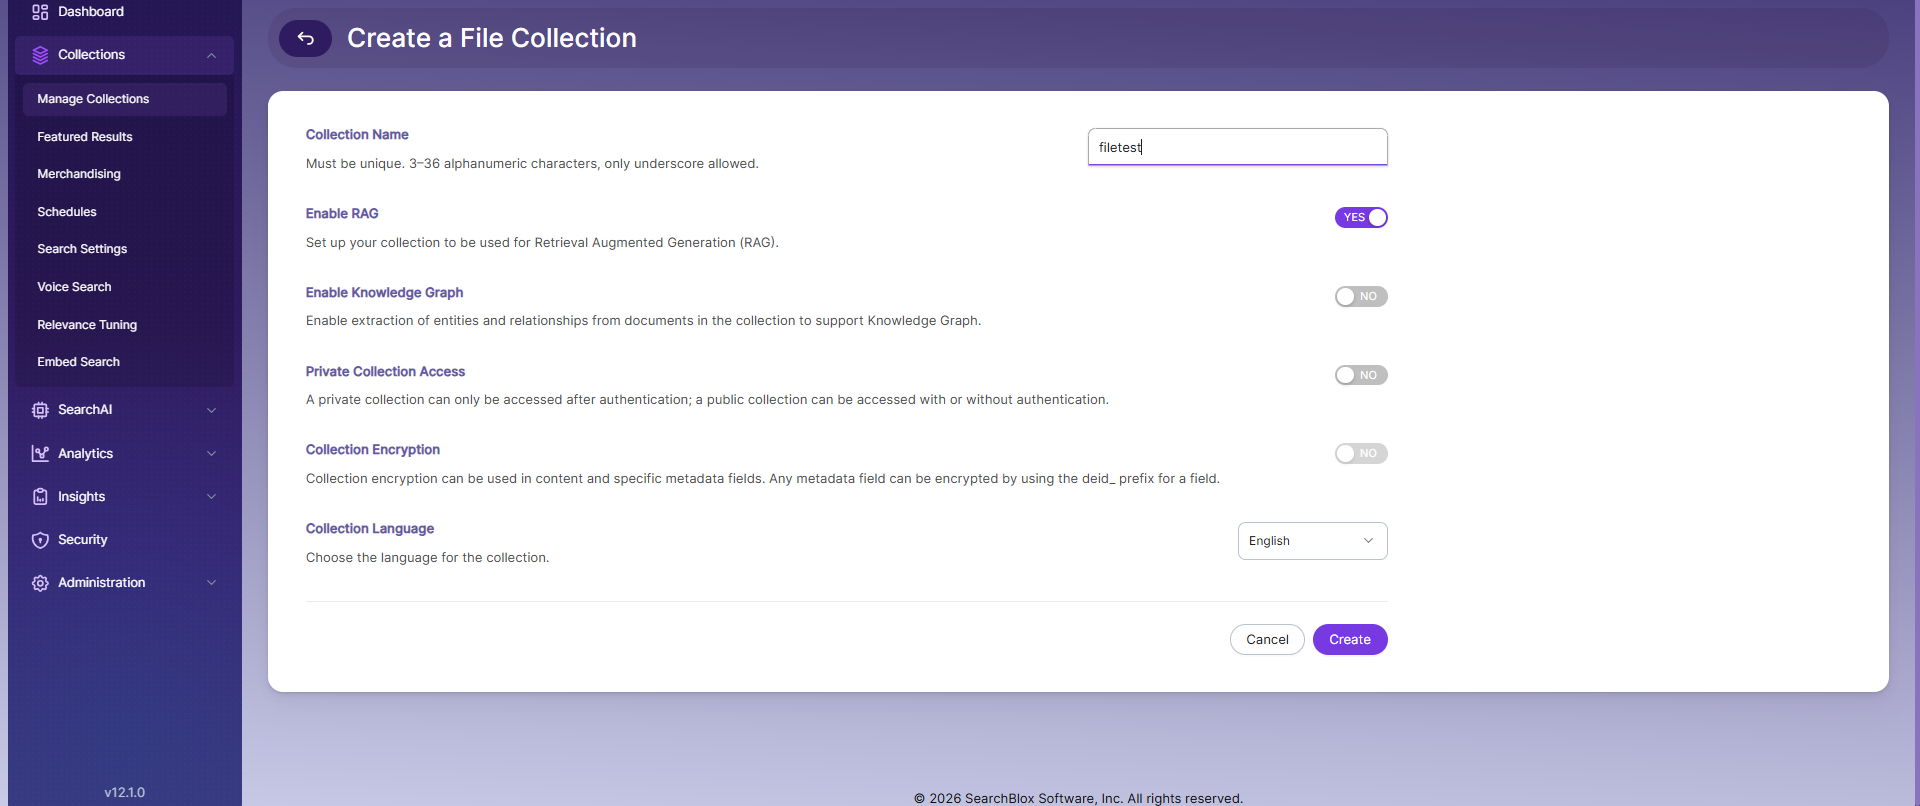
Creating a File Collection
To create a File System Collection in SearchBlox, follow these steps:
-
Log in to the Admin Console
- Open SearchBlox and sign in.
-
Go to the Collections tab
- Click "Create a New Collection" or the "+" button.
-
Choose the Collection Type
- Select "File System Collection".
-
Name your Collection
- Enter a unique name (example: "SalesDocs").
-
Set the RAG Options
- Enable if you want to use Hybrid RAG search.
- Disable if you don’t need it.
-
Set Access Permissions
- Pick Private or Public access for the collection.
- Turn Encryption ON or OFF based on your security needs.
-
Select the Content Language
- Choose a language if it’s not English.
-
Click Save
-
Your File System Collection is now created.
-
Once the File Collection is created, you will be taken to the Path tab to set directory paths and apply file or folder filters for the Collection.
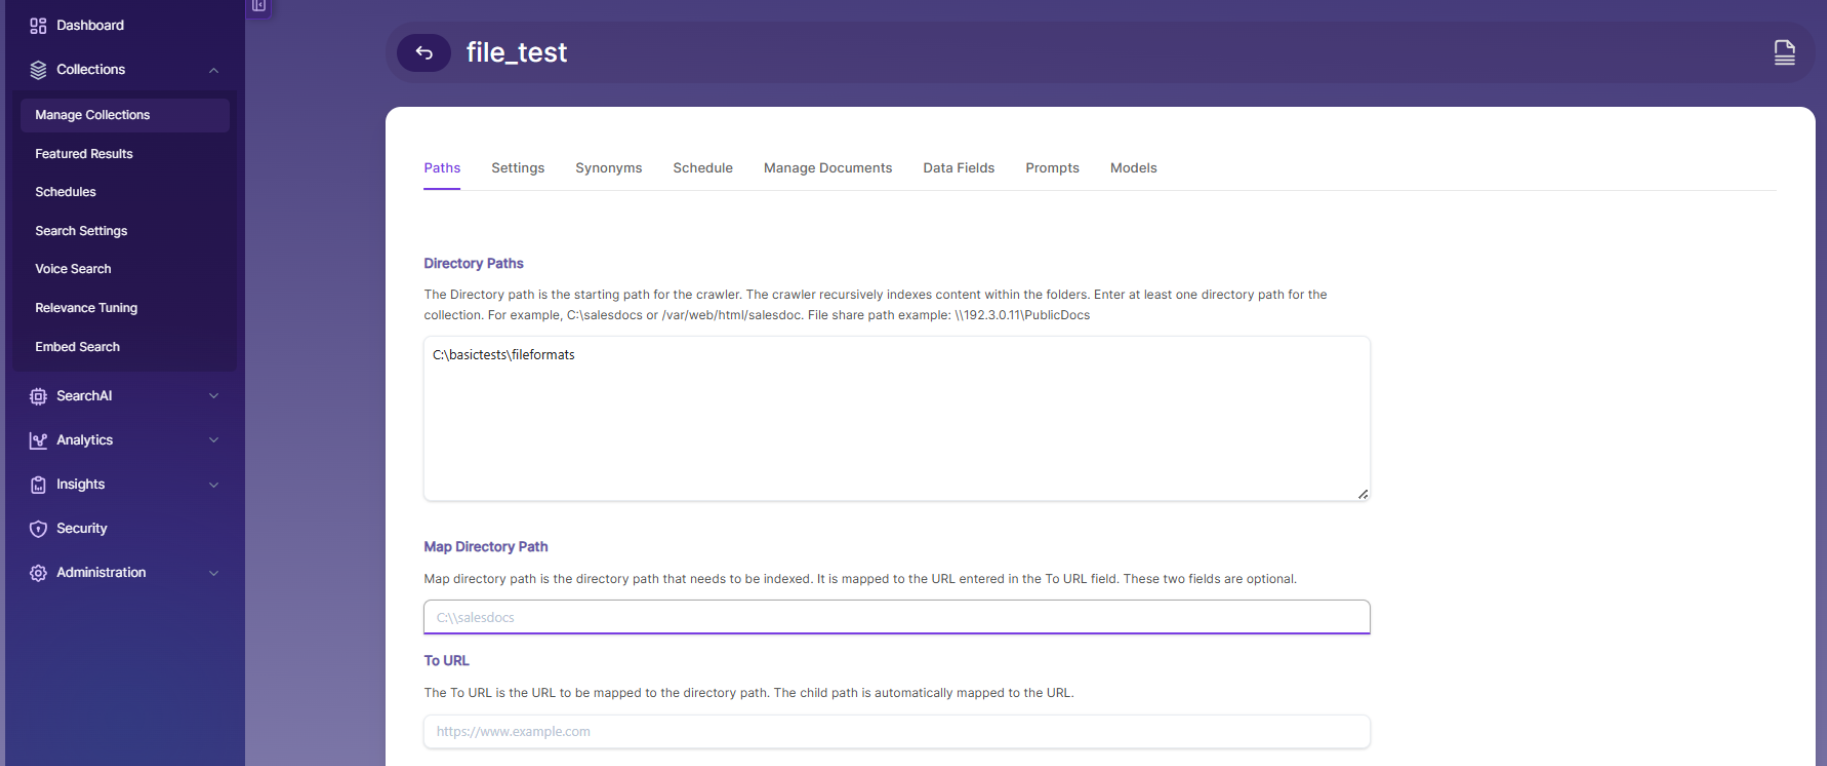
File Collection Path Settings
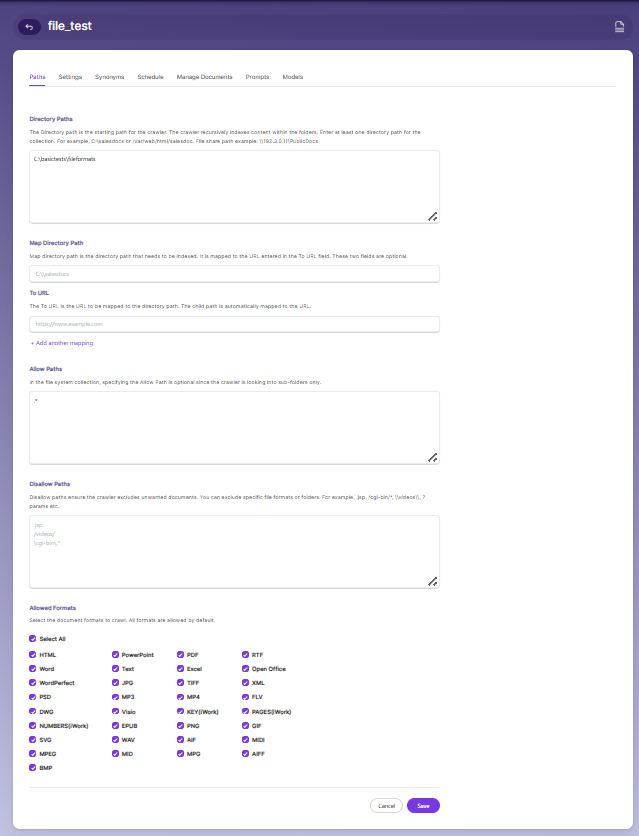
Directory Paths
The directory path is where the crawler starts searching for files. It automatically index through all folders inside it. In the Paths tab, just enter at least one folder path (like c:\salesdocs or /var/web/html/salesdoc) and save the settings.
Allow/Disallow Paths
Allow and Disallow filters help you control what gets indexed by letting you include only the folders you want and exclude any unwanted files or documents.
The path settings are listed in the table:
| Field | Description |
|---|---|
| Directory Path | The directory path is where the crawler starts searching for files. |
| Map Directory Path | The directory path to be indexed is linked to the URL entered in the To URL field, and both of these fields are optional. |
| To URL | The URL should be linked to the directory path. For example, if C:\testfolder is mapped to a URL, SearchBlox will index files from the system, but when users click a result, the document opens from the web server. All subfolders are automatically mapped to the same URL. |
| Allow Paths | C:\\www\\html\\*When creating a file system-based collection, specifying an allow filter is optional because the indexer scans all sub-folders, but if there are symbolic links, the crawler will also follow them into linked directories. |
| Disallow Paths | C:\\www\\html\\noindex\\.*\\cgi-bin\\.* |
| Allowed Formats | Select the file formats you want to include by checking the boxes. Supported formats include HTML, XML, Word, PowerPoint, Excel, Visio, PDF, Text, RTF, EPUB, AutoCAD, OpenOffice, iWorks, WordPerfect, Images, Audio, Video, PST files, Emails, and Archives. |
File Collection Settings
The Settings tab contains adjustable options for the file system crawler and indexer. SearchBlox already provides default settings when you create a new collection, and you can modify the available options as needed.
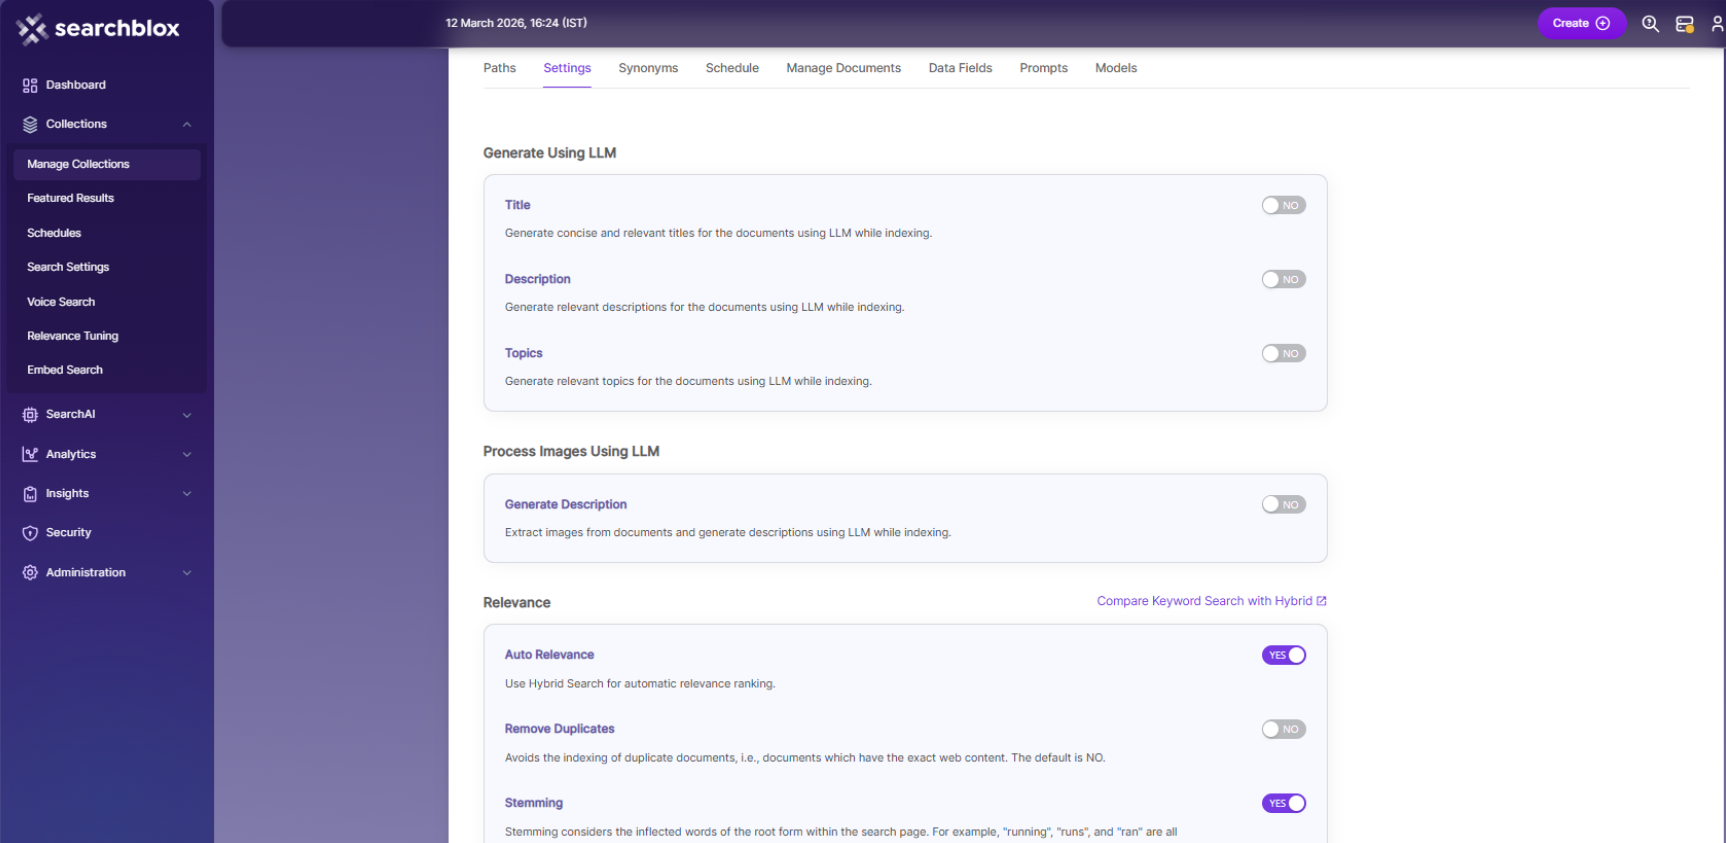
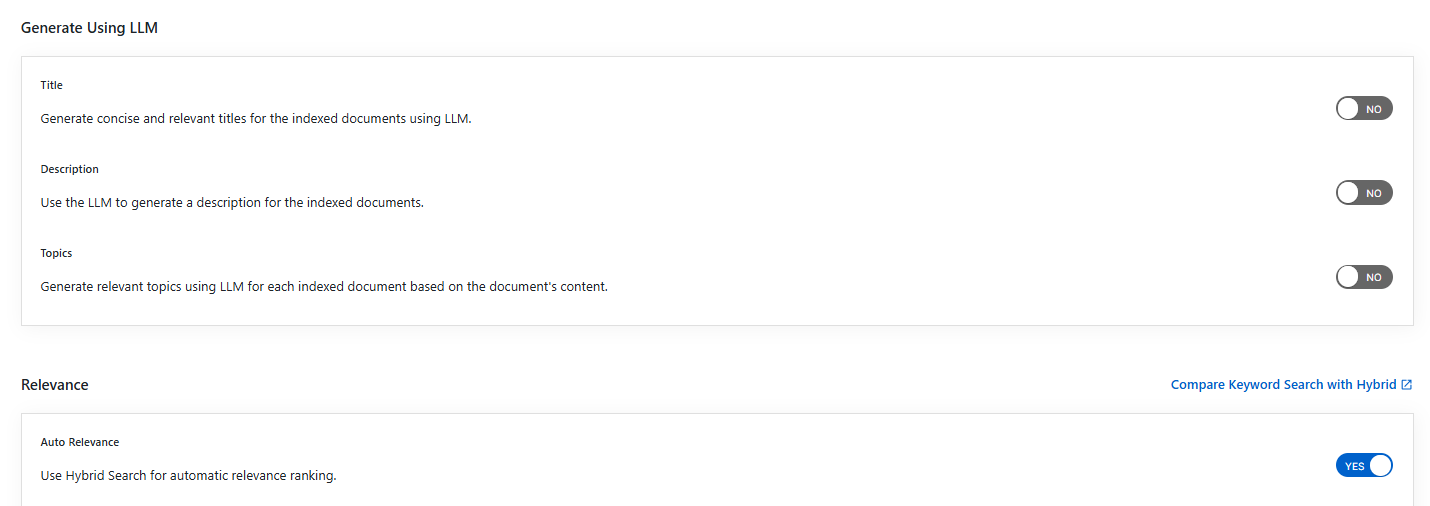
Generate Title, Description and Topics using SearchAI PrivateLLM and Enable Hybrid Search:
- Choose and enable
Generate Using LLMandAuto Relevance
- By clicking
Compare Keyword Search with Hybridwill redirect to the Comparison Plugin
Settings Description Title Generates concise and relevant titles for the indexed documents using LLM. Description Generates the description for indexed documents using LLM. Topic Generates relevant topics for indexed documents using LLM based on document's content. Auto Relevance Enable/Disable Hybrid Search for automatic relevance ranking
| Setting | Description |
|---|---|
| Remove Duplicates | Turn this on to avoid indexing duplicate documents. |
| Stemming | When on, words are reduced to their root form (e.g., "running", "runs", "ran" → "run"). |
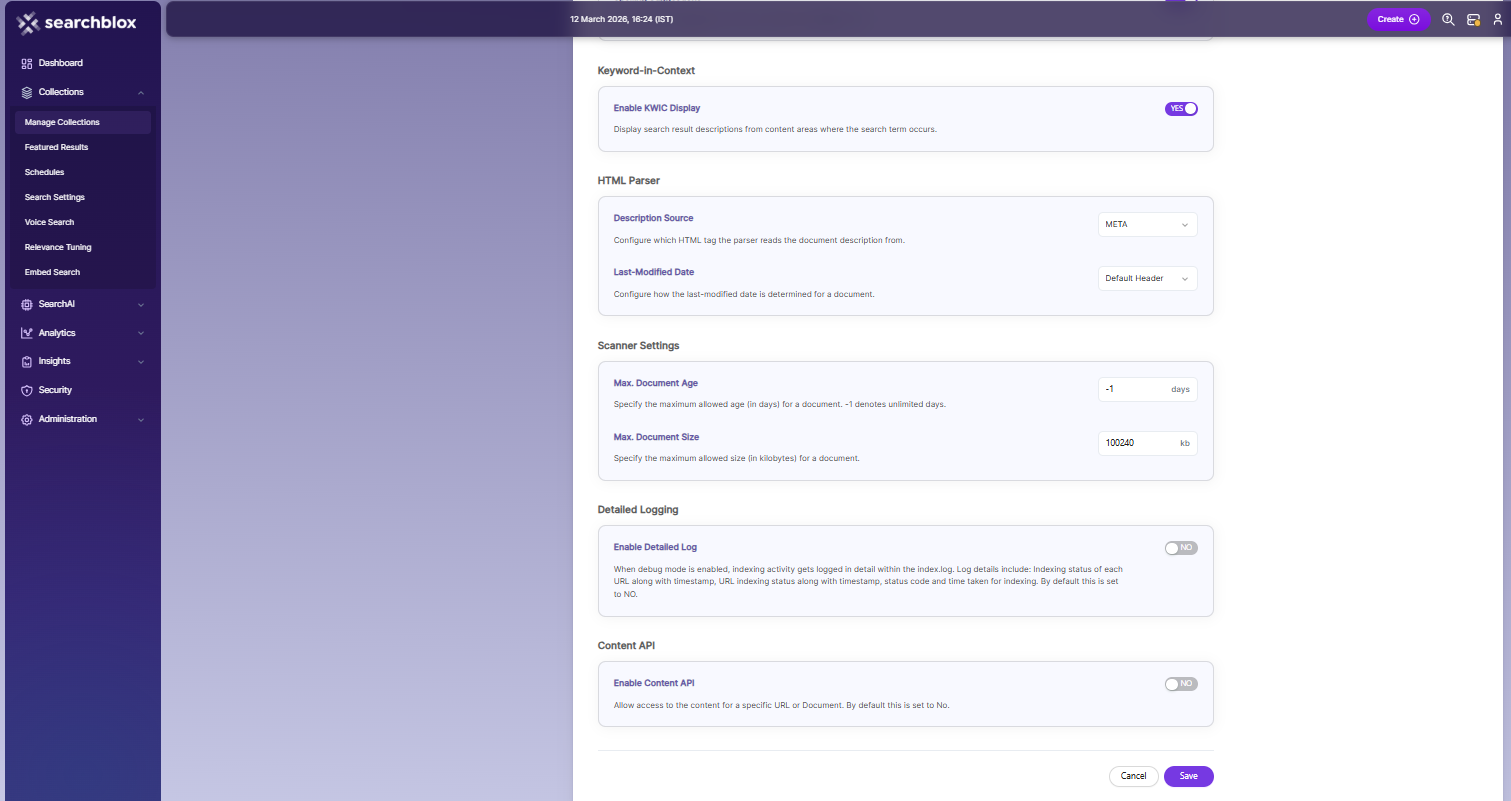
| Spelling Suggestions | Provides spelling suggestions for the collection. Default setting is YES. |
| Keyword-in-Context Display | Shows search results with snippets from content where the search term appears. |
| HTML Parser Setting | Configures the HTML parser to get the document description from HTML tags like META, H1, H2, H3, H4, H5, or H6. |
| Maximum Document Age | Sets the maximum age (in days) a document can be in the collection. |
| Maximum Document Size | Sets the maximum allowed size of a document in the collection (in kilobytes). |
| Logging | Records detailed indexer activity in <SearchBlox_installation_dir>/webapps/ROOT/logs/index.log. It includes: - List of crawled files - Processing details with timestamps, whether indexing occurred or a URL was skipped - All data as separate entries in index.log - Timestamp of indexing completion and time taken per page - File last modified date - Information on skipped files and reasons |
| Enable Content API | Allows the crawler to index content that contains special characters. |
Indexing File Share Using File collection
-
To index files from a file share, enter the share path (UNC path) of the folder containing the files you want to index.
- If the file share is on another server in the same network and needs permission, run the SearchBlox server service with admin access and enter the required credentials.
- Using an admin account or any account that has access to the shared files will ensure the files are indexed successfully.

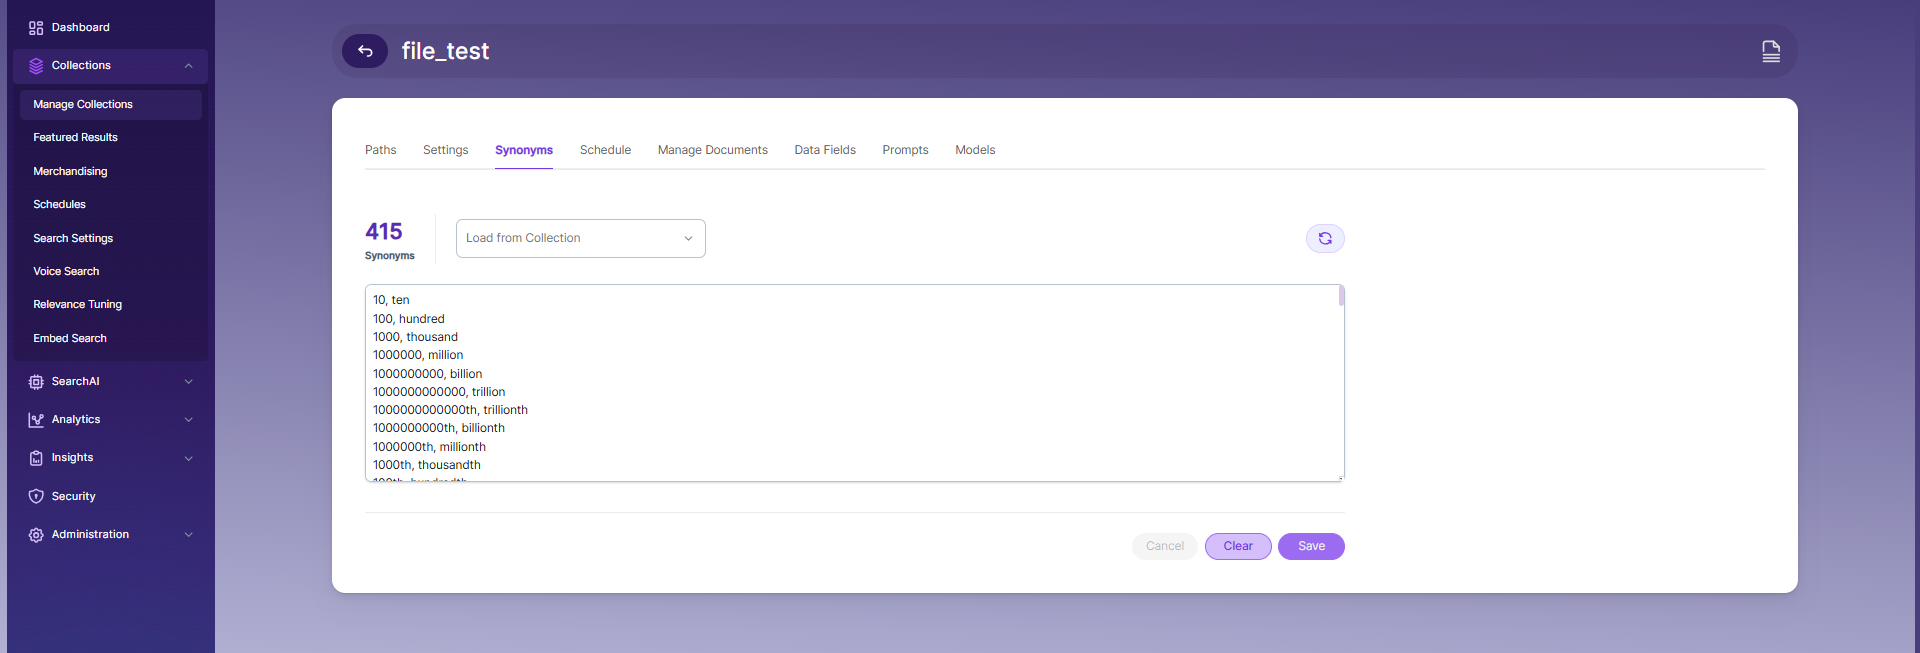
Synonyms
Synonyms help the search show relevant documents even when the exact search word is not used.
For example, if someone searches for “global,” the results can also include documents that use “world” or “international.”
We have an option to load Synonyms from the existing documents.
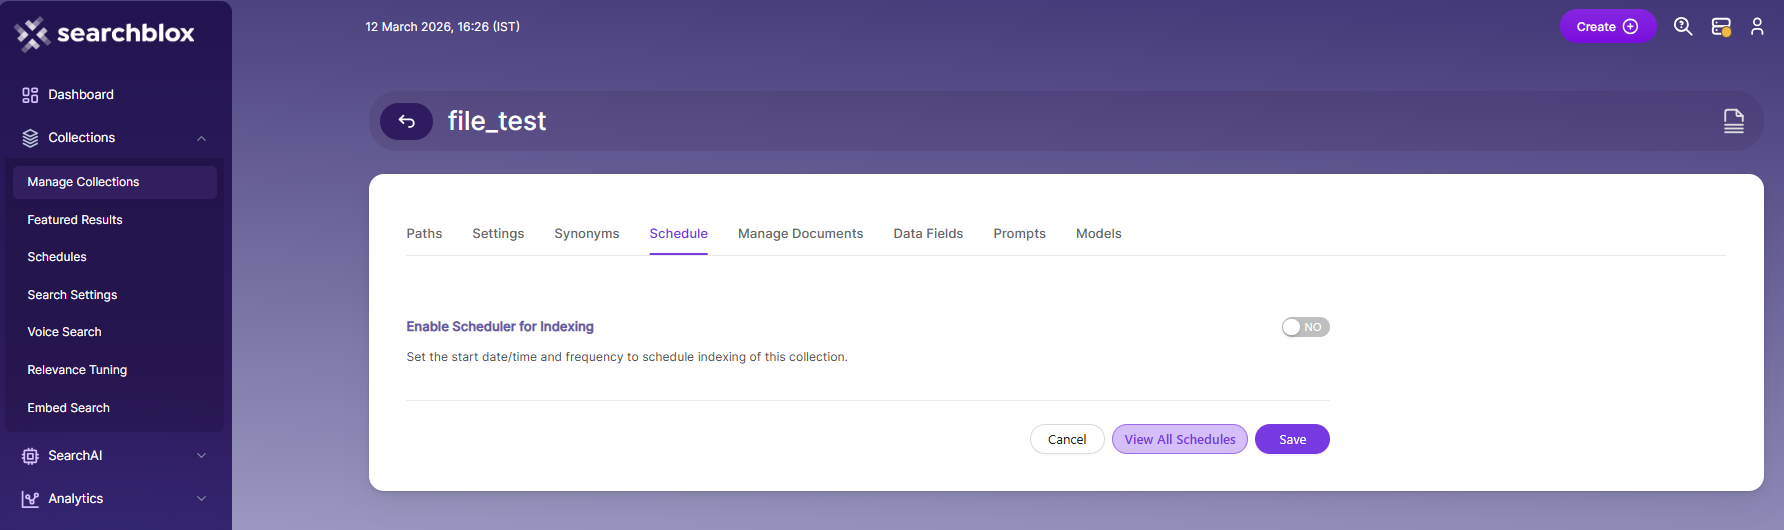
Schedule and Index
You can set how often and when a collection should start indexing from its root paths. SearchBlox supports the following schedule options:
- Once
- Hourly
- Daily
- Every 48 Hours
- Every 96 Hours
- Weekly
- Monthly
The following operation can be performed in file collection:
| Activity | Description |
|---|---|
| Enable Scheduler for Indexing | Turn this on to set the start date and how often indexing should run. |
| Save | Saves your scheduling settings for the collection. |
| View all Collection Schedules | Opens the Schedules page where you can see all scheduled collections. |
Best Practices
- Always enter a correct directory path or valid UNC path in the File Collection settings.
- When mapping a directory to a URL, make sure the same directory path is entered in the “Map Directory Path” field.
- If you have multiple collections, schedule them so only 2–3 collections index or refresh at the same time.
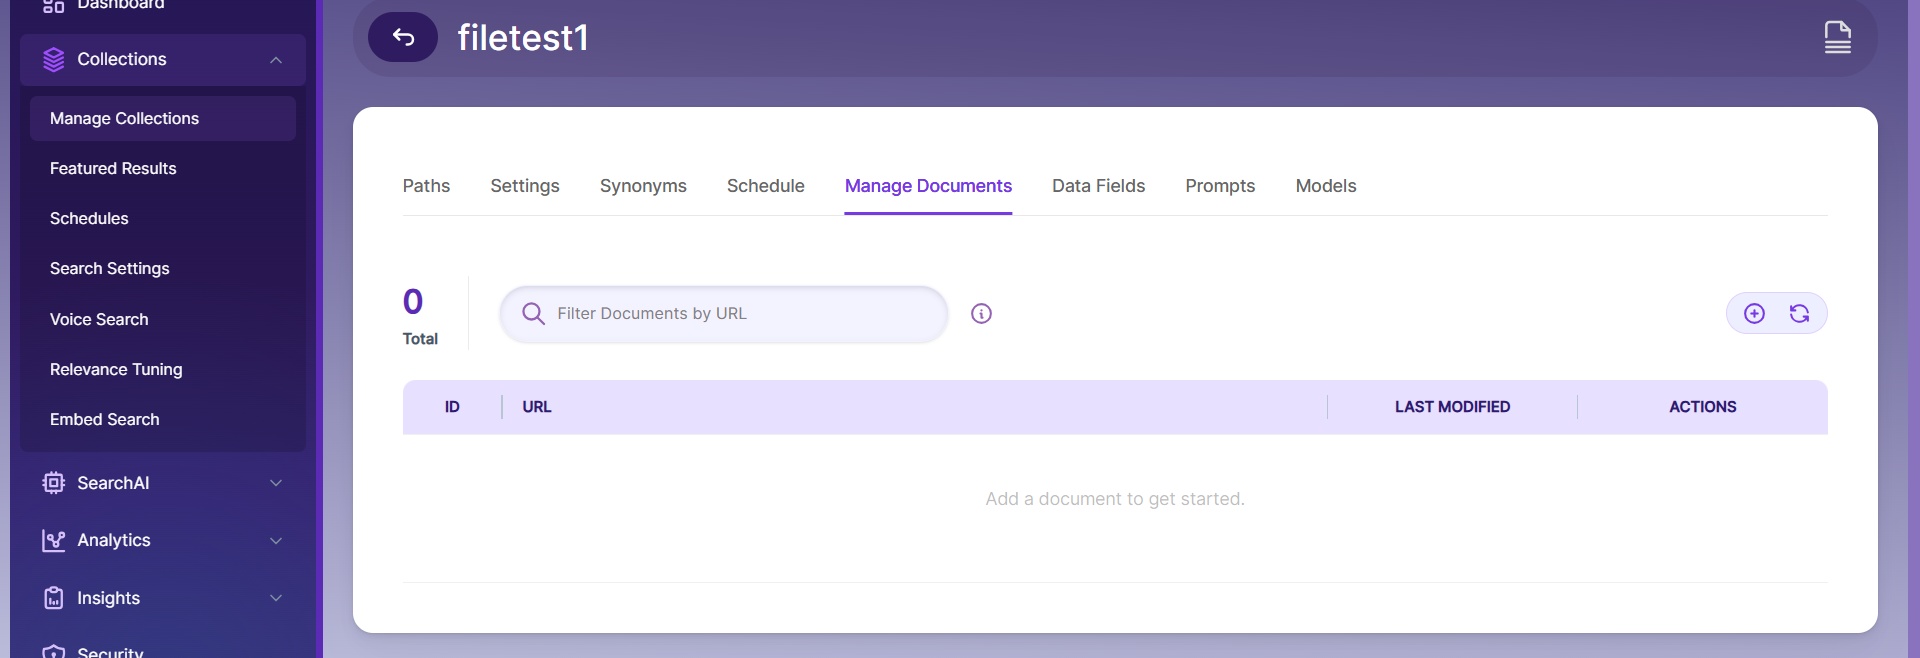
Manage Documents Tab
-
The Manage Documents tab allows you to perform these actions:
- Add or update documents
- Apply filters
- View document content
- View metadata
- Refresh documents
- Delete documents
-
To add a document, click the "+" icon.
-
Enter the document or URL, then click Add/Update.
-
After adding it, the document URL will appear, and you can perform all the actions listed above.
-
To delete a document, enter its file path and click Delete.
-
To check the status of an indexed file, click View Metadata.
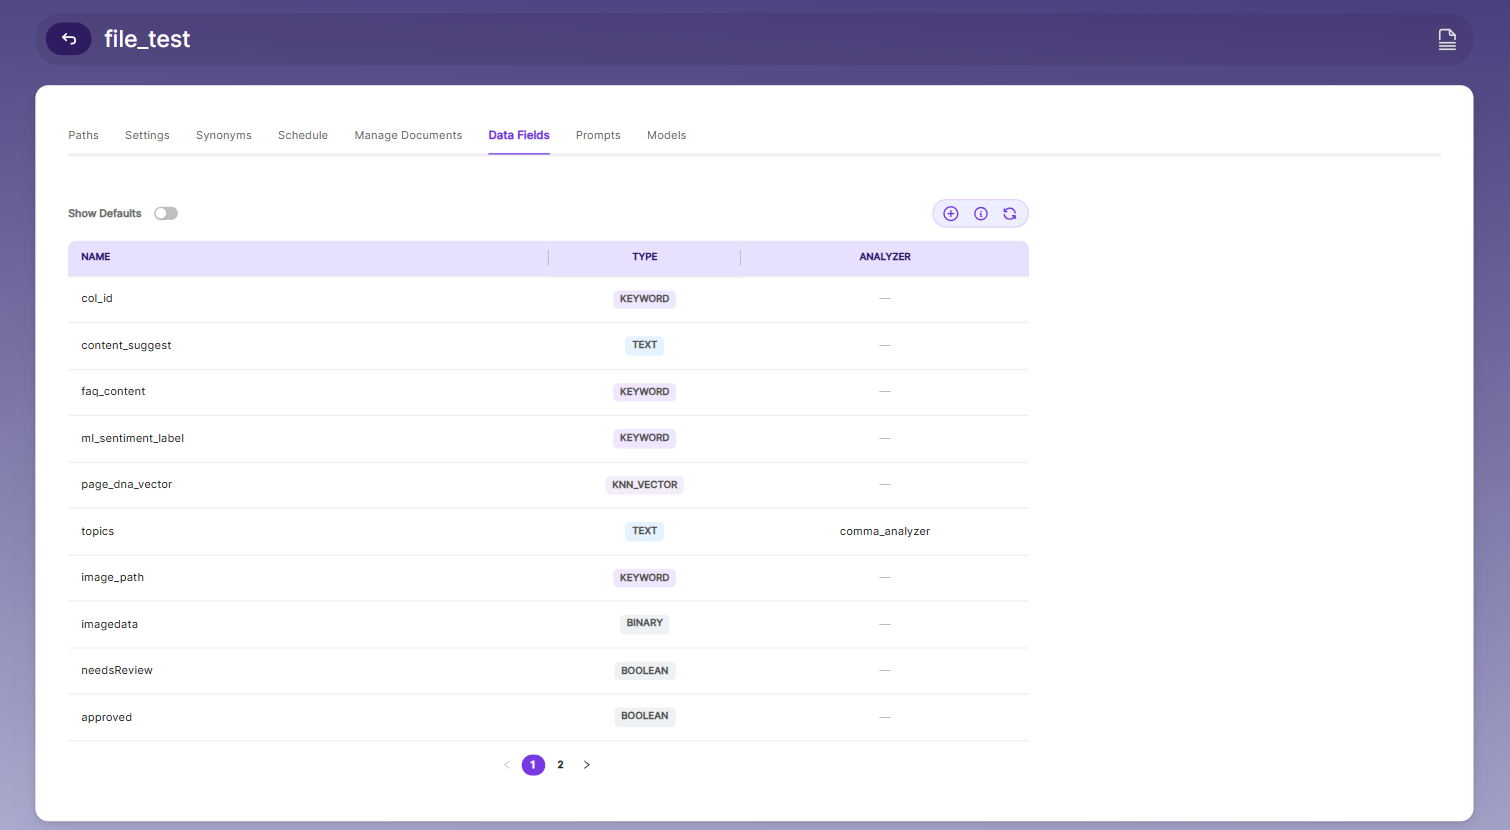
Data Fields Tab
The Data Fields tab lets you create custom fields for search and view the default fields for non-encrypted collections. SearchBlox supports the following field types:
| Type | Description |
|---|---|
| Keyword | For alphanumeric values like IDs, tags, or codes |
| Number | For numeric values like prices or quantities |
| Date | For date values to use in search and filters |
| Text | For full-text search in custom fields |
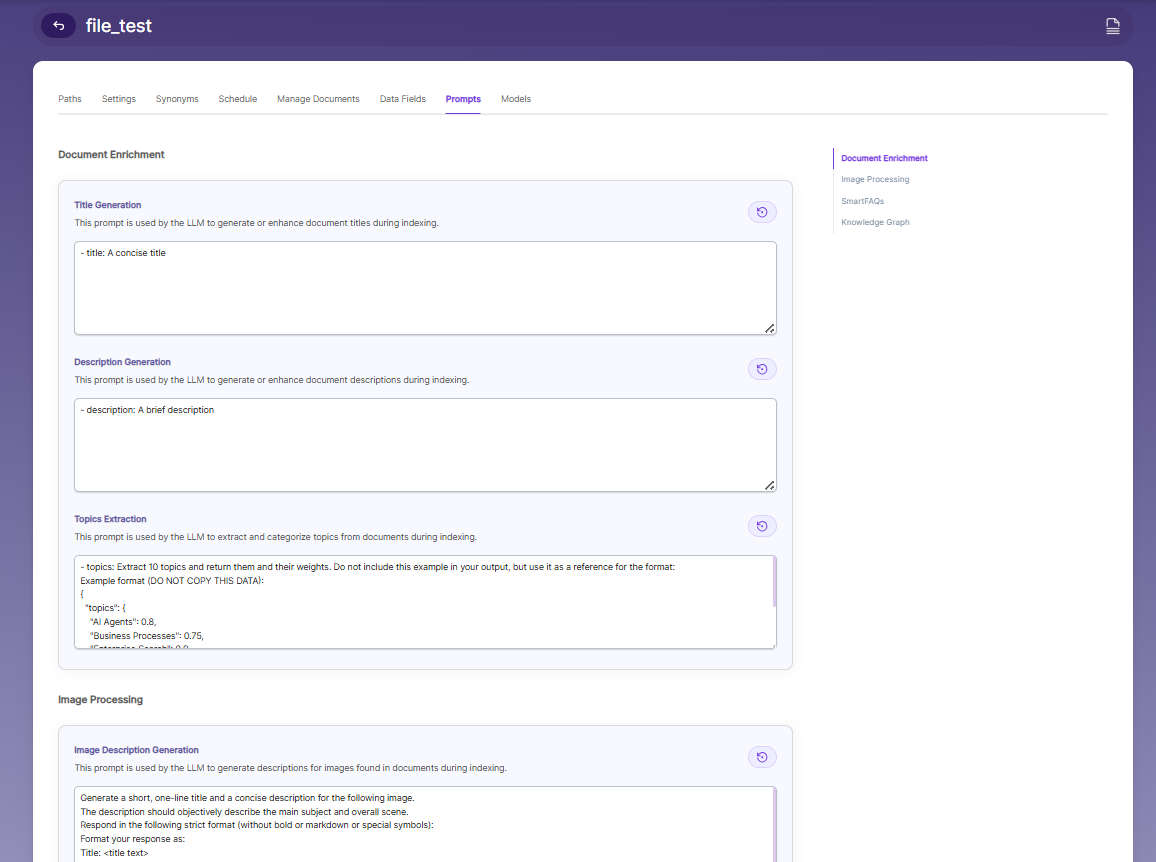
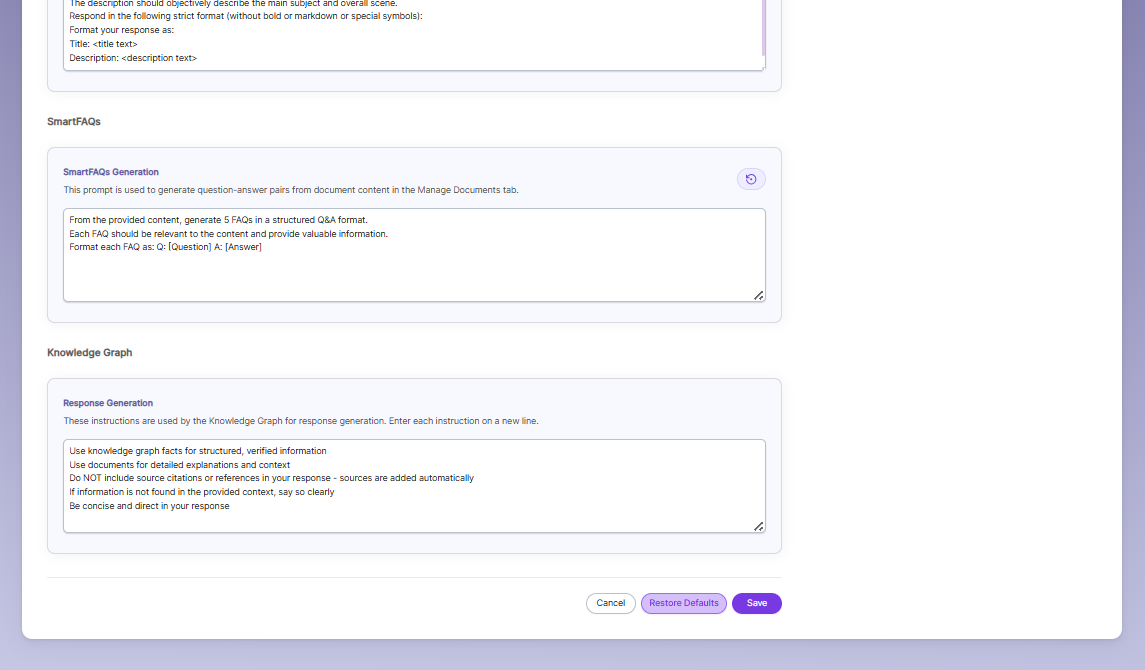
Prompts
When LLM/RAG is enabled, you can edit AI-based prompts for Title, Description, Topic, Image Description, and Smart FAQs.
You can customize these prompts anytime, and use Restore Default to reset them back to the original SearchBlox settings.
Models
The Models section lets you override the global embedding, reranking, and LLM settings for this specific collection. Changes made here apply only to the current collection and do not affect other collections.
Embedding
- Provider specifies the embedding provider used to generate vector representations of documents.
- Model defines the embedding model used to convert document content into vectors for semantic search.
Reranker
- Provider specifies the reranker provider used for improving search result relevance.
- Model defines the reranker model used to re-score and reorder search results based on relevance.
LLM
-
Provider specifies the Large Language Model provider used for AI-powered features.
-
Model defines the LLM used for tasks such as document enrichment, summaries, and SmartFAQs.
-
These settings override global configurations and apply only to the current collection.