
Merchandising
Merchandising lets you control how products rank and appear in search results, customizable per query through promote, pin, and hide rules, managed in the Admin Console.
Merchandising Dashboard
Merchandising is available for Product Discovery collections. Go to Dashboard → Collections → Merchandising to set up and manage rules for a collection, or open the Merchandising page to work with rules across all your Product Discovery collections.
A rule activates whenever a shopper's query matches its trigger keywords, and then promotes, pins, or hides the products you choose. You can create as many rules as you need, and more than one rule can apply to the same query.
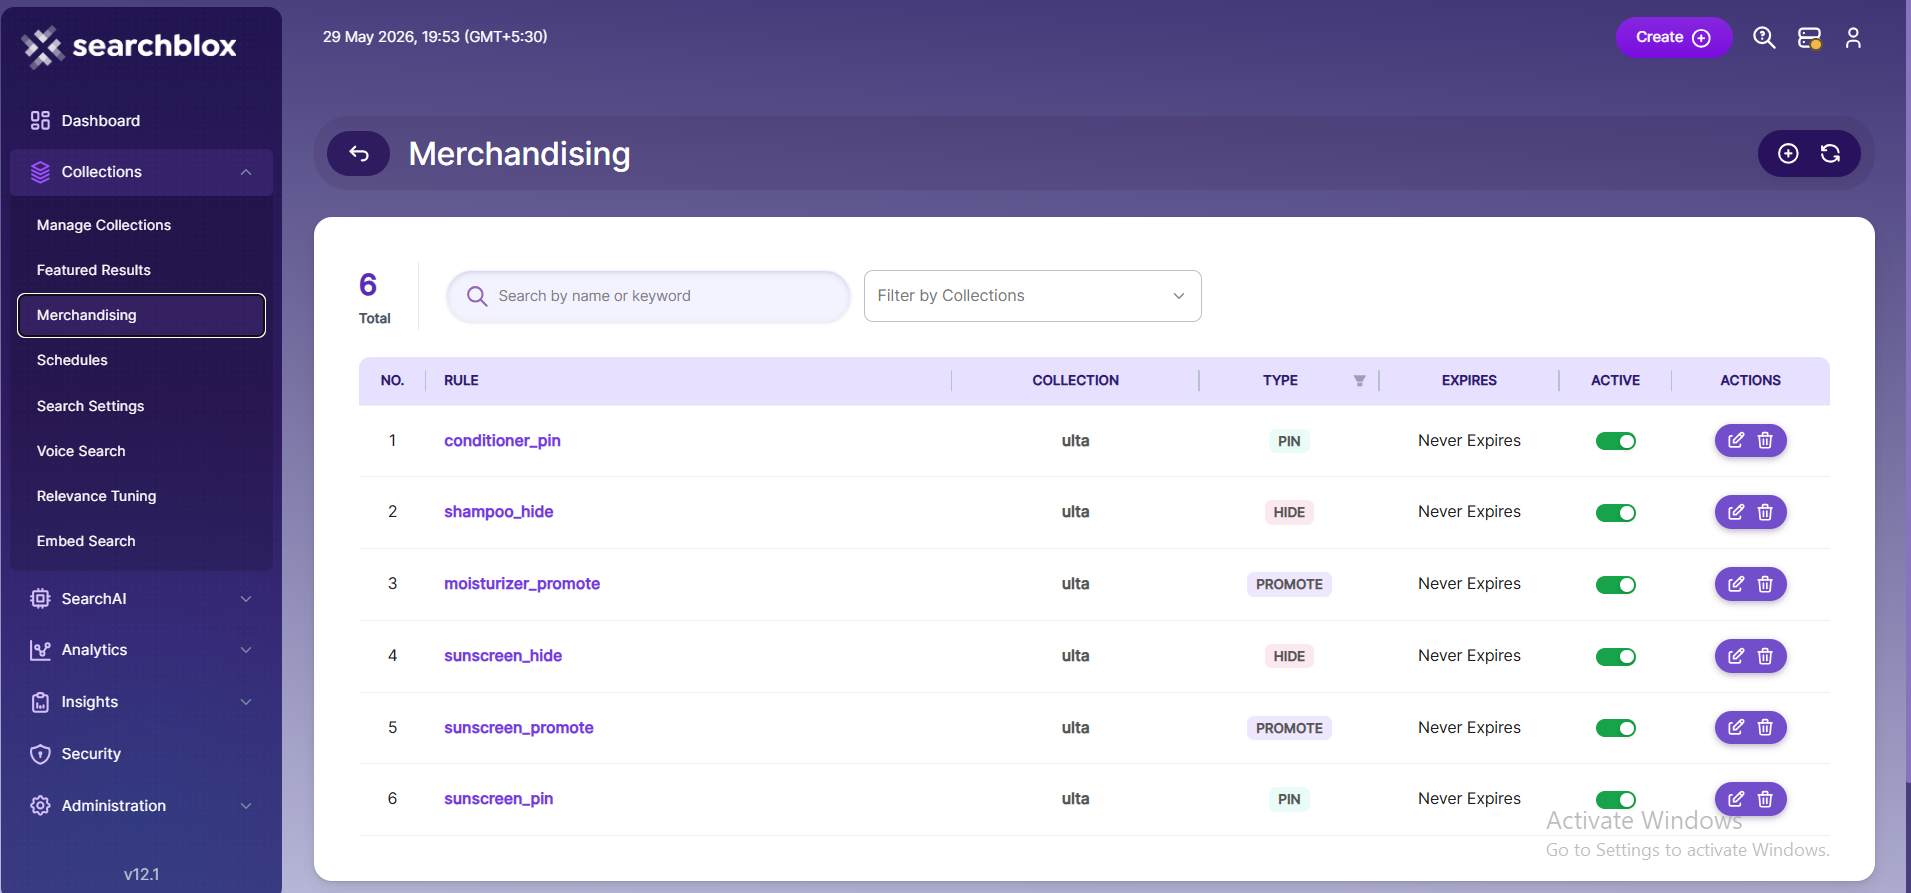
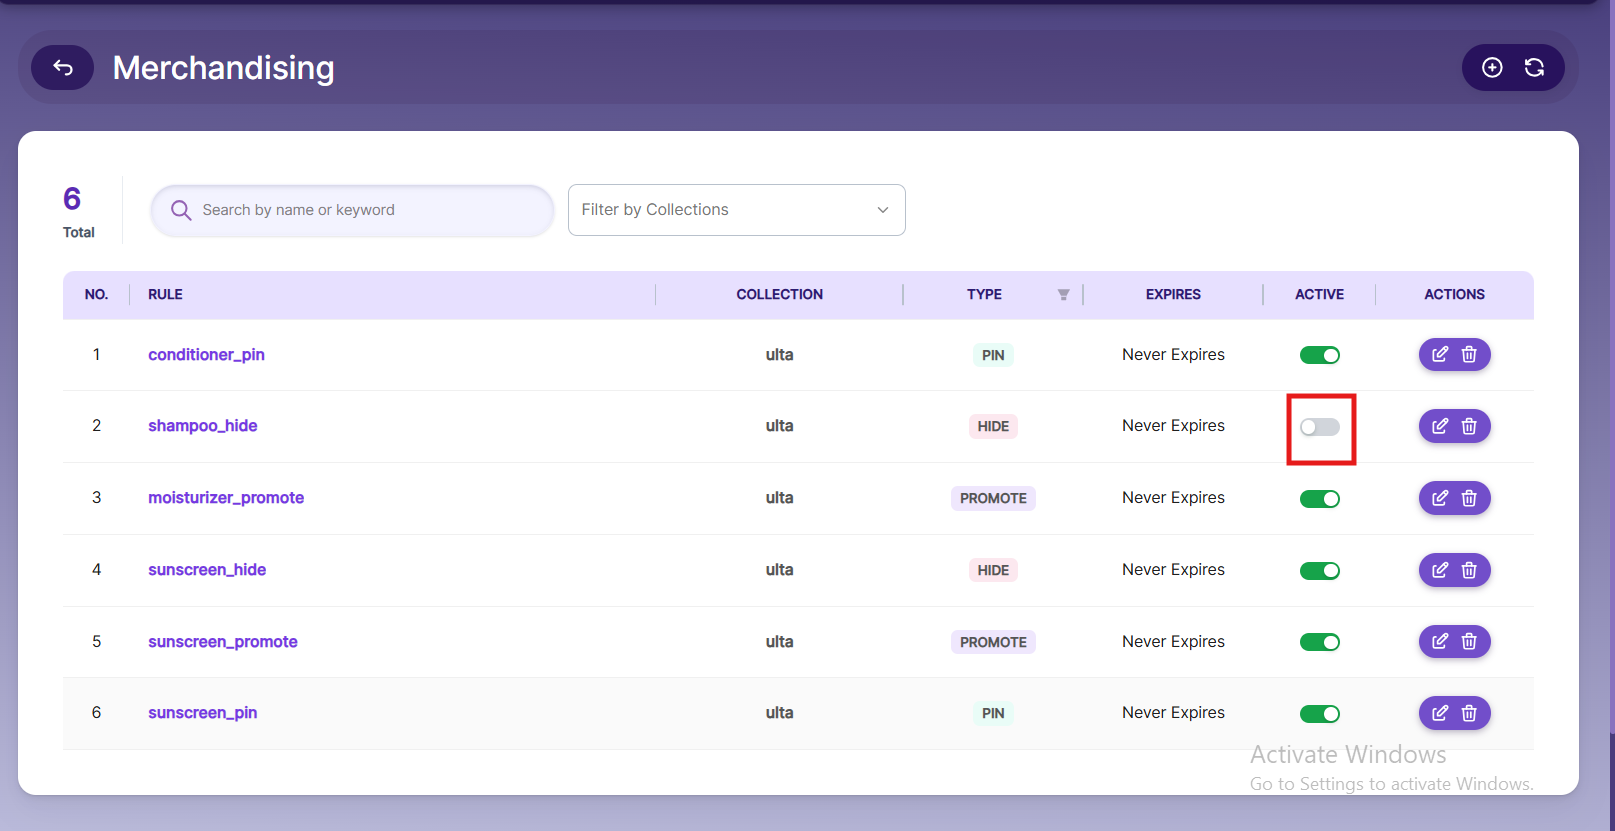
Merchandising Dashboard Functionality
The rules list shows every rule you have created. Each row displays:
- Rule — The name of the rule. Click the name to edit it.
- Collection — The collection the rule belongs to.
- Type — Promote, Pin, or Hide.
- Expires — The end date, or Never Expires for rules without a schedule.
- Active — A switch to turn the rule on or off without deleting it.
- Actions — Edit or delete the rule.
Types of Merchandising Rules
| Type | Description |
|---|---|
| Promote | Ranks matching products higher using boost criteria such as brand, category, features, and use cases with adjustable weight |
| Pin | Fixes selected products at specific positions in the results regardless of relevance score |
| Hide | Removes selected products from the search results for the trigger query |
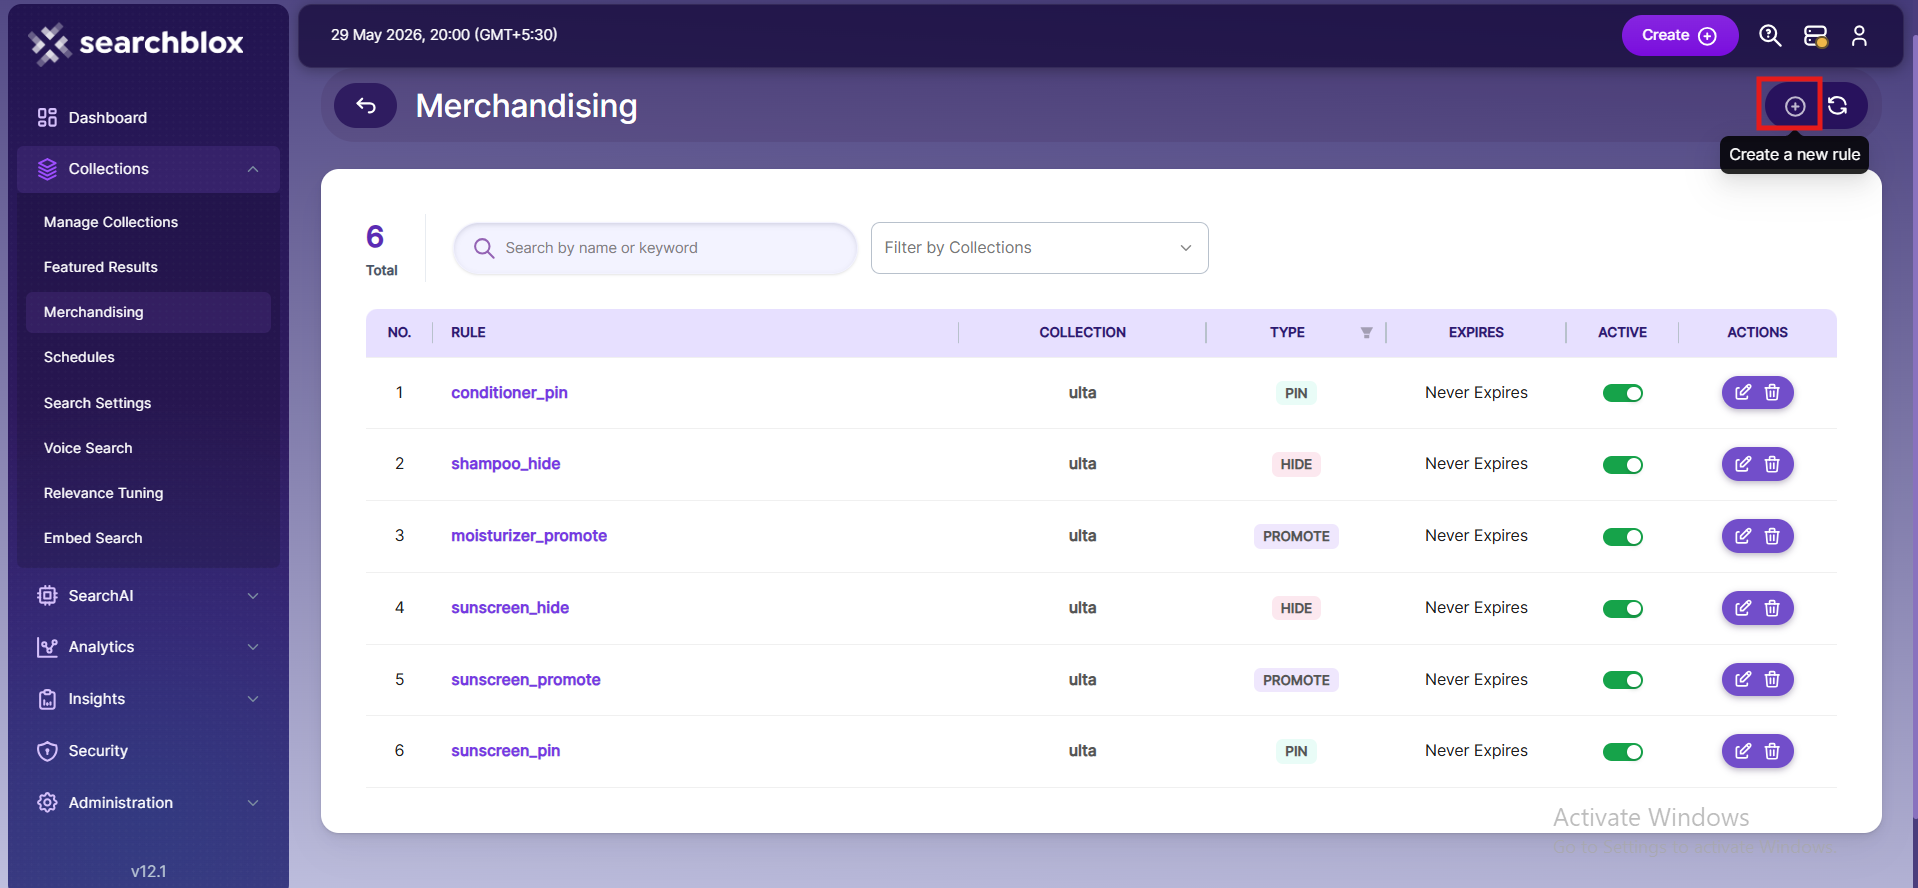
Creating a Merchandising Rule
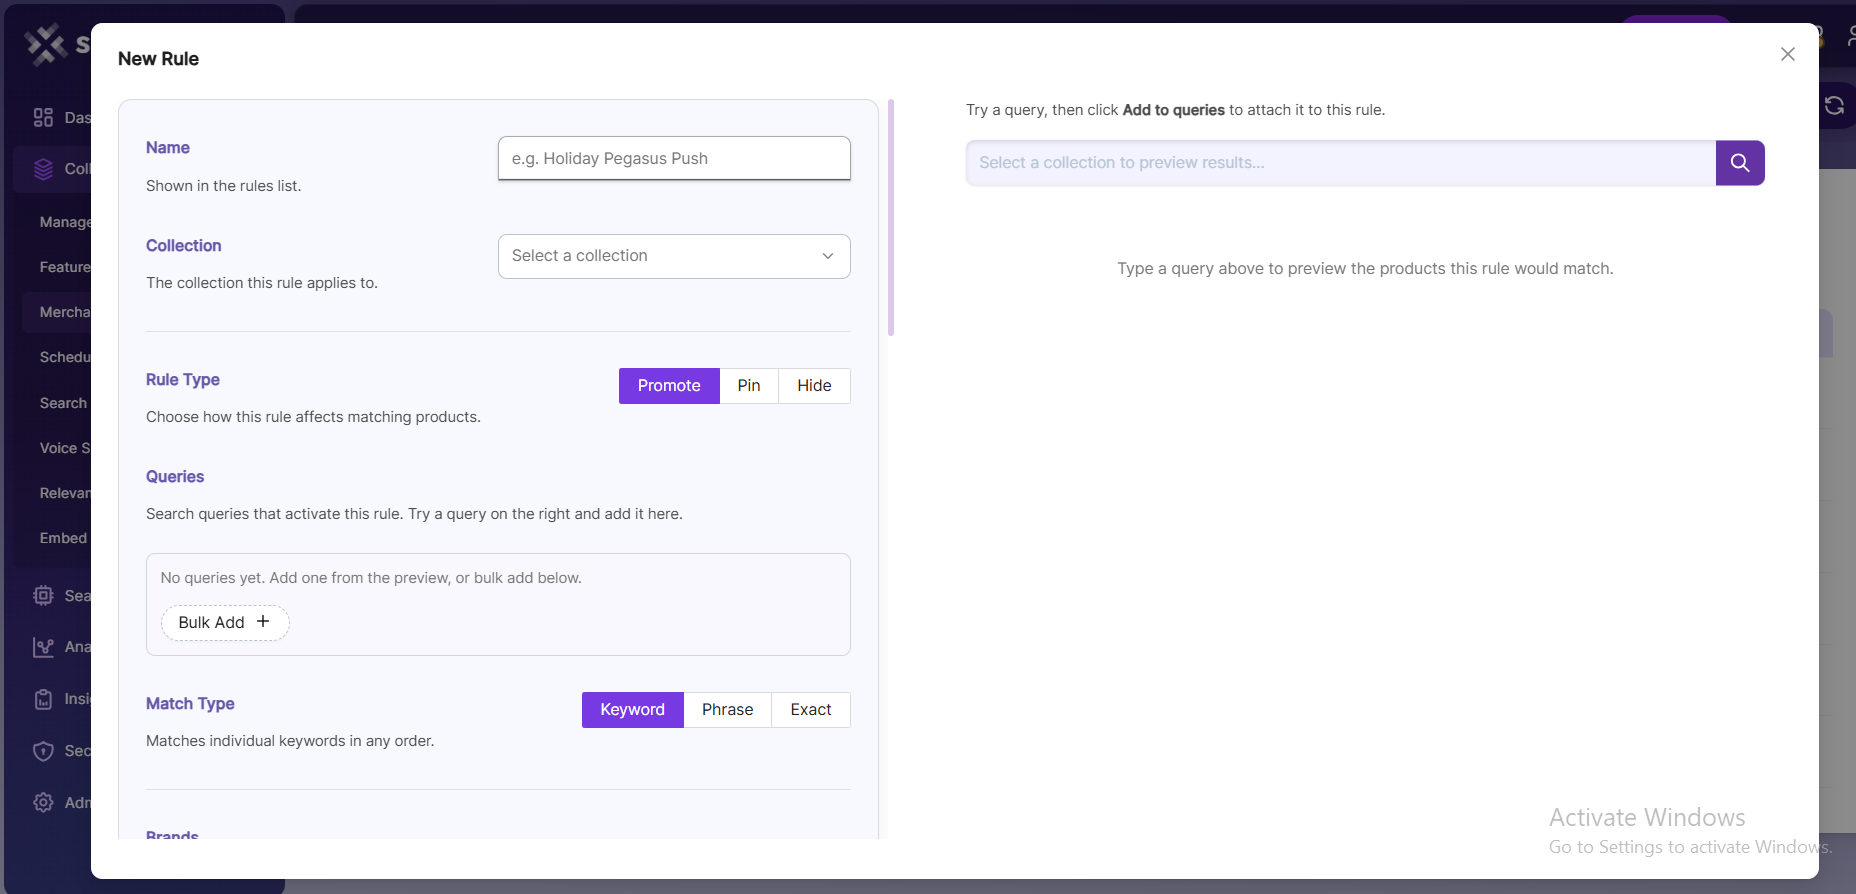
Click Create or the "+" icon to begin. The rule editor opens with the rule form on the left and a live search preview on the right.
To create a rule
-
Enter a Name for the rule. This appears in the rules list.
-
Select the Collection the rule applies to.
-
Choose the Rule Type — Promote, Pin, or Hide.
-
Add the Queries that should activate the rule.
- Type a query in the preview and click Add to queries
- Or click Bulk Add to paste a comma-separated list
-
Choose the Match Type for the trigger queries.
-
Configure the rule action for the selected rule type.
-
Click Create to save the rule.
Settings in Merchandising Rules
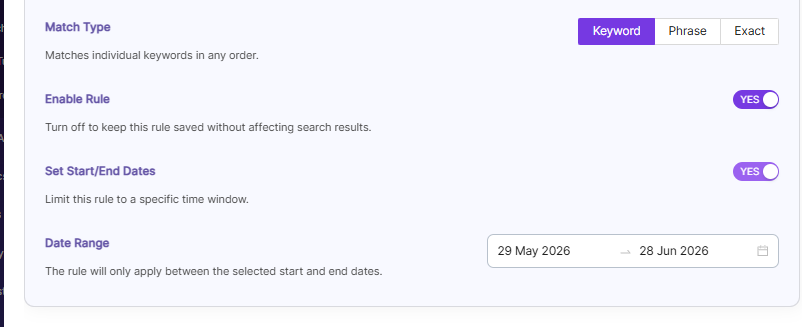
Match Type
The Match Type controls how a shopper's query is compared against your trigger queries.
| Match Type | Behavior |
|---|---|
| Keyword | Matches individual keywords in any order |
| Phrase | Matches the exact phrase within a query |
| Exact | Matches only the exact query and nothing else |
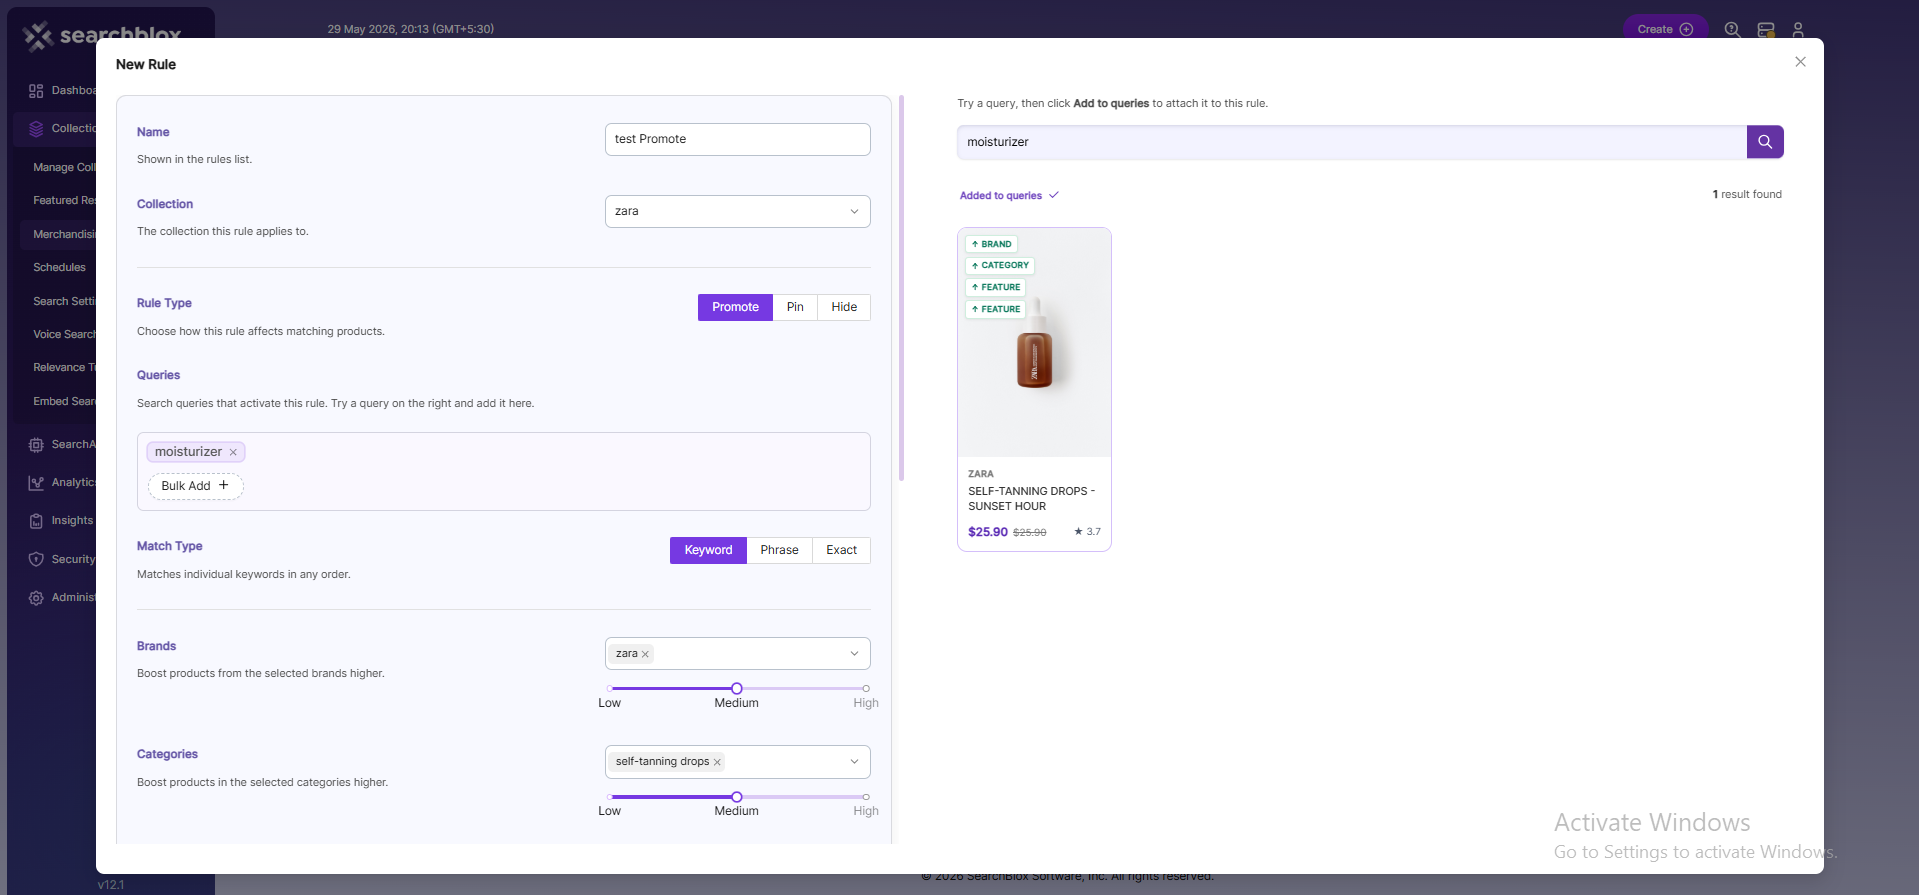
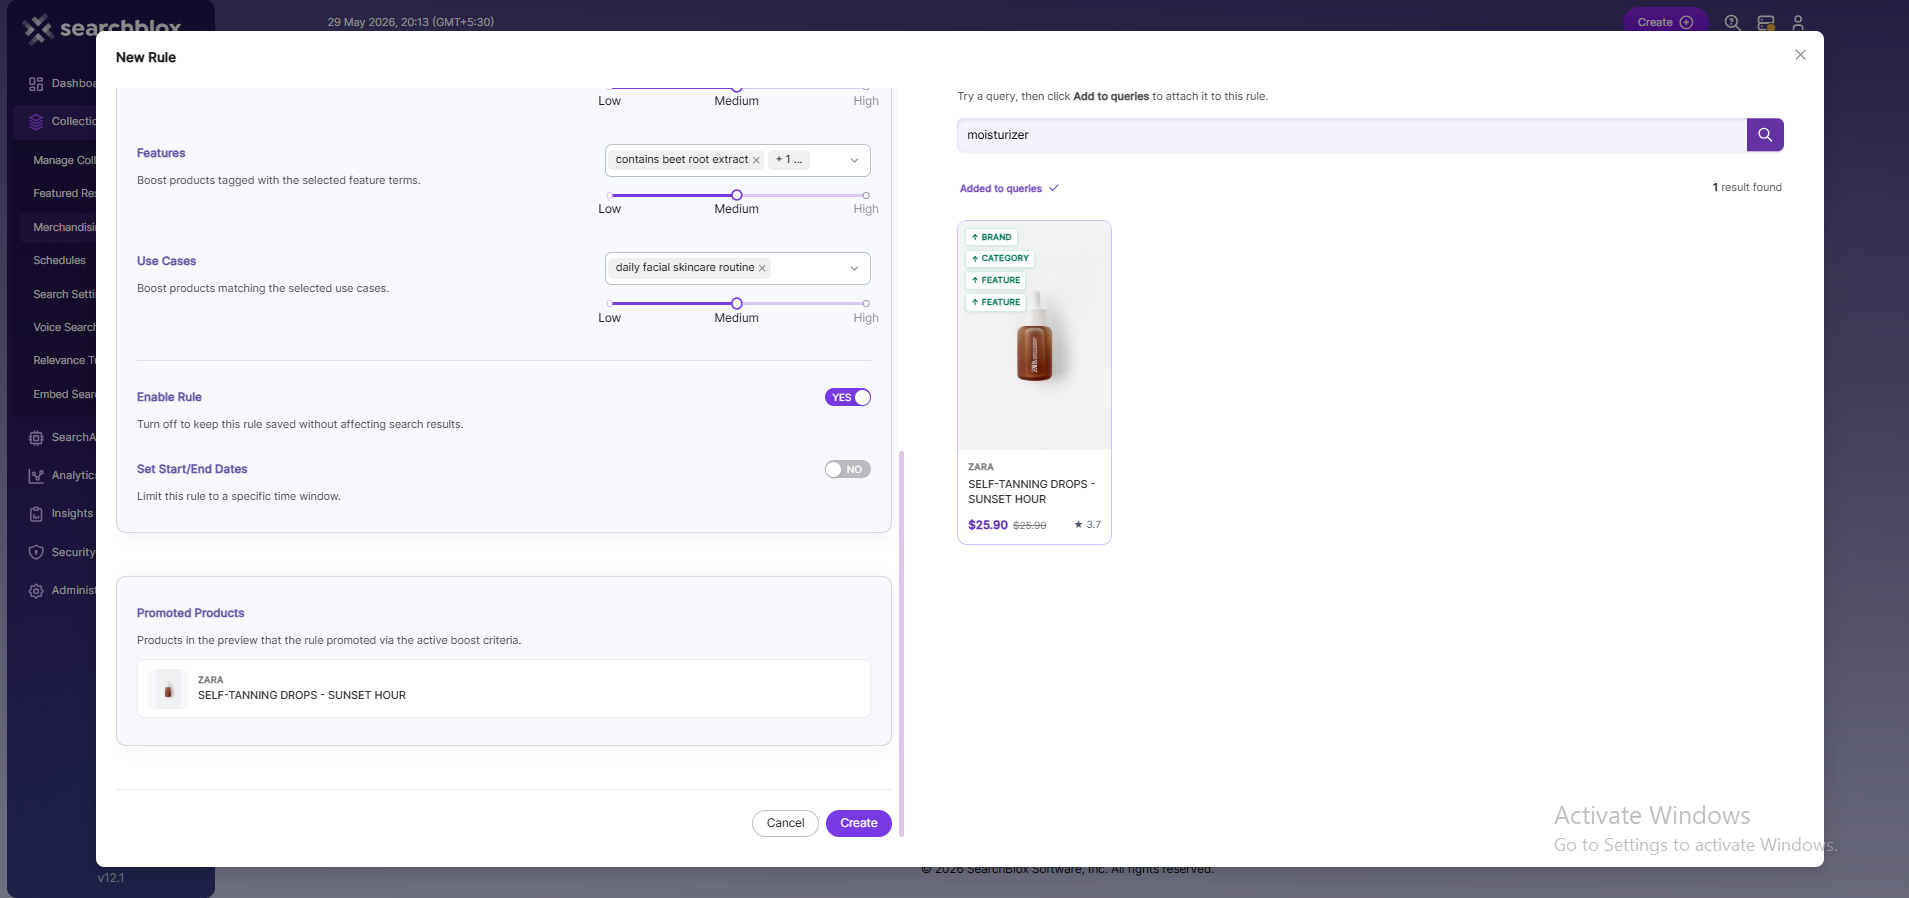
Promote Settings
For a Promote rule, configure boost criteria across four fields:
- Brands
- Categories
- Features
- Use Cases
Select the values to boost for each field, then set the boost weight using the slider:
- Low
- Medium
- High
Products matching the selected criteria are ranked higher in search results.
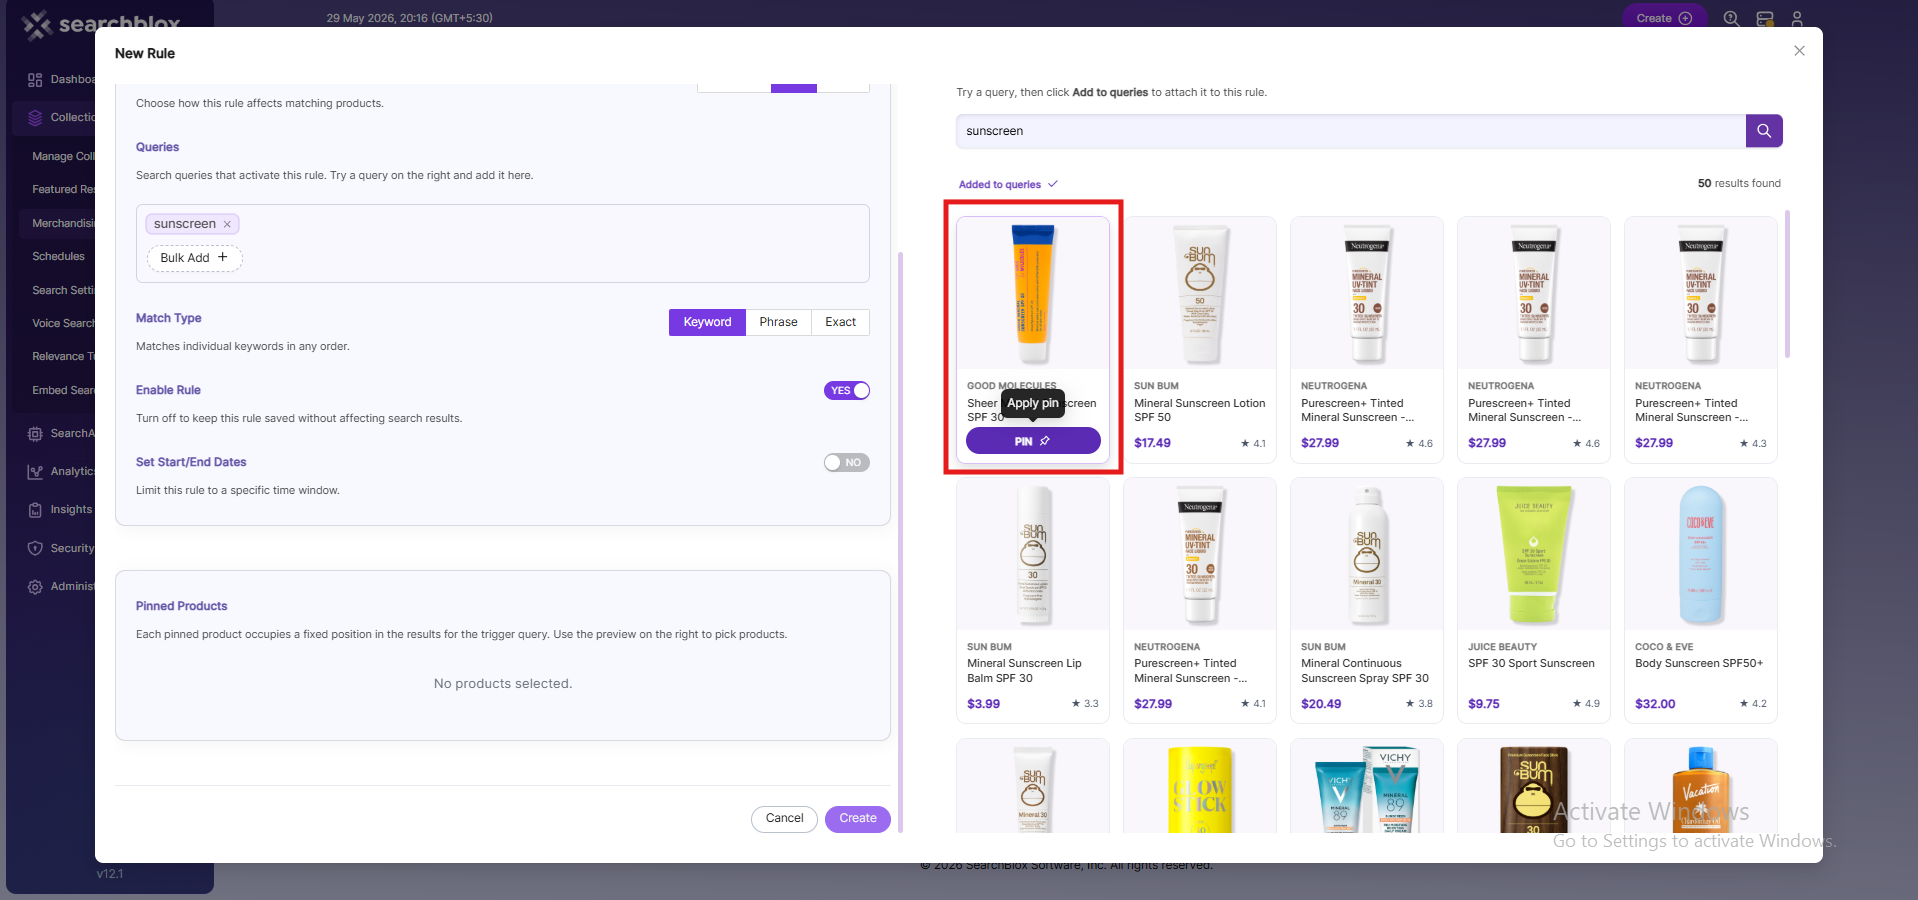
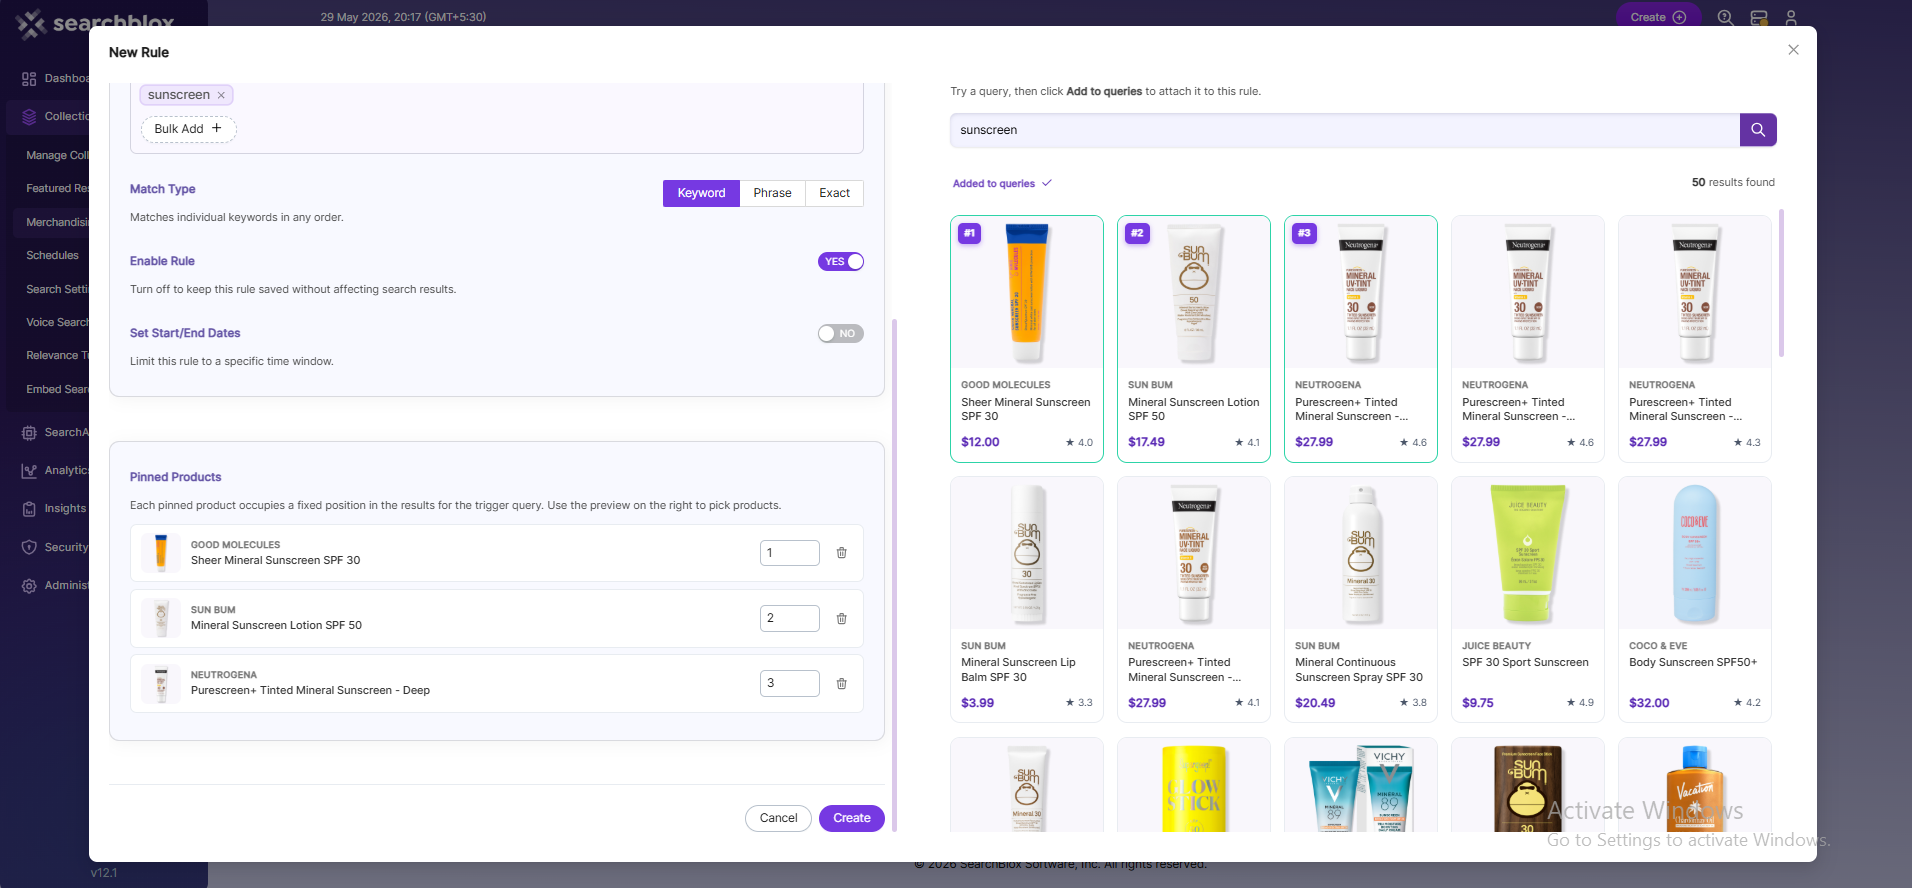
Pin Settings
For a Pin rule:
- Select products from the preview
- Assign them fixed positions
- Drag products to reorder them
Each pinned product displays a position badge such as:
#1#2
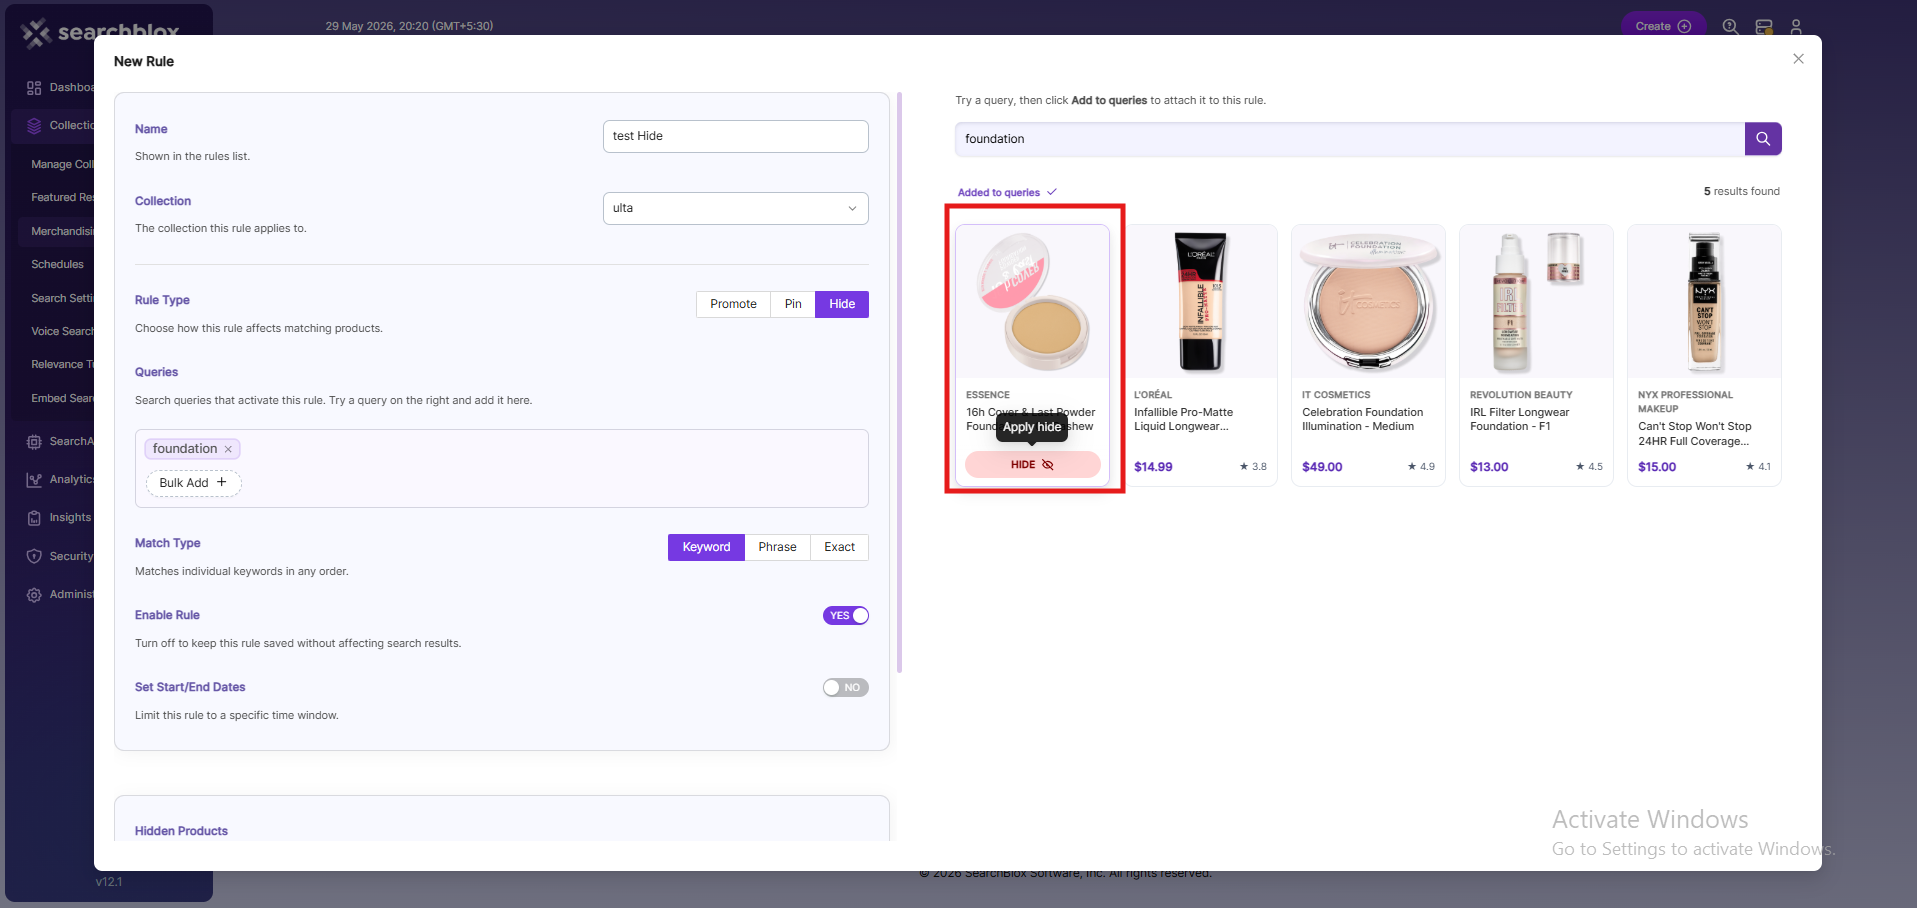
Hide Settings
For a Hide rule:
- Select the products you want to exclude from results
- Hidden products appear dimmed in the preview
This helps confirm exactly which products shoppers will not see.

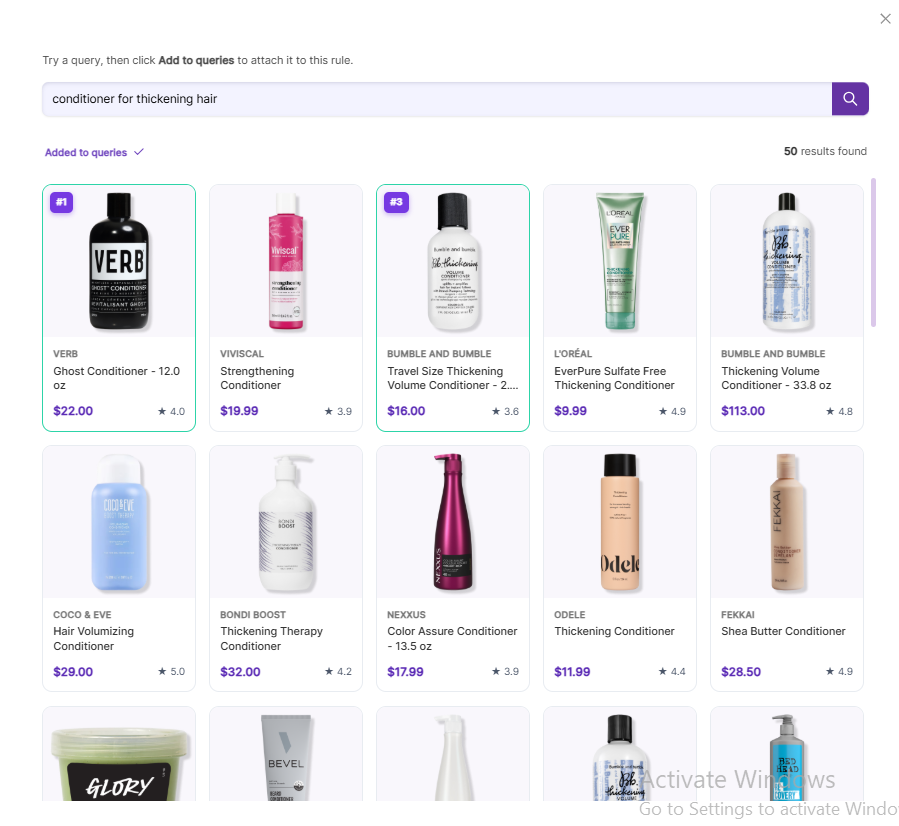
Live Preview
The preview panel on the right displays real search results while you build the rule, allowing you to verify the outcome before saving.
Features of the live preview
-
Type a query to see matching products
-
Click Add to queries to attach the query to the rule
-
Hover over a product card to:
- Pin
- Hide
- Promote products directly
-
The Also firing strip shows other rules affecting the same query
-
Promoted products display badges showing which boost criteria affected ranking
Scheduling Merchandising Rules
You can schedule rules for a specific time period, which is useful for:
- Seasonal campaigns
- Promotions
- Flash sales
To schedule a rule
- Turn on Set Start/End Dates
- Choose the start and end dates
- The rule applies only during the selected time range
Use the Enable Rule switch to keep a rule saved but inactive until needed.
Editing and Deleting Rules
Edit a Rule
- Click the rule name in the list
- Or click the Edit icon in the Actions column
Delete a Rule
- Click the Delete icon
- Confirm the deletion
Deleting a rule is permanent and stops affecting search results immediately.
To temporarily stop a rule without removing it, turn off the Active switch.
General Instructions
- Start with a query in the preview and confirm the products look correct before adding the query to the rule
- Use the Active switch instead of deleting rules you may reuse later
- Monitor the Also firing strip and Conflict ribbons to understand how rules interact
- Set start and end dates for temporary campaigns so rules automatically deactivate when the campaign ends
Updated 2 months ago