
Create a New ChatBot Action
This provides a step-by-step guide on how to set up a new action, including defining keywords, selecting the action type, and configuring its behaviour.
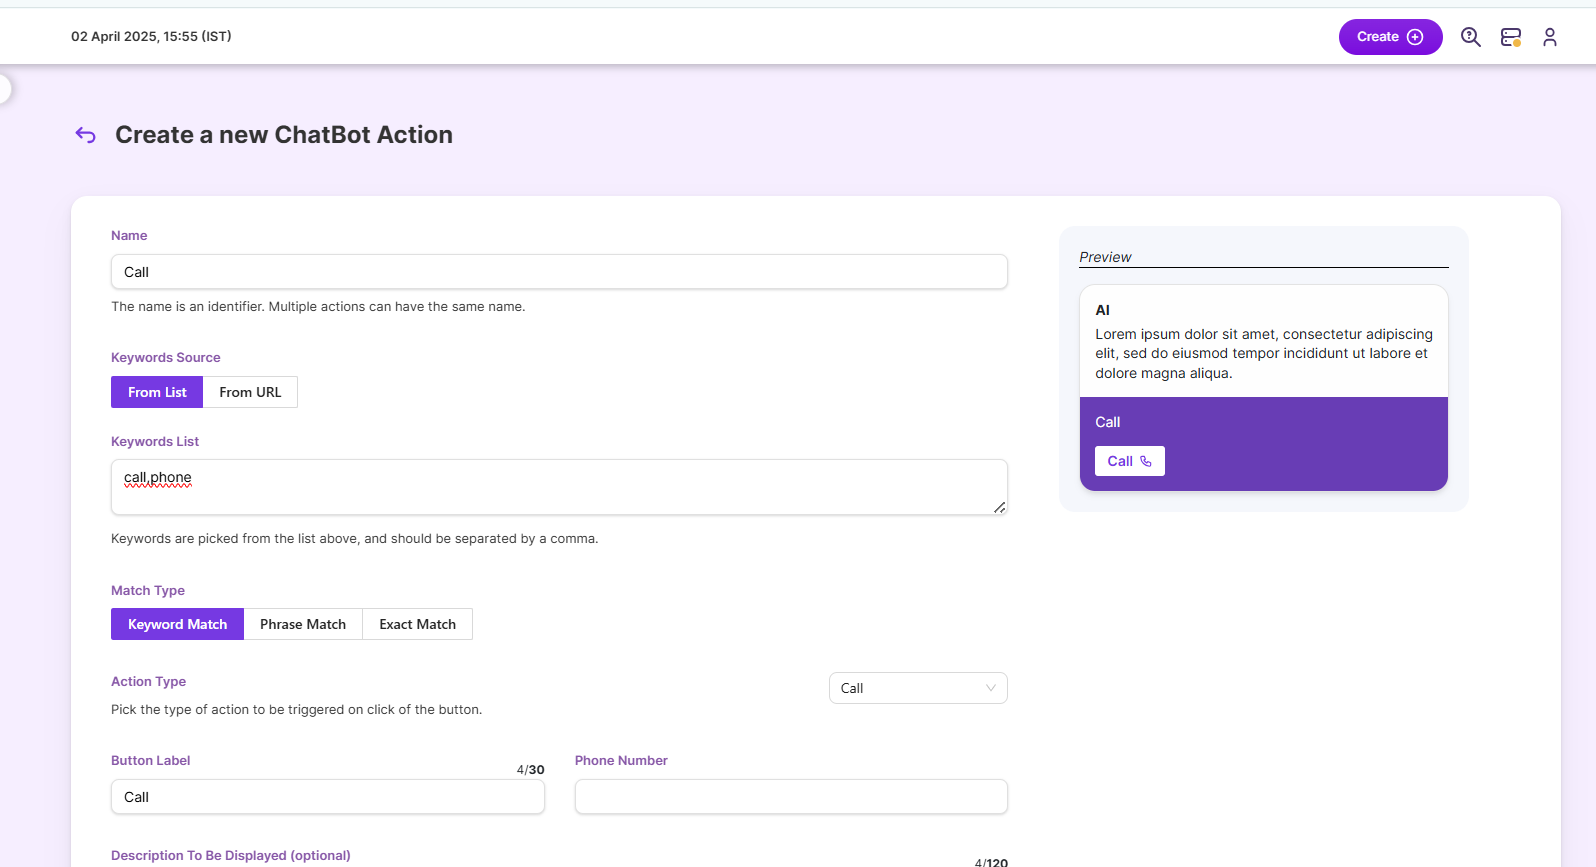
1. Give your Action a Name
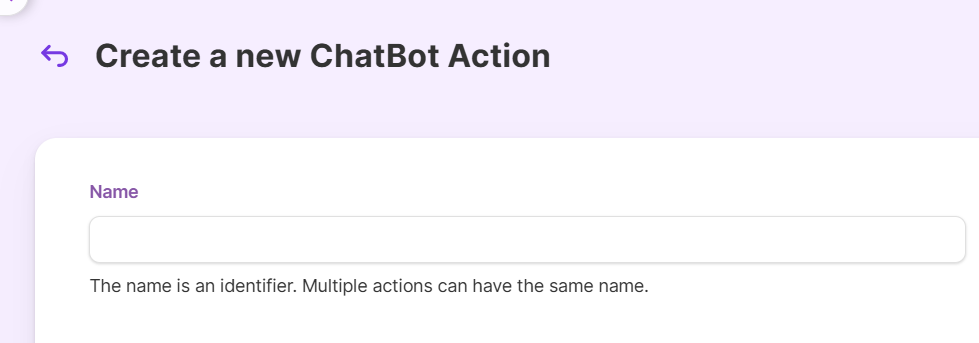
Name your action, helping you identify and manage it later.
Example: "Schedule a Demo", "Download Whitepaper", "Contact Support"
2. Add Keywords to Trigger an Action
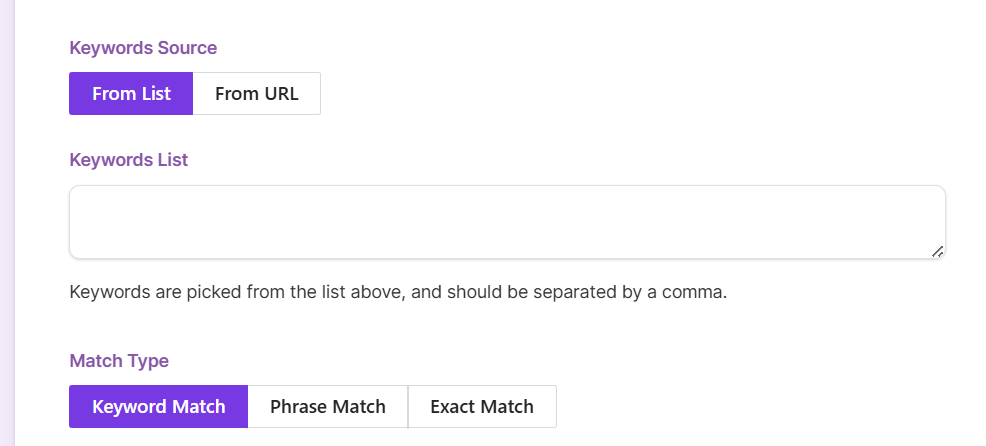
These are the specific words or phrases that, when used by a user, will trigger this action. You can manually list down keywords or choose from an URL list.
Example: If you want the action to trigger when someone wants to contact your support team, you might use keywords like "Call Support," "Speak to an agent," "Call agent," or "connect to an agent."
3. Matching Keywords to your Action

You can choose these options to control how strictly the chatbot needs to match the user's input to your keywords before triggering the action.
Keyword Match: The action triggers if any of the keywords are present, even within a larger sentence.
Phrase Match: The action triggers only if the exact phrase you specify is used. This offers more control than keyword match.
Exact Match: The action triggers only if the user's input perfectly matches the keywords and nothing else. This is the most restrictive option, ensuring the action is only triggered when the user's intent is very clear.
4. Select your Action type
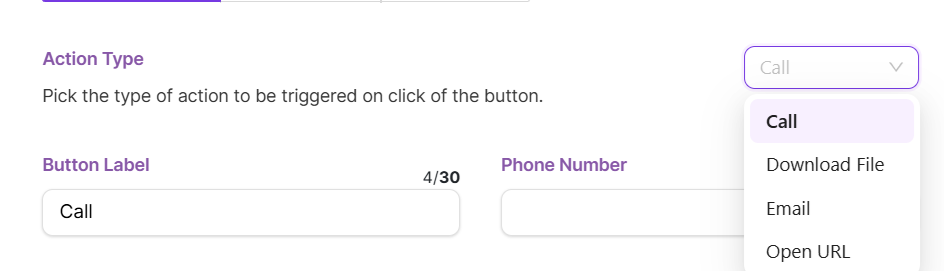
Use the dropdown to choose a related action you want the Chatbot to take. This defines what your ChatBot will actually do when the action is triggered.
Call: The chatbot will initiate a call to a specified phone number.
Download File: The chatbot will provide a link for the user to download a specific file.
Open URL: The chatbot will open a particular webpage in a new browser tab or window.
Email: The chatbot will send a pre-written email to a designated recipient.
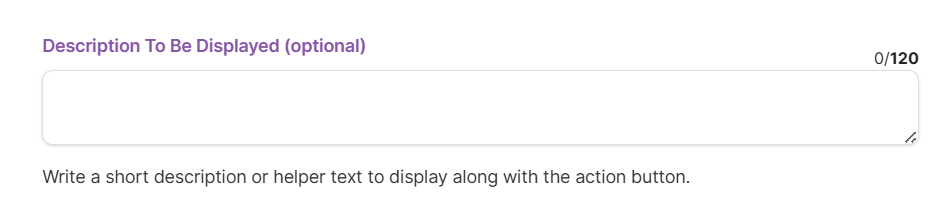
5. Give your Action a description
Write a short explanation of the action that will be shown to the user.
Preview Actions:
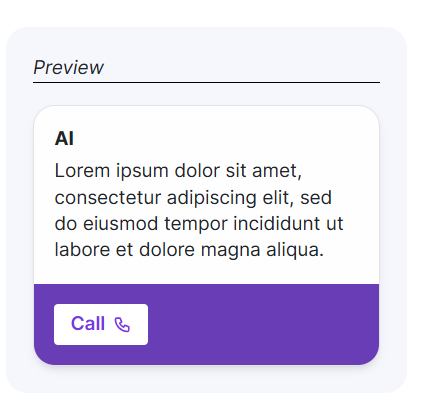
You can preview how the action description and button will appear to users in the snippet on the right side of the page.
6. Select ChatBot to implement Actions
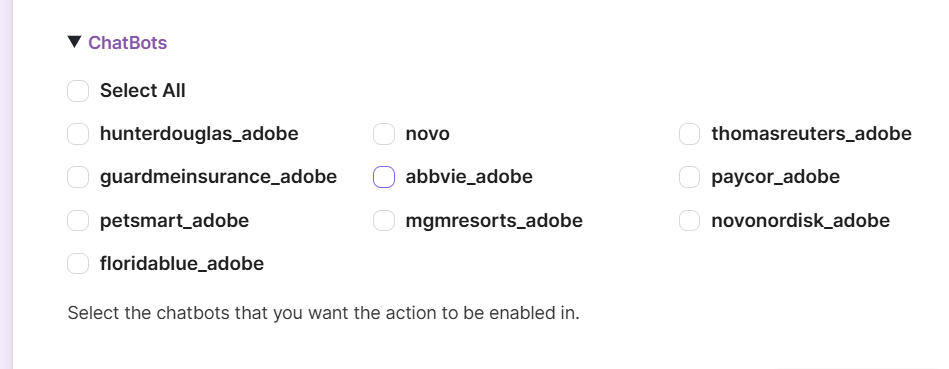
Choose the relevant chatbot(s) from the list that should have this action enabled.
7. Set Priority for the Action

Assign a priority number. If multiple actions are triggered, the one with the highest priority (lowest number) will be presented to the user first.
This sets the importance of this action relative to other actions that might also be triggered by the same user input.
8. Set Start/End Date

To set the date range, you need to toggle the option to Yes.
This allows you to define a specific Start and End date range during which the action will be active.
9. Limit No. of Triggers

This allows you to set the maximum number of triggers allowed.
10. Enable/Disable ChatBot Action
Toggle this switch to "On" to make the action available to users.
This option is Activates or deactivates the action.

11. Save and Enable Action
After configuring the action details, click Save to create the action.
Updated 2 months ago