Zabbix
Installing Zabbix Agent
Follow these instructions to install Zabbix Agent on CentOS, RHEL 7/6/5 systems.
Step 1 – Add Required Repository
Configure the Zabbix yum repository using the following commands depending on your required version and operating system.
Centos 7
rpm -ivh https://repo.zabbix.com/zabbix/4.0/rhel/7/x86_64/zabbix-release-4.0-1.el7.noarch.rpm
Ubuntu 18.04
wget http://repo.zabbix.com/zabbix/3.2/ubuntu/pool/main/z/zabbix-release/zabbix-release_3.2-1+xenial_all.deb
dpkg -i zabbix-release_3.2-1+xenial_all.deb

Step 2 – Install Zabbix Agent
Centos7
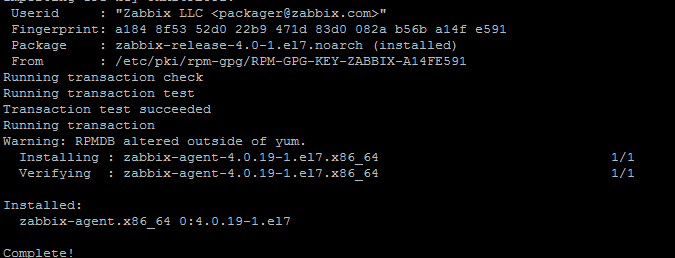
yum install -y zabbix-agent
Ubuntu
apt-get install zabbix-agent -y
Step 3 – Edit Zabbix Agent Configuration
Configure zabbix agent by adding zabbix server IP in its configuration file/etc/zabbix/zabbix_agentd.conf
vi /etc/zabbix/zabbix_agentd.conf
#Server=[zabbix server ip]
#Hostname=[ Hostname of client system ]
Server=104.131.113.198
Hostname=Zabbix Server
Step 4 – Restarting Zabbix Agent
Restart agent service using the following commands.
systemctl enable zabbix-agent
systemctl start Zabbix-agent

To start and stop zabbix-agent service anytime, use the following commands.
systemctl start zabbix-agent
systemctl stop zabbix-agent
Port#10050 should be allowed in your Firewall (iptables, firewalld)
Adding JMX Monitoring to Zabbix
Step 1 – Enable jmx in jetty configuration
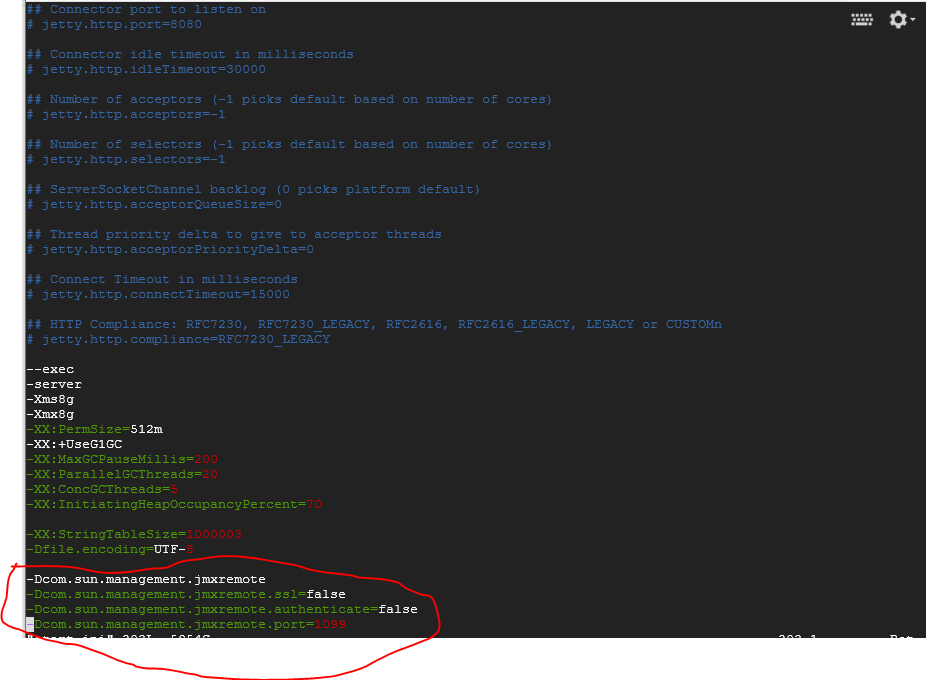
Open start.ini in searchblox directory (Eg: /opt/searchblox )
In line 48
-Dcom.sun.management.jmxremote
    -Dcom.sun.management.jmxremote.ssl=false
    -Dcom.sun.management.jmxremote.authenticate=false
    -Dcom.sun.management.jmxremote.port=1099
Then restart the SearchBlox service: # service searchblox restart
Confirm that it is listening using netstat –nutlp
netstat -nutpl | grep 1099
tcp6       0      0 :::1099                 :::*                    LISTEN      10419/java
Step 2 – Adding JMX monitoring in Zabbix
In Zabbix, go to Configuration -> Hosts

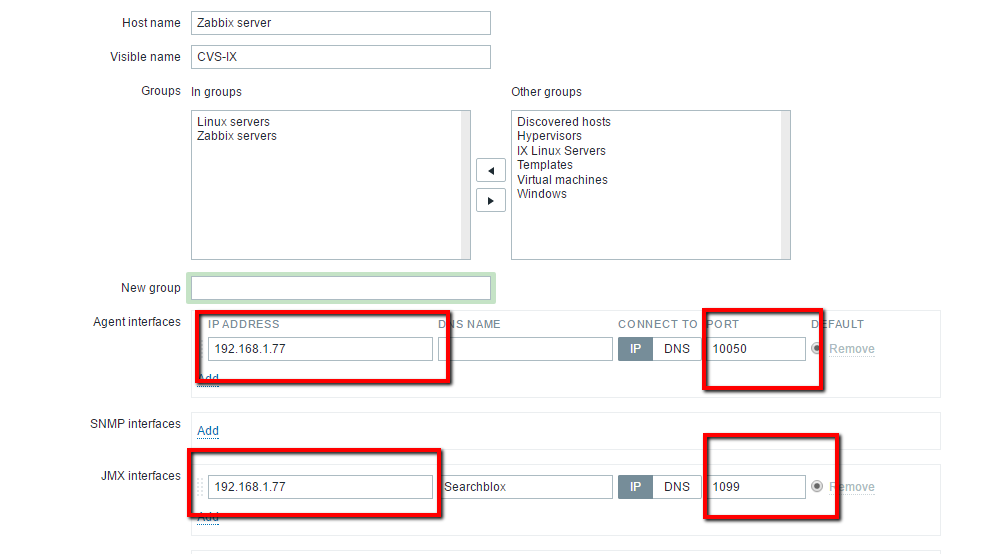
Adding the host into zabbix server
- Hostname:
- Visible Name: <give some name(optional) >
- Groups : <Template/Application>
- Agent Interface : and Port no is 10050
- JMX insterface : and port no 1099
- And click add to complete the host creation
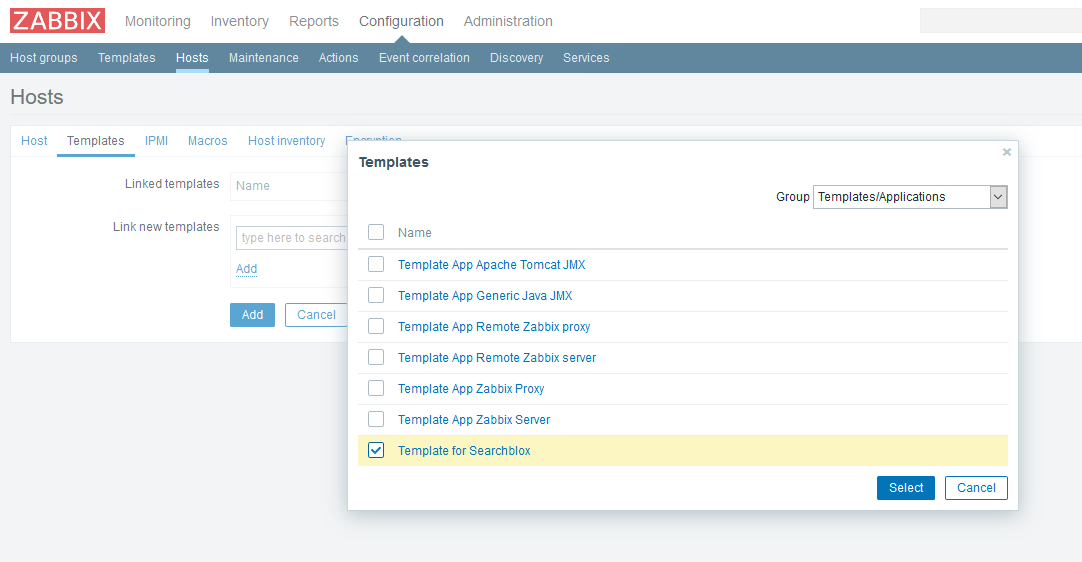
Step 3 - Select the custom Template
- click Template
- click Link new template
- select the Template for SearchBlox
- click Select
Step 4 - Creating the Application:
- Click Configuration
- Click Hosts
- Select Application Group :
<application Template> - Select Host:
<select created host> - Click Create Application

- Name:
<Searchblox> - Click Add option.

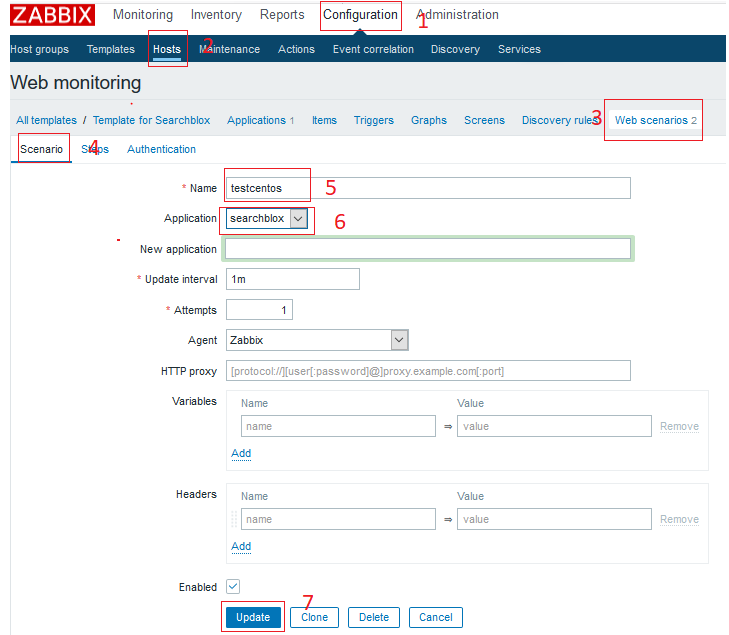
Step 5 – Creating Web Scenario
- Click Configuration
- Click Hosts
- Click Web scenarios
- Click Scenarios
- Name:
<give some meaning full name> - Application:
<select the application Name> - Click Update
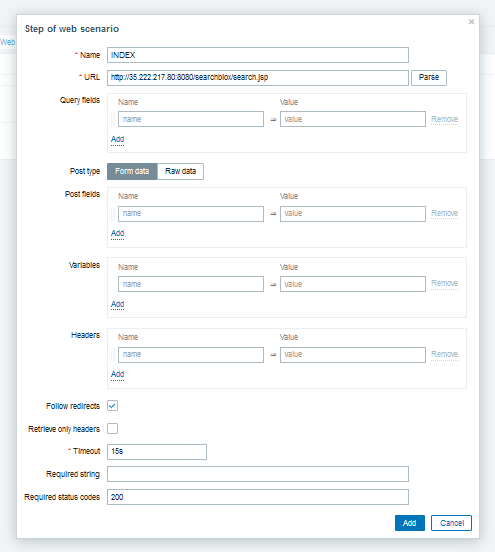
- Click Steps
- Name :
<application name> - URL:
<application url> - Click Follow Redirection
Note: status code should be 200 - Click Add button
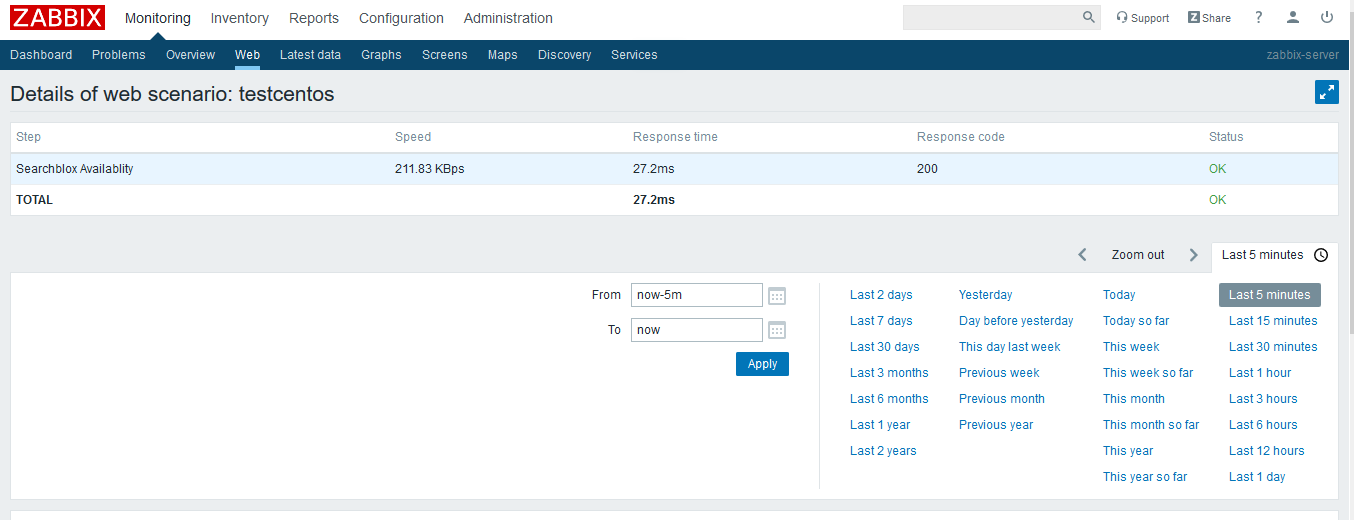
Step 6 – Monitoring
- Click Monitoring
- Click Web
- Select the server
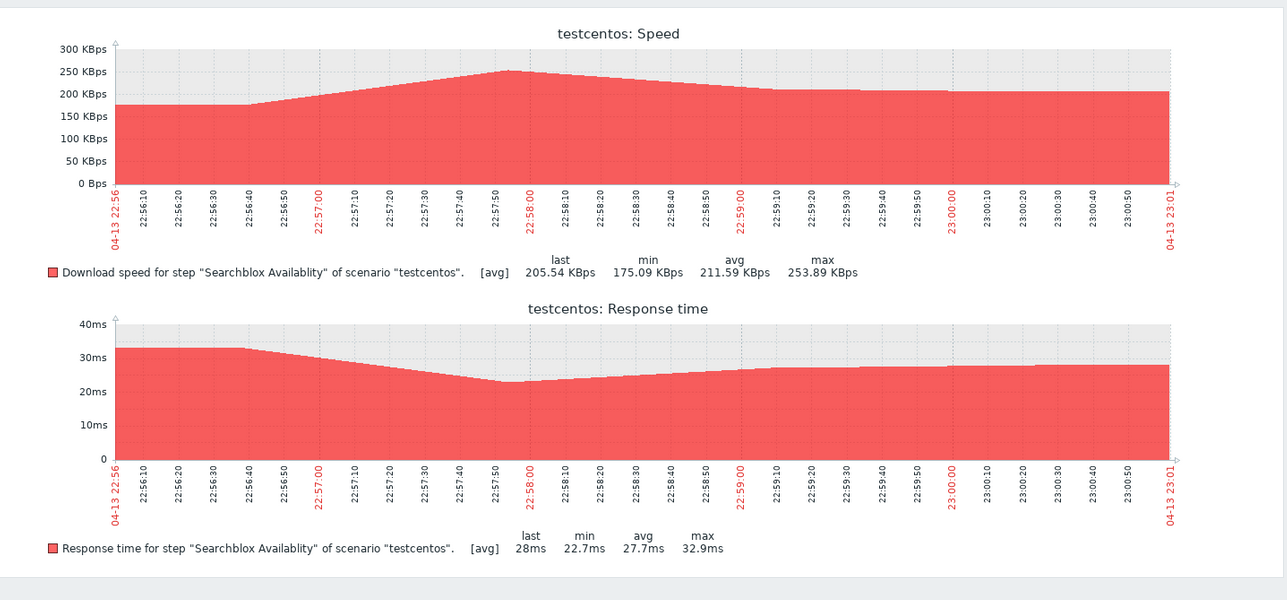
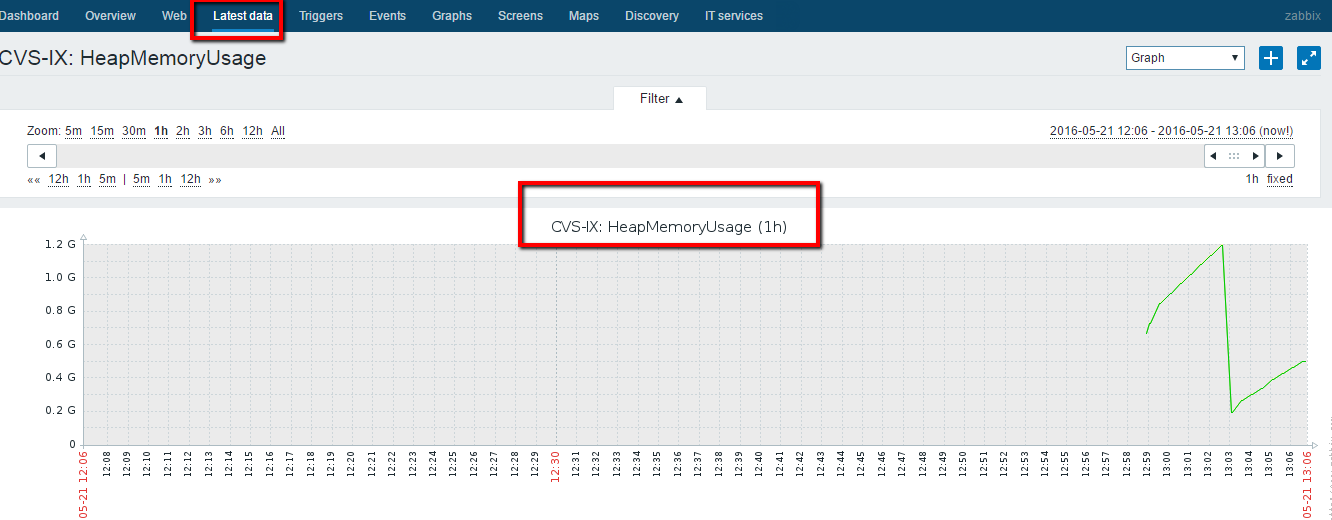
Go to Monitoring -> Latest data
Updated about 5 years ago
