Uploading Search Front Ends
Uploading Plugins
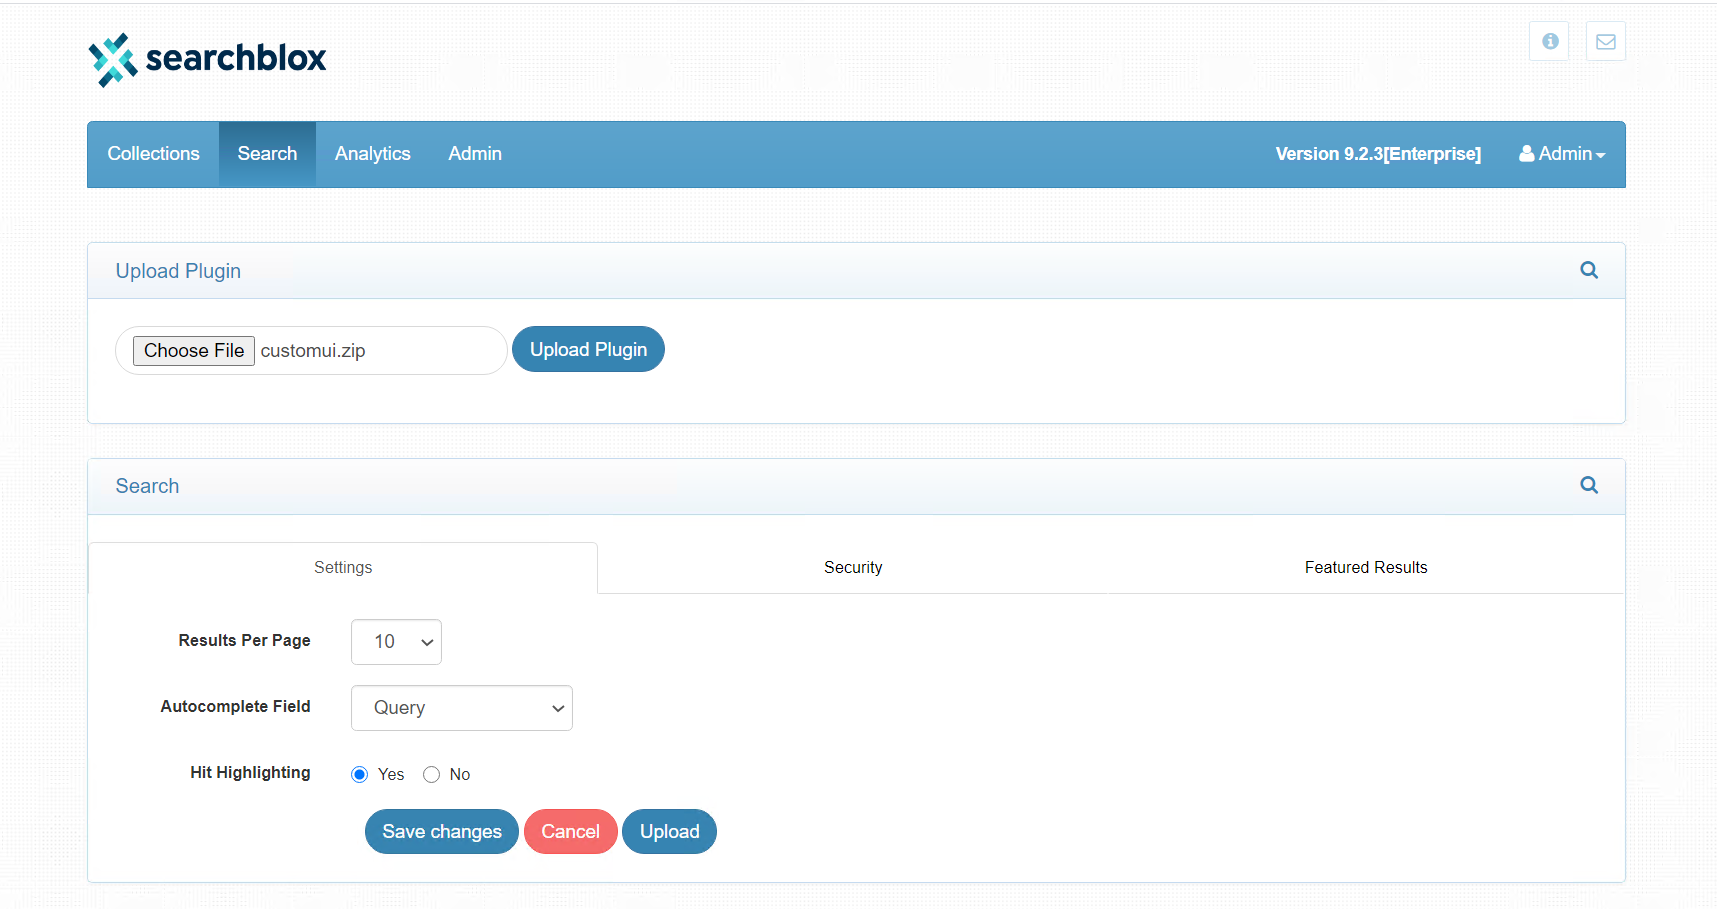
To upload a custom plugin through UI, it should be in zip file format. Rename the zip file for the plugin (whatever the custom plugin name you prefer Eg: customui.zip).
Important Note:
If you need to replace the existing plugin folder (<SEARCHBLOX_INSTALLATION_PATH>/webapps/searchblox/plugin) take a backup of it or rename the plugin folder to some other name. If you upload the custom UI using plugin.zip, otherwise it will overwrite the existing plugin folder files.
- Now From Admin Console, Go to Search > Settings Tab and click on the Upload button.
- Choose the Custom Plugin zip file and click on the Upload Plugin button.

Once custom plugin upload is done you will see the 'Upload Plugin' section goes off from the screen. You can check that the custom plugin name folder is available in <SEARCHBLOX_INSTALLATION_PATH>/webapps/searchblox/.
Then, you can access the custom plugin using the following link:
https://localhost:8443/searchblox/customui/index.html
You can make the custom plugin facet.js configuration before/after the plugin upload.
Updating Custom Favicon with Plugin
You can update this SearchBlox Favicon to your own Brand Favicon using the steps below:
- Add Favicons in the path <SEARCHBLOX_INSTALLATION_PATH>/webapps/searchblox/plugin we need 2 image file formats i.e., PNG & ICO.
- Once the Favicons placed in the plugin folder, edit the file names under index.html page from the same plugin folder path i.e., <SEARCHBLOX_INSTALLATION_PATH>/webapps/searchblox/plugin
Note: Here plugin can be any custom plugin too.
Updated over 4 years ago
