Cluster Setup on AWS
Please setup the 3 individual SearchBlox Servers and apply the license keys to all servers before proceeding with the cluster setup instructions.
To create a 3-server SearchBlox Cluster on AWS EC2 (1 indexing server and 2 search servers), follow the step-by-step instructions.
Configure EC2 instances and SearchBlox
- Create or edit an existing AWS EC2 security group for the three SearchBlox servers, with the following rules:
| Type | Protocol | Port Range | Source |
|---|---|---|---|
| All TCP | TCP | 0-65535 | sg-xxxxxxxx (Search) |
| All UDP | UDP | 0-65535 | sg-xxxxxxxx (Search) |
| All ICMP | All | N/A | sg-xxxxxxxx (Search) |
| SSH | TCP | 22 | 0.0.0.0/0 |
| HTTPS | TCP | 8443 | 0.0.0.0/0 |
| HTTPS | TCP | 8444 | 0.0.0.0/0 |
Note
- sg-xxxxxxxx is the ID of the security group (Search is the name of the group); all instances started with this security group allow internal traffic.
-
Please create 3 servers (one Index server and two Search servers ) in Amazon EC2.
-
Install SearchBlox in all three instances using the instructions Installing on Amazon Linux 2
-
If you want more security and use the internal IP for communication between the servers you need not make the changes provided in the next 4 steps. If you want to proceed with internal IPs for Elasticsearch, please make sure that all three servers are able to access the other server's Elasticsearch using the internal IP.
-
If you want an external IP for Elasticsearch, please make sure to allocate static public IP to the EC2 instances through Elastic IP in AWS.
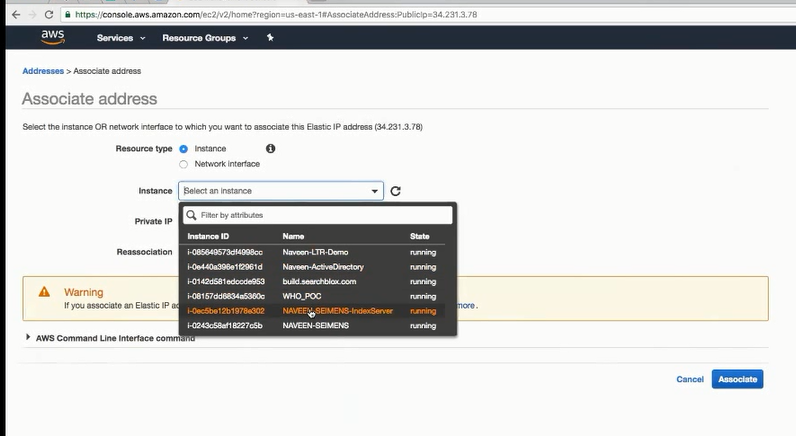
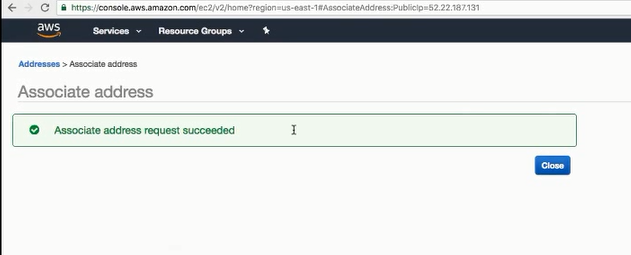
- Go to
/etc/hostsand allocate the public IP to public DNS name, as following and restart
34.xxx.xx.78  ec2-xx-xxx-3-78.compute-1.amazonaws.com
127.0.0.1   localhost localhost.localdomain localhost4 localhost4.localdomain4
#::1         localhost6 localhost6.localdomain6
- Now Go to
/etc/hostnameand make sure that the public DNS name is given in the file

- Now restart the instance and SearchBlox. Now the IP in SearchBlox Admin Console would be public IP. Please request a license key for this IP address.
Please make this change in all the servers within the cluster setup
-
If you are not making any changes then the internal IP address would be displayed on the Admin Console license page. If you are to use the same for a cluster then get the license for this IP address.
-
Access SearchBlox Admin Console and upload license in all servers.
-
Restart all 3 SearchBlox servers.
Security Requirements:
- Traffic must be allowed on ports 9200 and 9300 among these 3 servers.
- Disallow external traffic access to 9200 and 9300.
- Allow traffic port 8443 to access the SearchBlox service.
- Allow traffic port 8444 to access the SearchBlox Analytics service.
Configuring Cluster in SearchBlox
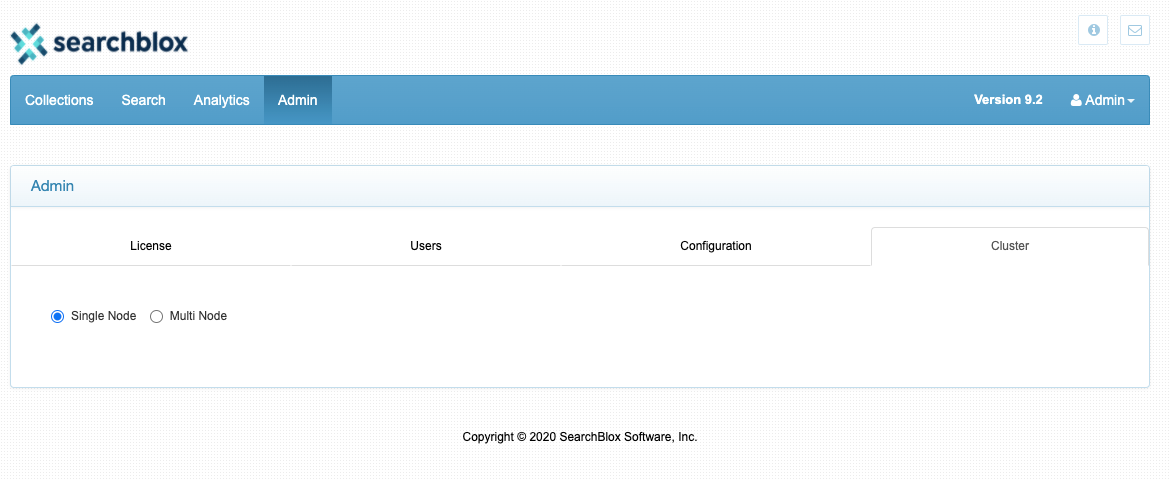
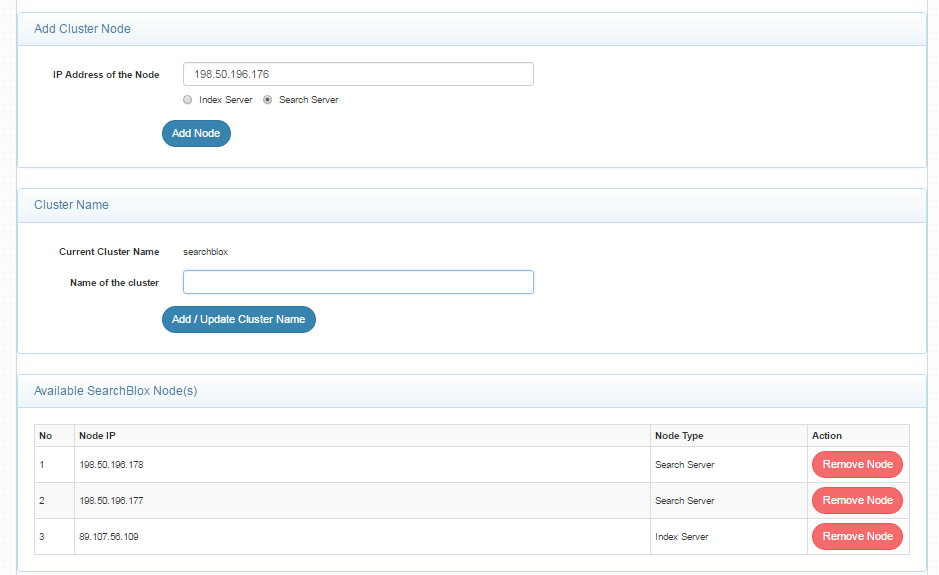
- Go to Menu -> Admin -> Cluster for each server in the cluster (shown below). The minimum number of nodes is 3 for the cluster setup.
-
Make the same changes mentioned in steps 3 to 7 in all three SearchBlox servers within the cluster
-
Select Multi-Node as in the following screenshot:
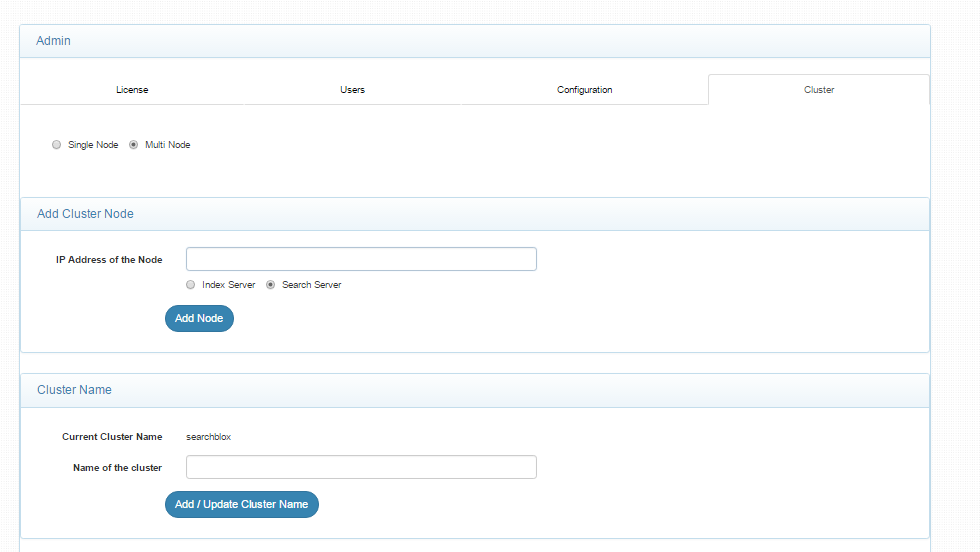
- Add the IP addresses for servers that have to join the cluster, including the current server.
Indexing Server
Enter the IP address of the server you want to be designated as the indexing node. There can only be one indexing server.
Search Server
All the other servers can be added as search servers.
Cluster name
You can change the cluster name if you choose to. However, you must use the same cluster name for all the servers within the same cluster.
-
Stop SearchBlox in all 3 Servers.
-
Edit the file
<SEARCHBLOX_INSTALLATION_PATH>/webapps/searchblox/WEB-INF/searchblox.ymlin all 3 servers:
searchblox.shards: 1
searchblox.replicas: 0
Please change to the following values and save the file:
searchblox.shards: 1
searchblox.replicas: 1
- Delete the folder called data within
<SEARCHBLOX_INSTALLATION_PATH>/elasticsearchpath
Important Information on Restart:
Be sure to stop and start all the servers after adding the cluster nodes and changing the cluster name by logging into the AWS server.
To start the services, use the following commands:
systemctl start sbelastic
systemctl start searchbloxTo stop the services, use the following commands:
systemctl stop searchblox
systemctl stop sbelastic
- If you are using the internal IP for Elasticsearch and license in SearchBlox you can skip this step.
If you are using public IP for Elasticsearch then
Stop SearchBlox
go to<SEARCHBLOX_INSTALLATION_PATH>/elasticsearch/config/elasticsearch.ymlfile make the changes as shown below:
network.bind_host: 172.30.3.4
network.publish_host: 34.231.3.78
where network.bind_host value is the private IP and network.publish_host is the public IP which is now mapped in /etc/hosts.
...
searchblox.master: 34.231.3.78
network.bind_host: 172.30.3.4
network.publish_host: 34.231.3.78
discovery.zen.ping.unicast.hosts: [34.231.3.78, 52.22.187.131]
-
Start SearchBlox and go to SearchBlox Admin console once all instances are up (which might take a few minutes).
-
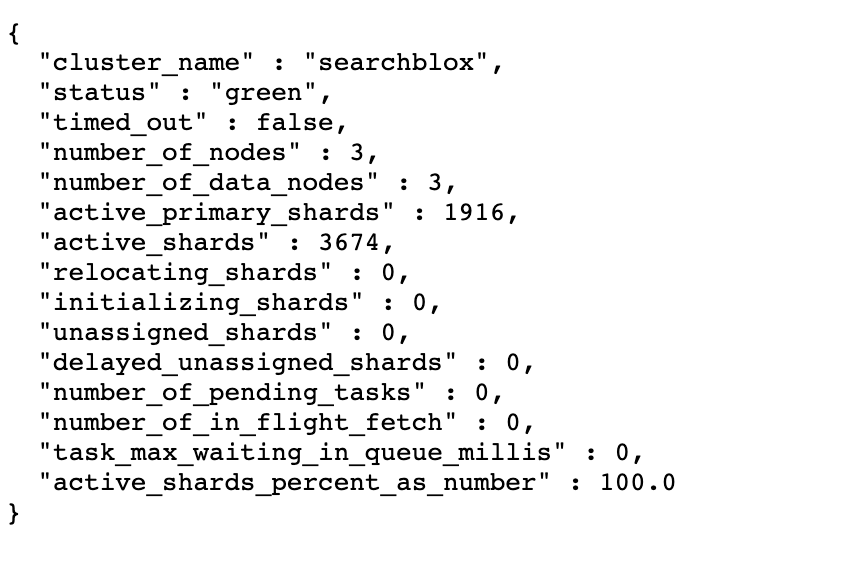
Run the following command on all servers to check the cluster status:
curl -XGET 'http://localhost:9200/_cluster/health?pretty=true' -
If the cluster health shows a YELLOW or GREEN status, then the setup has been successful.
-
The
number_of_nodeshas to be3for a three-server cluster setup. If thenumber_of_nodesis3and the cluster health is YELLOW or GREEN then the setup has been successful.
- Create a new collection on the Index server. Kick off the crawling on the indexing server, and see if the search results show up on the search servers for the same collection.
Indexing and Searching in Cluster
- Indexing is possible only from the indexing server.
- Searching is possible from both indexing and search servers.
- If the indexing server goes down, searching is still possible through search servers until the indexing node recovers.
- If one search server goes down, indexing and searching operations are still possible through other servers. When the failed search server comes up, the indexed data will be synchronized.
Set up Analytics for Cluster
Analytics server will use SQLITE by default for the standalone server. For a cluster, you will need to setup an external database using Postgres so search analytics will be stored in a central database.
Setup a centralized Analytics database with the following steps:
-
Download and install Postgres. You can download Postgres from the official site https://www.postgresql.org/download/
-
Create a new database called sbanalytics within Postgres
-
Provide the details of the analytics database in
.../webapps/searchblox/WEB-INF/searchblox.ymlin all 3 cluster servers. This configuration will log the user search queries into this central database.
Format:
analytics.db.type: postgres
analytics.db.url: {IP/HOST}:{PORT}
analytics.db.username: {POSTGRES_USERNAME}
analytics.db.pasword: {POSTGRES_PASSWORD}
analytics.db.name: {DATABASE_NAME}
Example:
analytics.db.type: postgres
analytics.db.url: 1.1.1.1:5432
analytics.db.username: sb_analytics_user
analytics.db.pasword: password12345
analytics.db.name: sbanalytics
- Update
<SEARCHBLOX_INSTALLATION_PATH>/analytics/.envin all 3 servers to update the connection information to your database.
Example:
CUBEJS_DB_HOST=1.1.11.1
CUBEJS_DB_NAME= sbanalytics
CUBEJS_DB_USER=sb_analytics_user
CUBEJS_DB_PASS=password12345
CUBEJS_WEB_SOCKETS=true
CUBEJS_DB_TYPE=postgres
-
Restart SearchBlox servers. You can restart the Index server followed by the 2 Search servers.
-
Restart the Analytics server and try test searches from Search servers to see the queries being logged in the database. You will see 3 tables within the database - autosuggest_click_logs, click_logs, query_logs.
Best Practices for Cluster Setup
- Configure AWS Application Load Balancer (ALB) to distribute the load between search servers for best performance.
- Ensure that indexing and search servers are able to connect with each other.
- Traffic must be allowed on ports 9200 and 9300 among these 3 servers.
- If there is any issue first check the cluster health status
- Ensure searches are done only on the Search Servers for best performance.
Updated over 4 years ago
