Amazon S3 Data Source
Configuring SearchBlox
Before using the Amazon S3 Data Source, install SearchBlox successfully, then create a Custom Collection.

Configuring Amazon S3 Data Source**
- Download the SearchBlox Connector UI. Extract the downloaded zip to a folder.
Contact [email protected] to request the download link for SearchBlox Connectors UI. The following steps include the example paths for both Windows as well as Linux. In Windows, the connector would be installed in the C drive.
- Unzip the archive under C:* or /opt*.
- Create a data folder on your drive where the files would be temporarily stored.
- Configure the following properties once you create a data source in the connector UI.
| encrypted-ak | Encrypted access key from Amazon s3. Encrypter would be available in the downloaded archive |
| encrypted-sk | Encrypted secret key from Amazon s3. Encrypter would be available in the downloaded archive |
| region | Region of Amazon S3 instance |
| data-directory | Data Folder where the data needs to be stored. Make sure it has write permission. |
| api-key | SearchBlox API Key |
| colname | The name of the custom collection in SearchBlox. |
| queuename | Amazon S3 SQS parameter. This is required for update of documents after indexing in a bucket. |
| private-buckets | If set to true the content from private buckets will be indexed |
| public-buckets | If set to true the content from public buckets will be indexed |
| url | SearchBlox URL |
| includebucket | S3 buckets to be included |
| include-formats | File formats to be included |
| expiring-url | Expiring URLs in the search result. Default URL will be expiring URL |
| expire-time | Default expire time will be 300 mins |
| permanent-url: | permanent URLs in the search result. Among the expiring and permanent URL expiring URL is given more preference |
| max-folder-size | Maximum size of static folder after which it should be sweeped in MB. |
| servlet url & delete-api-url: | Make sure that the port number is right. If your SearchBlox runs in 8443 port the URLs should be right. |
Steps to trigger notification when a document is updated in S3
- In Amazon S3 console under services, click on the Simple Queue Service(SQS) which can be found under application integration.
- The Select Create New Queue, then give an appropriate queue name and configure the queue.

- Set message visibility timeout, retention days and receive message wait time.

- Receive message wait time should be set between 1 - 20 seconds. So as to set the queue for long polling.
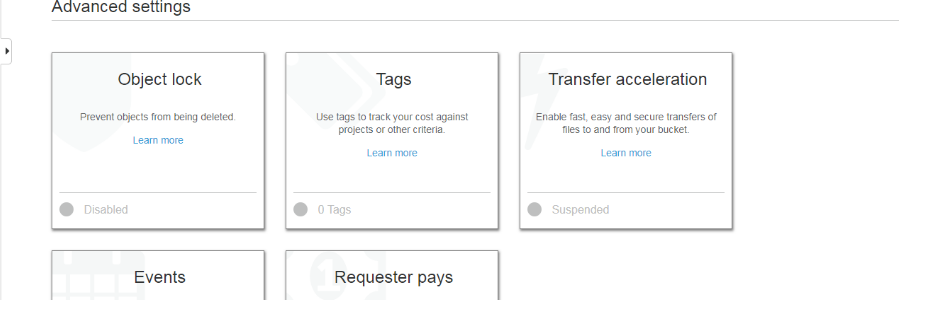
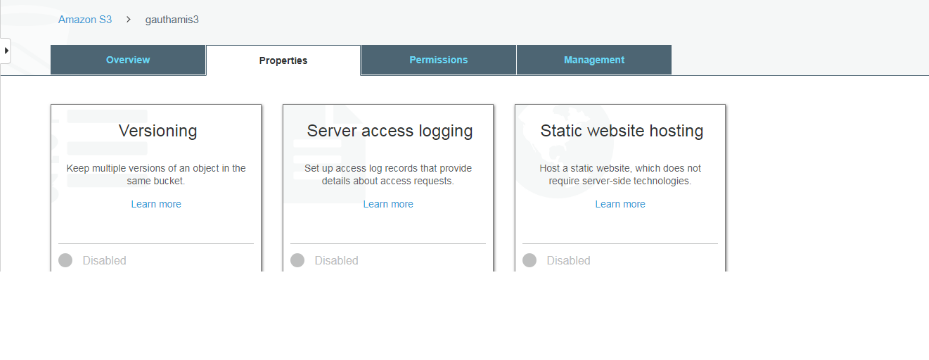
- Then in the S3 console select a bucket whose SQS you need to set and click on “Properties”, Then in “Advanced settings” click on events.


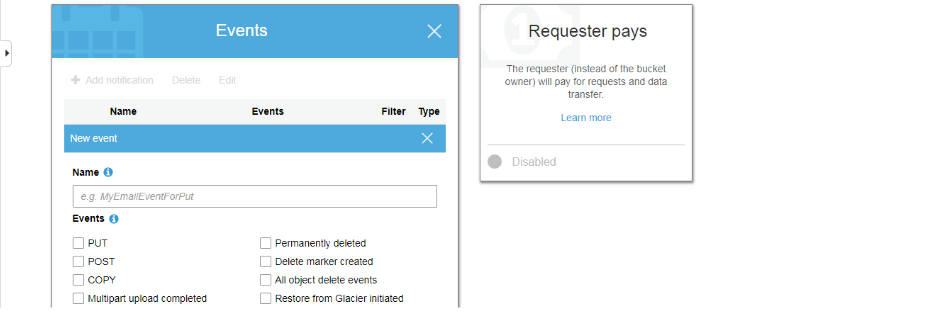
- Now select “Add Notification” and give a name to the notification and check the events for which you need notification.https://files.readme.io/e00dec7-4.png

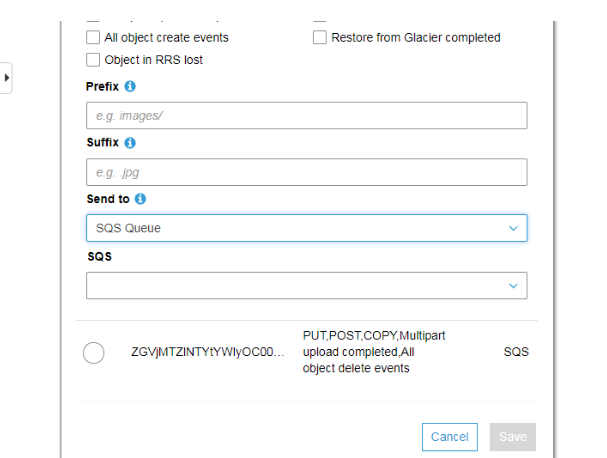
- Then in “Send To” fill SQS Queue and under SQS fill in the name of the queue which we created before and click on Save.

-
Now, whenever there is change to the documents in this particular bucket then a notification will be sent to SQS.
-
The queue names need to be given in the S3 connector yml file in order to trigger indexing whenever a document is updated
Updated over 4 years ago
