Setup Analytics for Cluster Setup
When using a cluster setup in SearchBlox, we recommend setting an external database using Postgres for Analytics to store the data related to Analytics in a central database.
Setting up Analytics for Cluster in Linux
It is required to first install Postgres in any of the servers, preferably in the index server or any other server accessible to all the servers in the cluster.
Steps to Install Postgresql in Centos
- Install Postgres using the command:
sudo yum install postgresql-server postgresql-contrib
Using the above command in Centos7 9.x version of PostgreSQL would be installed.
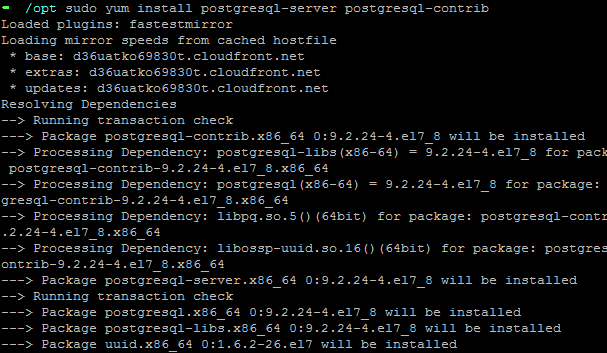
- Initialize database using the command:
sudo postgresql-setup initdb
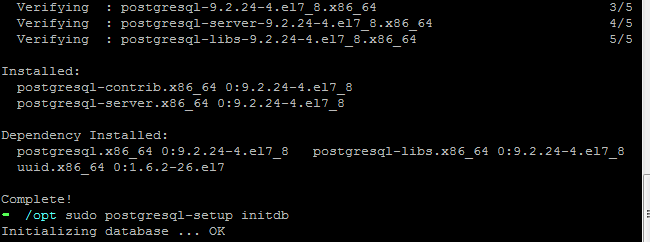
- Set password for postgres database
sudo passwd postgres
Enter and reenter the password.

-
Edit
vi /var/lib/pgsql/data/postgresql.confand make sure you set the parameter value as listen_addresses = '*'. -
Edit
vi /var/lib/pgsql/data/pg_hba.confand give trust to local and host connections. For host connection please specify 0.0.0.0/0 to listen to all addresses, if you want more security give the specific address in which postgres runs i.e., the host address
Modify the local and host entries as below:# "local" is for Unix domain socket connections only local all all trust # IPv4 local connections: host all all 0.0.0.0/0 trust # IPv6 local connections: host all all ::1/128 trust
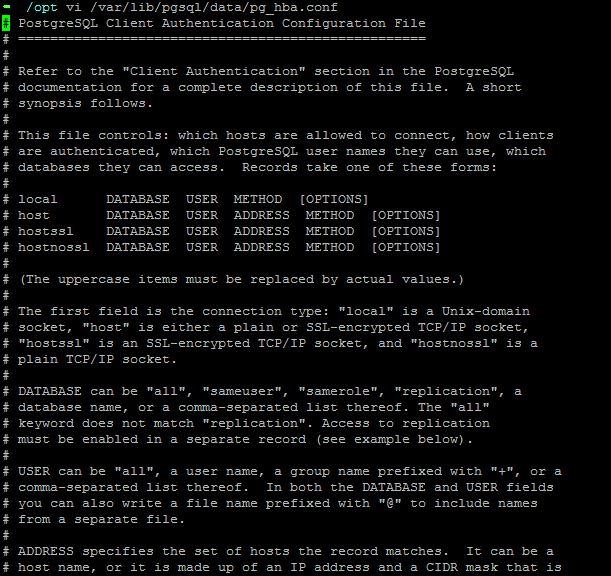
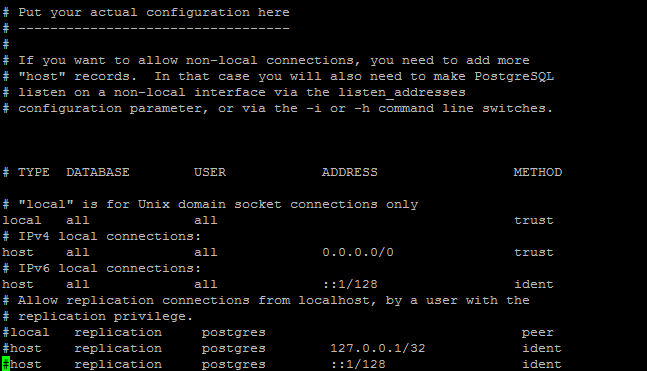
- Start database using the command:
sudo systemctl start postgresql

- To automatically restart postgresql with system reboot
sudo systemctl enable postgresql

- To restart Postgres use the commands:
sudo systemctl stop postgresql
sudo systemctl start postgresql

Postgres Access
Please make sure that the host is pointing to localhost in /etc/hosts file so that Postgres
http://localhost:5432is accessible ashttps://<IP or DNS>:5432in index server and is accessible in search servers.
Access Postgresql and create Database
-
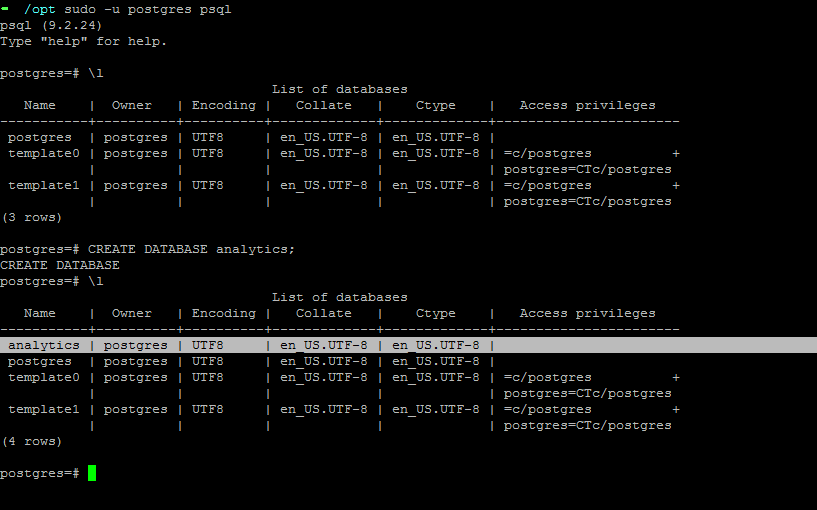
Use the command below to go to Postgres console
sudo -u postgres psql -
To check the version of Postgres
psql --version -
To list the database use
\l -
Create a database using the command
CREATE DATABASE analytics; -
Check the created database from the list of databases
\l -
To quit give
\q
Configure Postgres for Analytics in All Three SearchBlox Servers
The following changes should be made in all three servers i.e., index and 2 search servers. Please ensure the steps are repeated in all three servers in the cluster.
-
Go to /opt/searchblox/analytics/.env file
vi /opt/searchblox/analytics/.env -
Give the appropriate values for the following five parameters i.e., from Step 4 to Step 8
-
Please give the IP address of the host where Postgres is accessible.
CUBEJS_DB_HOST=<IP Address>
Note: Please make sure that the host is pointing to localhost in /etc/hosts file so that Postgres http://localhost:5432 is accessible ashttps://<IP or DNS>:5432across index and search servers. -
As we have created a database named analytics please give the same as value here
CUBEJS_DB_NAME=analytics -
We are using a default user Postgres, if you have created another user for the analytics database specify the same here
CUBEJS_DB_USER=postgres -
Specify the configured password
CUBEJS_DB_PASS=password -
The database type is postgres
CUBEJS_DB_TYPE=postgres -
The content of the .env file with above values would be as below:
      CUBEJS_DB_HOST=<IP or DNS>
      CUBEJS_DB_NAME=analytics
      CUBEJS_DB_USER=postgres
      CUBEJS_DB_PASS=searchblox
      CUBEJS_WEB_SOCKETS=true
      CUBEJS_DB_TYPE=postgres
      NODE_ENV=production
      CUBEJS_CACHE_AND_QUEUE_DRIVER=memory
      CUBEJS_API_SECRET= b4a2056bb6fb30cb02d11e0878115bb2cb27262791766641ceda1e5b105478d321c3c8e26e46ad1b766b5c69b624f6a0d72abe6d541f7d15c095c487bb650ba9
Please ensure that all the above parameters are available in the file.

-
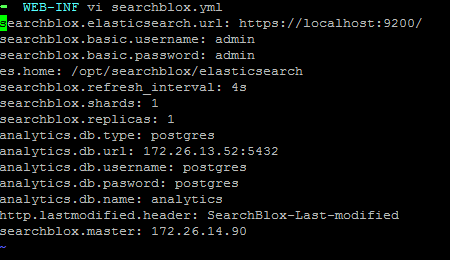
Go to /opt/searchblox/webapps/searchblox/WEB-INF/searchblox.yml
-
Give the appropriate values for the following fields
 analytics.db.type: postgres
 analytics.db.url: <IP or DNS>:5432
 analytics.db.username: postgres
 analytics.db.pasword: searchblox
 analytics.db.name: sbanalytics
-
Stop and Start SearchBlox service
systemctl stop searchblox
systemctl start searchblox -
After few seconds stop and start Analytics Service
systemctl stop sbanalytics
systemctl start sbanalytics

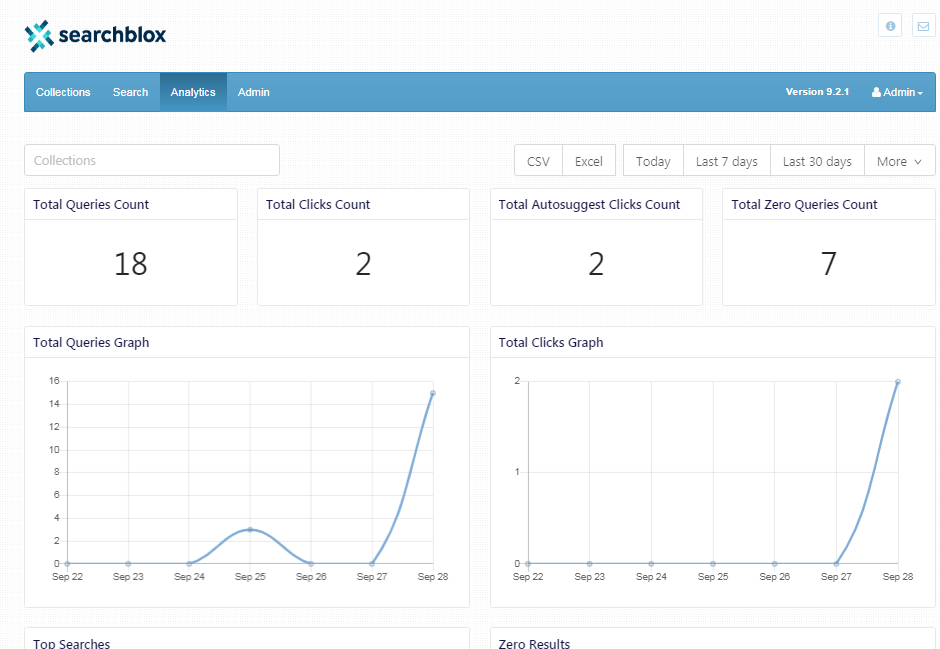
- After starting the analytics service, make few searches in the plugin and check analytics from the Admin Dashboard of Index and Search Servers.
Checking Postgresql database
To check whether data is available in the Postgres database
-
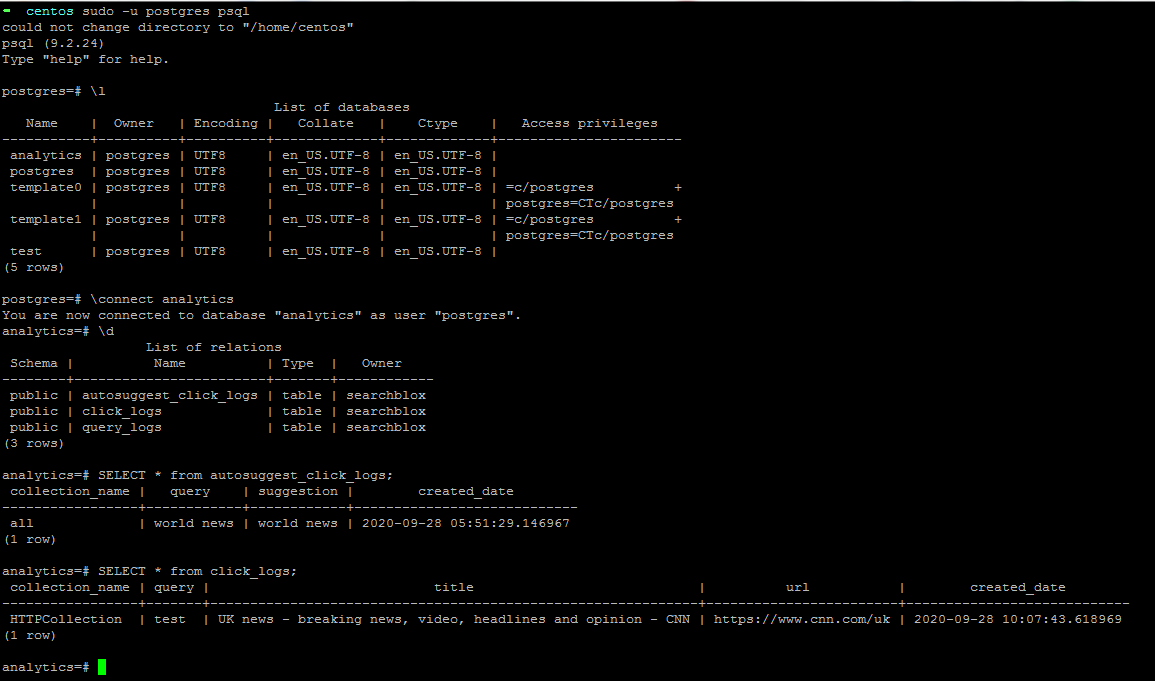
Use the command below to go to Postgres console
sudo -u postgres psql -
To list the database use
\l -
Connect to the analytics database
\connect analytics -
List tables
\d -
You will see 3 tables within the database - autosuggest_click_logs, click_logs, query_logs.
-
Fetching data from querylogs table
SSL Configuration for SearchBlox Analytics in Cluster
By default, the Analytics server will run on SSL port 8444. If you need to update the Analytics server port, we have to edit the below 2 files:
-
Open the file
C:\SearchBloxServer\analytics\.envor/opt/searchblox/analytics/.envand change the port as required finding the line below:
TLS_PORT=8444 -
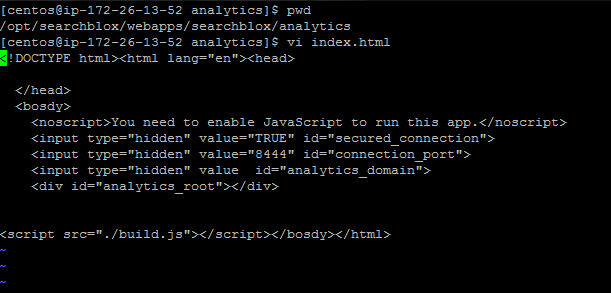
Open the file
C:\SearchBloxServer\webapps\searchblox\analytics\index.htmlor/opt/searchblox/webapps/searchblox/analytics/index.htmland change the port number to custom port as required:
<input type="hidden" value="8444" id="connection_port">
-
Stop and Start SearchBlox
systemctl stop searchblox
systemctl start searchblox -
Stop and Start Analytics
systemctl stop sbanalytics
systemctl start sbanalytics
Note:
- Any SSL configuration for Analytics in cluster setup given changes should be made in all three servers, i.e., index and two search servers.
- When SearchBlox runs on TLS/SSL, we need to place SSL files(cert.pem and key.pem) into
/opt/searchblox/analyticsto run SearchBlox Analytics.
Setting up Analytics for Cluster in Windows
In Windows, PostgreSQL can be installed using the installation wizard. We recommend installing the 9.x version of Postgres in one of the three servers in the cluster preferably in the indexing server.
Steps to Install PostgreSQL in Windows
-
Download the installer for Postgres version 9.6 using the link below:
https://get.enterprisedb.com/postgresql/postgresql-9.6.19-1-windows-x64.exe
You can also download the version based on your OS compatibility at the link below:
https://www.enterprisedb.com/downloads/postgres-postgresql-downloads -
Run the executable and follow the installer wizard to install Postgres
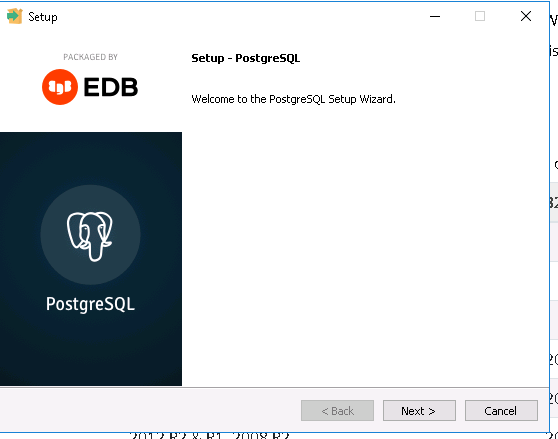
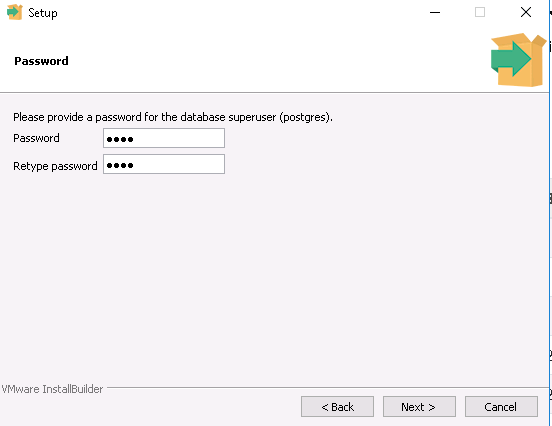
- Please give the password and note the same down for later use
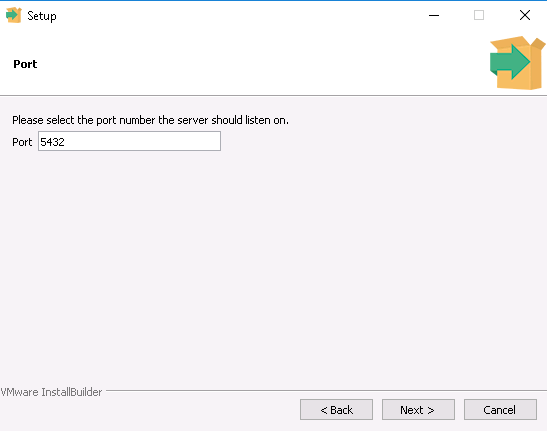
- Note down the port number for further use in SearchBlox
- Finally uncheck the "Launch Stack Builder at exit?" and Finish the installation
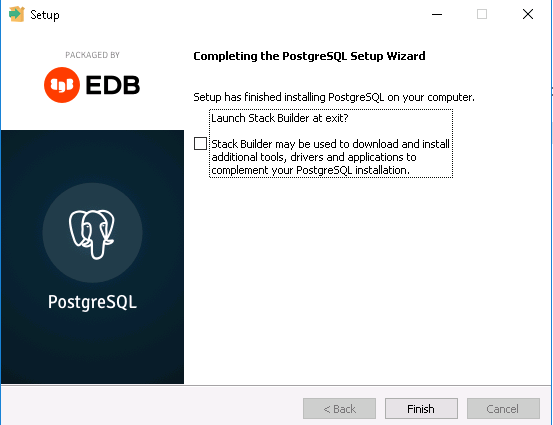
-
Open the file C:\Program Files\PostgreSQL\9.x\data\postgresql.conf and make sure you set the parameter value as listen_addresses = '*'.
-
For host connection please specify 0.0.0.0/0 to listen to all addresses, if you want more security give the specific address in which postgres runs i.e., the host address. Open the file C:\Program Files\PostgreSQL\9.x\data\pg_hba.conf and allow the cluster servers to trust postgres access using their IPs. Modify the local and host entries as below:
# Allow Postgres connection to Index server IP: host all all 13.54.234.241/24 trust # Allow Postgres connection to Search server1 IP: host all all 13.239.55.148/24 trust # Allow Postgres connection to Search server2 IP: host all all 3.25.193.78/24 trust -
Restart the PostgreSQL service.
-
In addition to above some Windows machines might also require incoming TCP traffic to be allowed on the port 5432.
To do this in Index Server, you would need to open Windows Firewall and add an inbound rule for the port 5432.
Head to Control Panel\System and Security\Windows Defender Firewall > Advanced Settings > Actions (right tab) > Inbound Rules > New Rule… > Port > Specific local ports and type in the port your using, 5432.
Access Postgresql using pgadmin4 and create Database
pgadmin4 tool is a GUI tool that comes with PostgreSQL installation in Windows. Using pgadmin4, database for SearchBlox analytics can be easily created using the following steps:
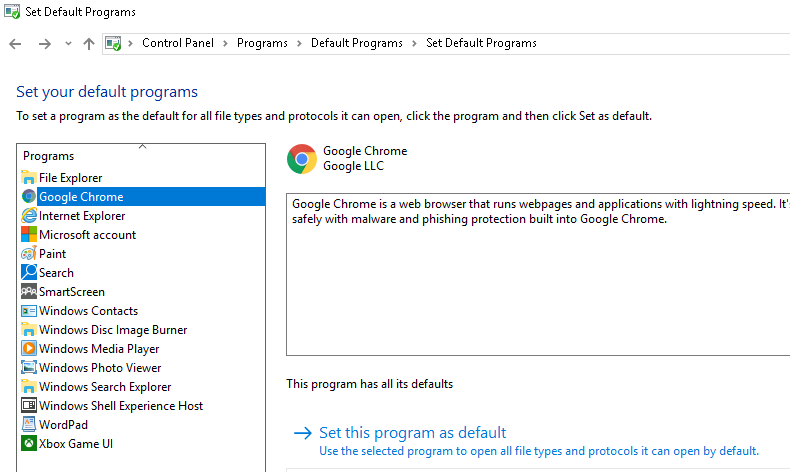
- Ensure that Google Chrome is installed in the Windows instance and is enabled as a default program/browser. pgadmin4 works with Chrome and Firefox browsers, however not compatible with Internet Explorer.
To make Google Chrome as default go to -> Control Panel -> Programs->Default Programs->Set your default programs -> Select Google Chrome and set it as default program.
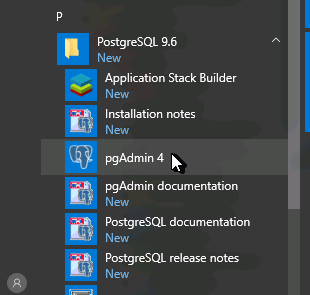
- Select pgadmin4 from the PostgreSQL menu from the start menu
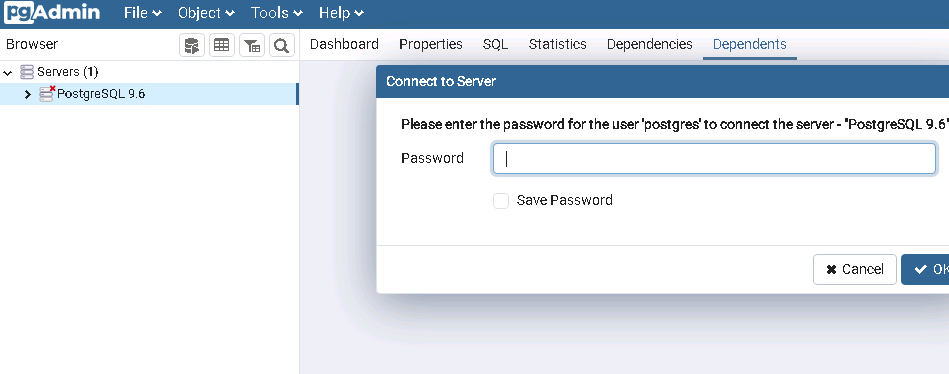
- Postgres9.6 would be available as a server in the dropdown as in the screenshot below. By default, Postgres9.6 would be connected.
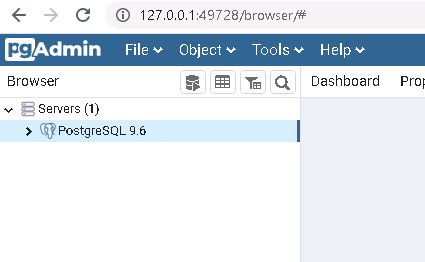
Otherwise, connect to the database by providing the password configured while installing.
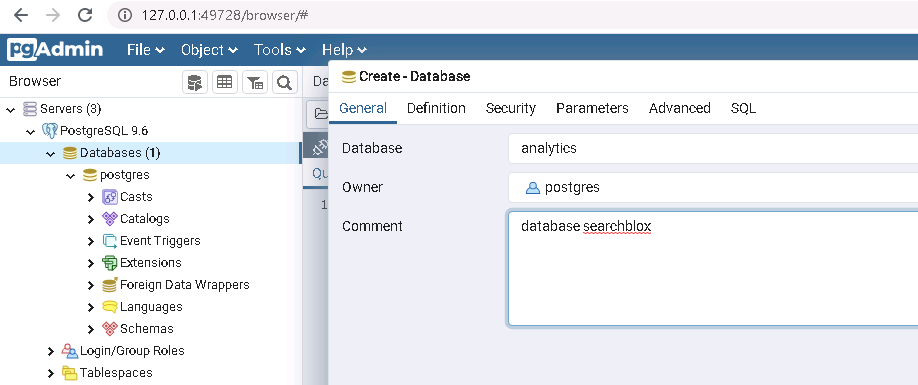
- Create a database named analytics
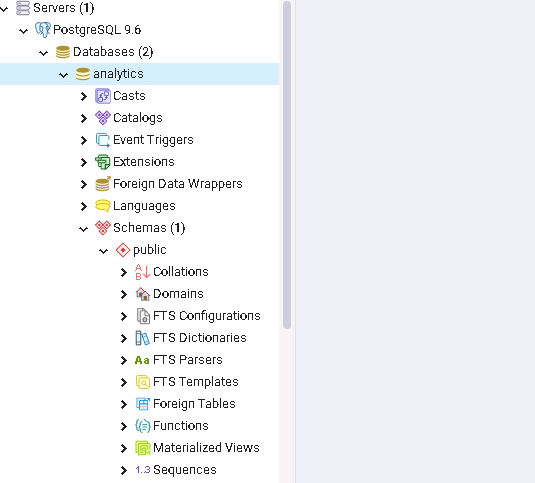
Expand the database as below and view:
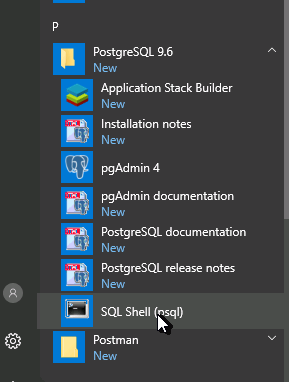
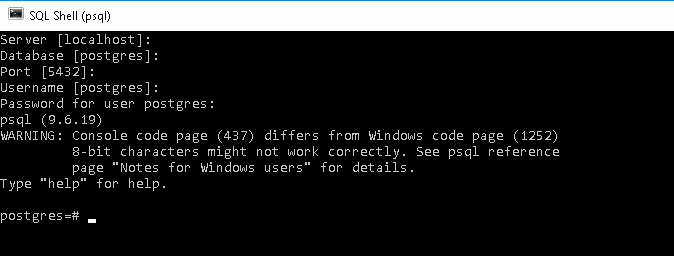
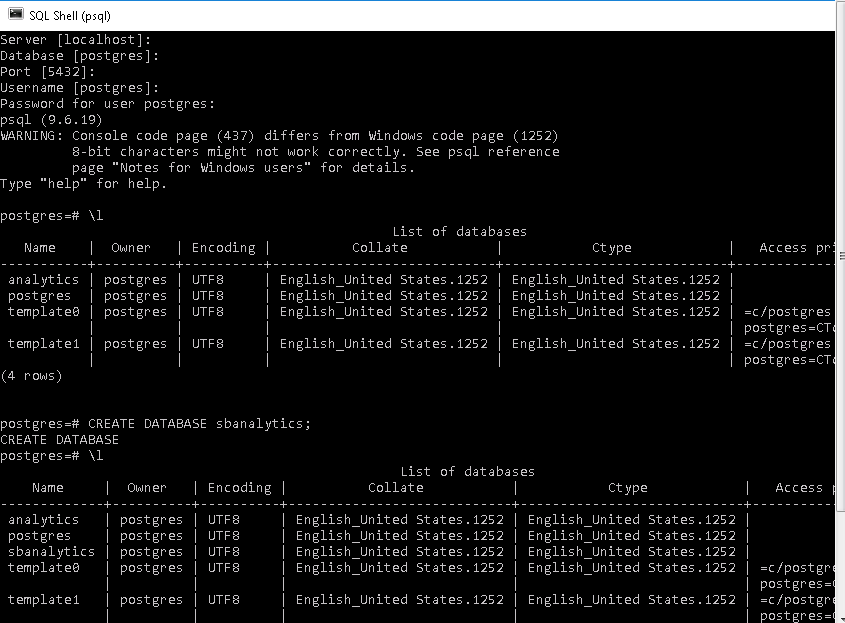
Alternatively, you can also use SQL Shell to access PostgreSQL and create a database.
Configure Postgres for Analytics in the Server
-
Stop SearchBlox and analytics server if running.
-
Go to
<SEARCHBLOX INSTALLATION PATH>\analytics\.envfile -
Give the appropriate values for the first five parameters
-
Please give the localhost or IP address of the host where Postgres is accessible.
CUBEJS_DB_HOST=<IP Address>
Note: Please make sure that Postgres in http://localhost:5432 is accessible ashttps://<IP or DNS>:5432across index and search servers. -
As we have created a database named analytics please give the same as the value shown here
CUBEJS_DB_NAME=analytics -
We are using a default user Postgres if you have created another user for the analytics database specify the same here
CUBEJS_DB_USER=postgres -
Specify the configured password
CUBEJS_DB_PASS=password -
The database type is Postgres
CUBEJS_DB_TYPE=postgres
The content of the .env file with above values would be as below:CUBEJS_CACHE_AND_QUEUE_DRIVER=memory CUBEJS_DB_HOST=<IP> CUBEJS_DB_NAME=analytics CUBEJS_DB_USER=postgres CUBEJS_DB_PASS=searchblox CUBEJS_WEB_SOCKETS=true CUBEJS_DB_TYPE=postgres NODE_ENV=production CUBEJS_API_SECRET=b4a2056bb6fb3d72abe6d549999jjel01f7d15c095c487bb650ba9
Please ensure that all the above parameters are available in the file.
-
Go to \searchblox\webapps\searchblox\WEB-INF\searchblox.yml
-
Give the appropriate values for the following fields
analytics.db.type: postgres analytics.db.url: localhost:5432 analytics.db.username: postgres analytics.db.pasword: searchblox analytics.db.name: analytics -
Start SearchBlox
-
Start Analytics
-
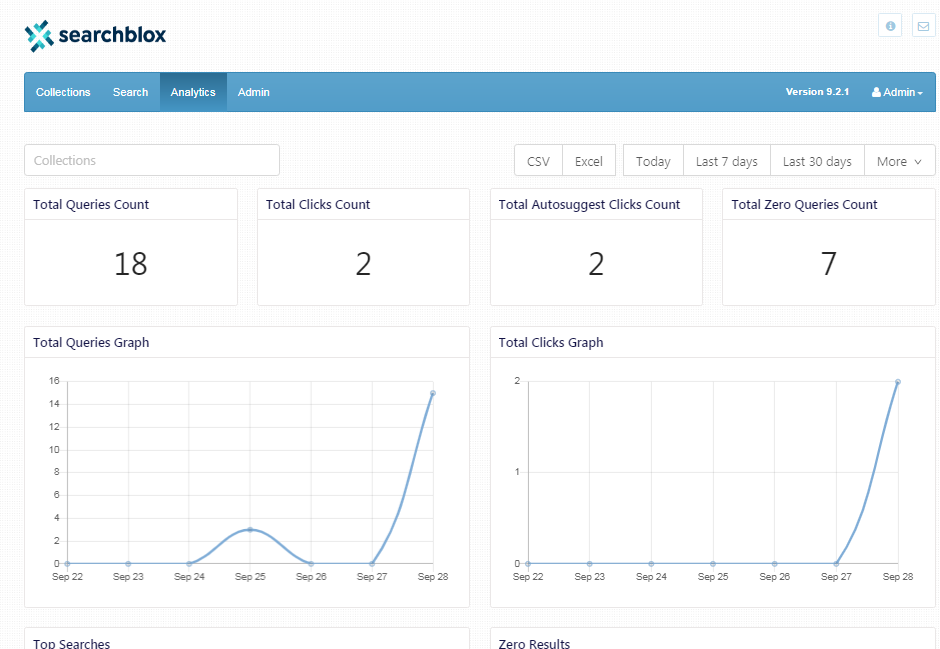
After starting the analytics service, make few searches in the plugin and check analytics from the Admin Dashboard.
Updated over 4 years ago
