OKTA Integration
Secure search can also be used through OKTA, which is an enterprise-grade, identity management service built for the cloud, but compatible with many on-premises applications. Click HERE for more Information on OKTA.
Configuring OKTA in SearchBlox
Follow these steps to use OKTA secure search:
- Select Enable OKTA.
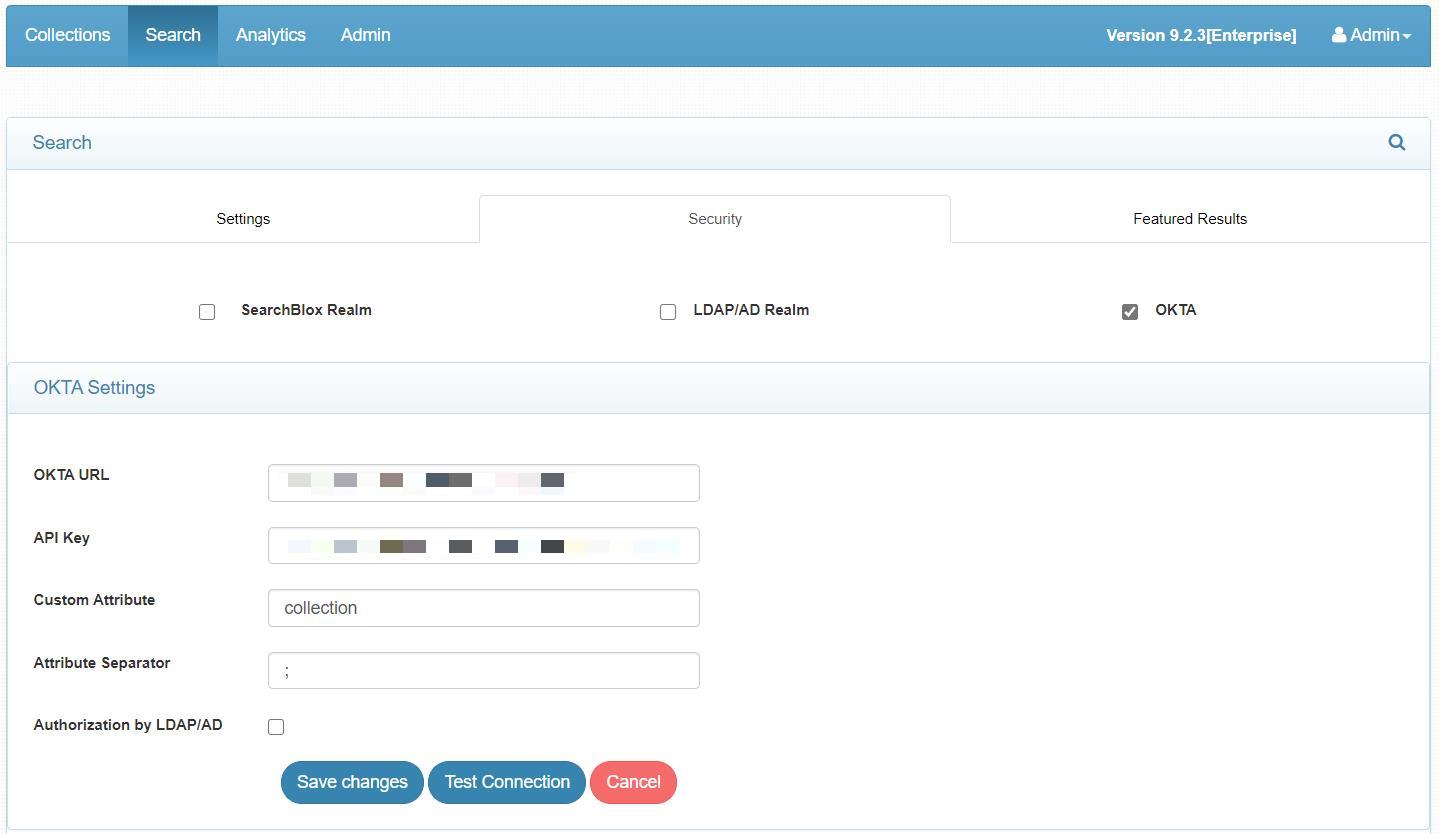
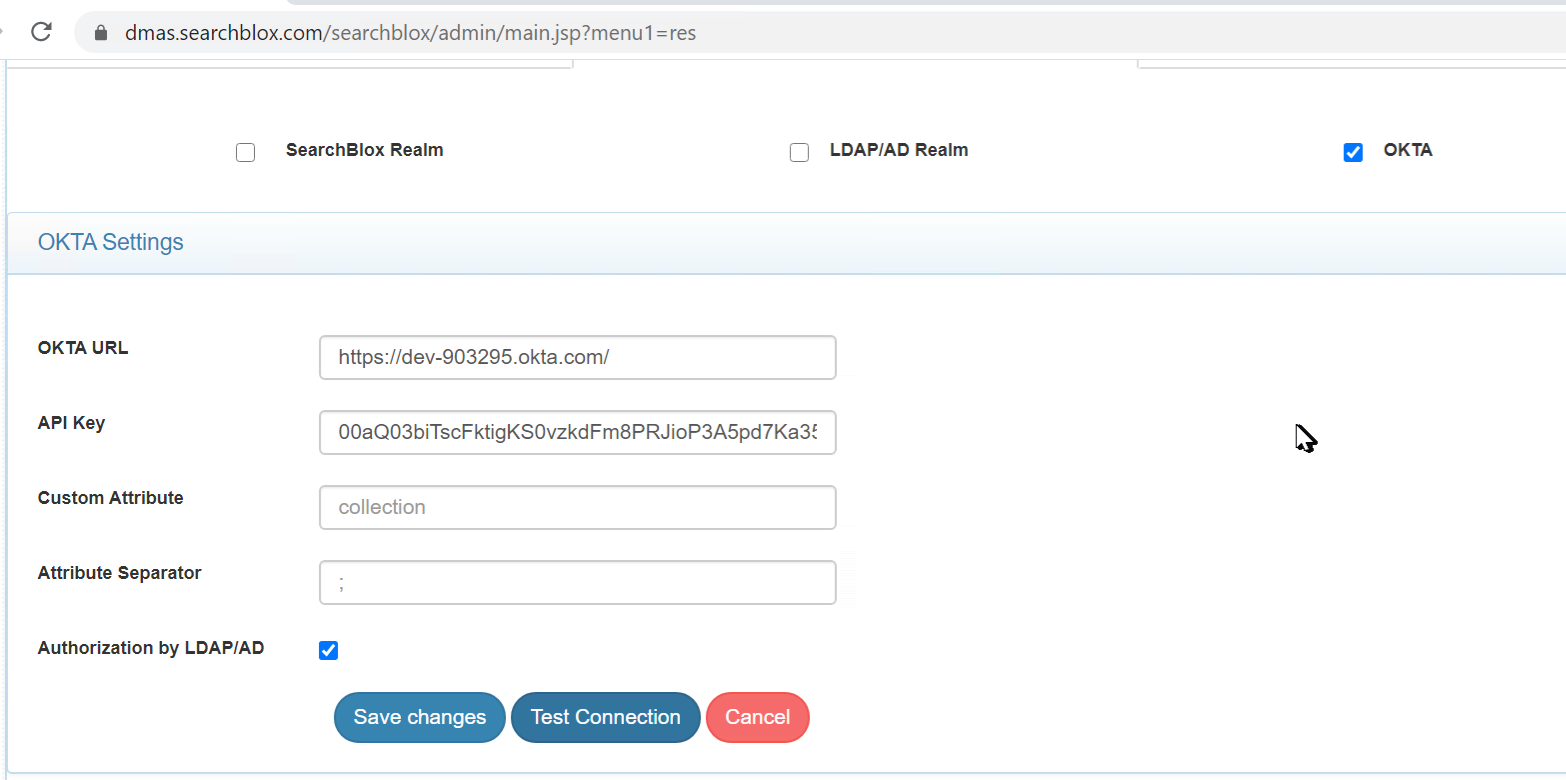
- Enter the required details regarding OKTA.
| Field | Details |
|---|---|
| OKTA URL | Full-qualified base URL for your OKTA organization. |
| API Key | The API key you generated as part of prerequisites from OKTA. |
| Custom Attribute | Attribute that you use to filter search results. By default, it is Collection. |
| Attribute Separator | The separator for the attributes that are given in OKTA. |
| Authorization by LDAP/AD | OKTA user authentication with LDAP/AD search authorization. This is an advanced collection-level security mechanism that can be supported. |
- Test the connection.
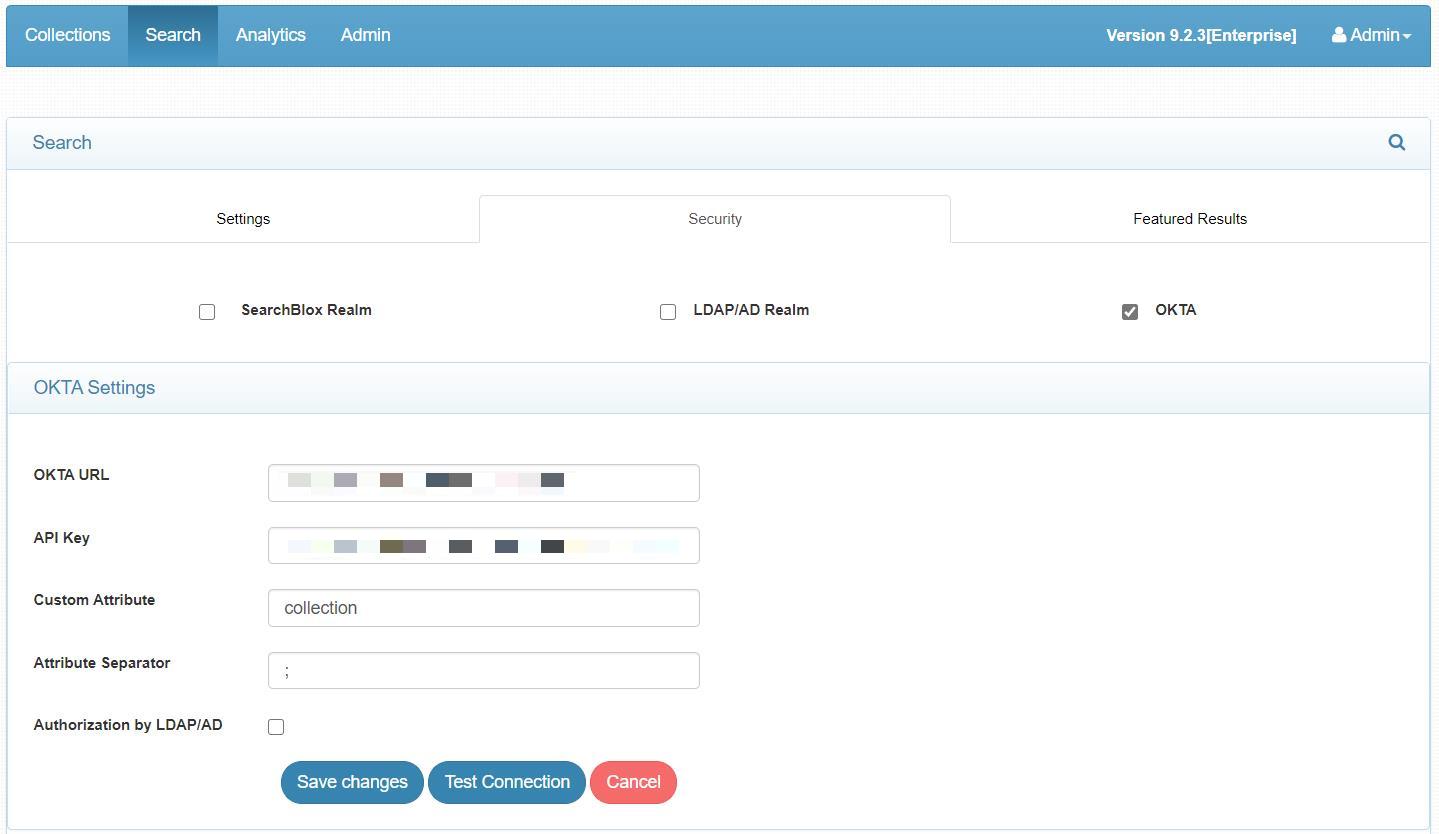
Configuration and API token
- Login to OKTA
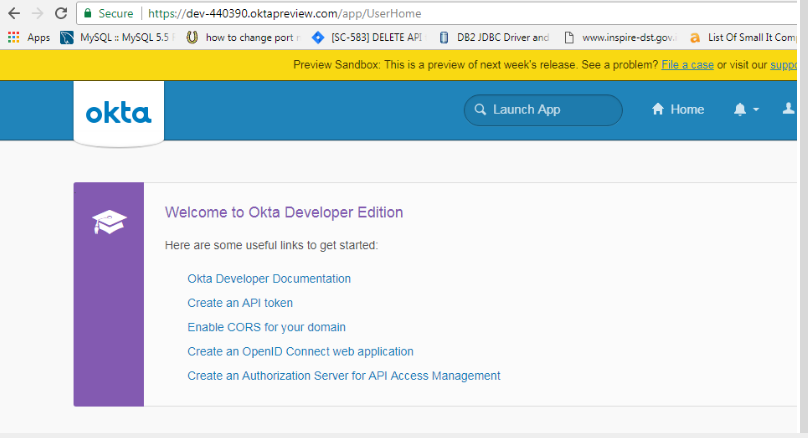
- Click Create an API token
You can otherwise access this token generation page by going to Security > API > Click Token tab.
The API key and URL are required from OKTA to use a secure search.
http://developer.okta.com/docs/api/getting_started/getting_a_token.html
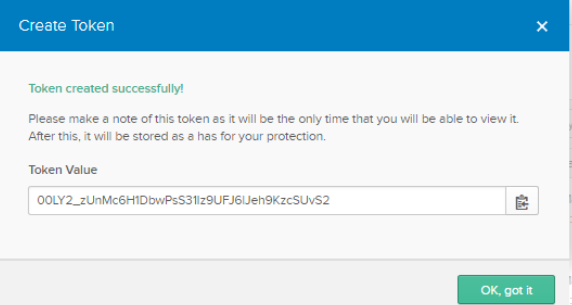
-
Please save this token locally as it cannot be viewed again.
-
Use this token in OKTA settings in Searchblox Admin > Search > Security
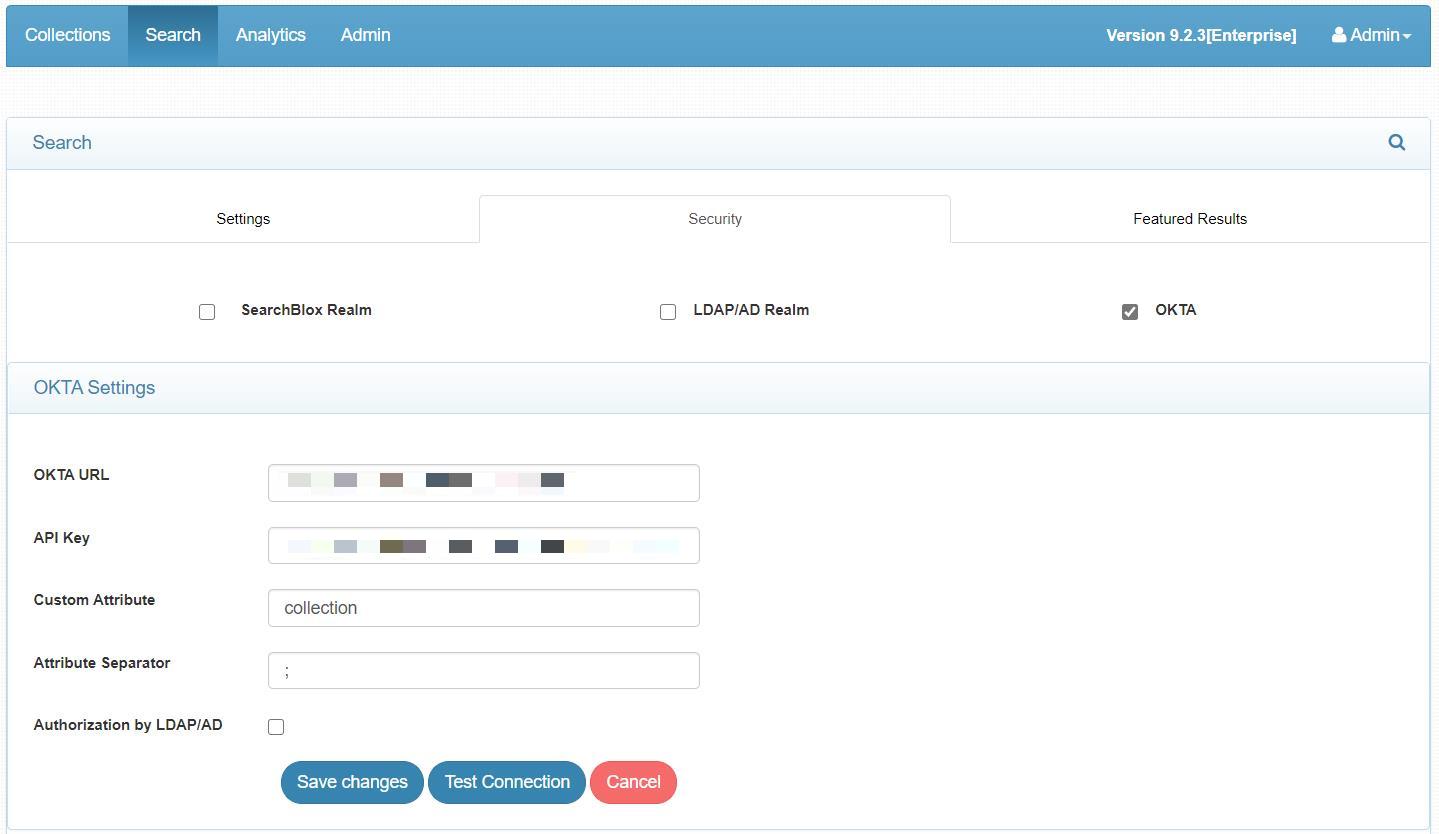
- On testing the connection, it should be successful.
Important Note:
- If you are setting up OKTA for SearchBlox for the first time, please set up your collection attribute mentioned below and then try testing the connection.
Setting up collection attributes
- Navigate to Directory/Profile Editor.
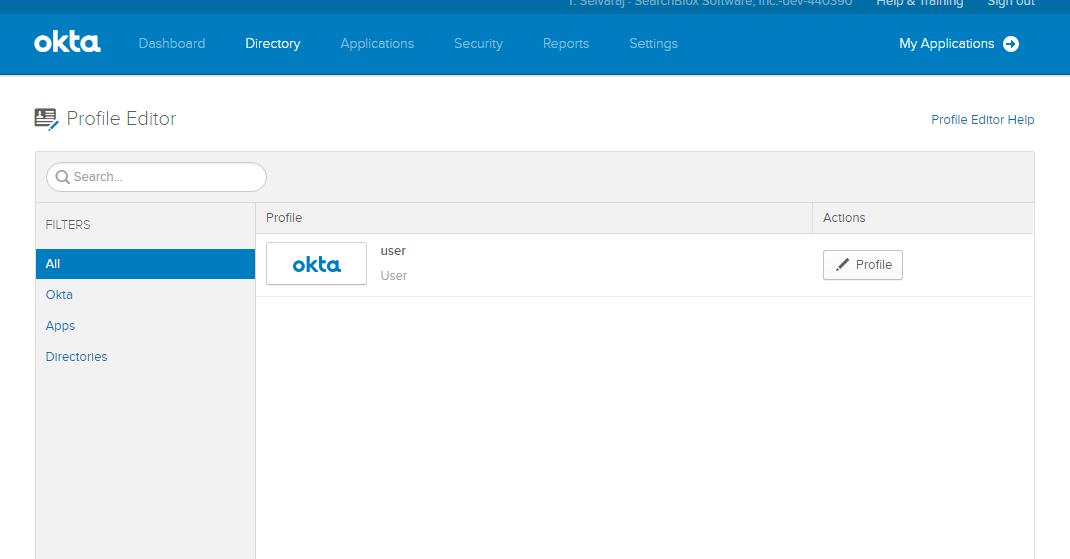
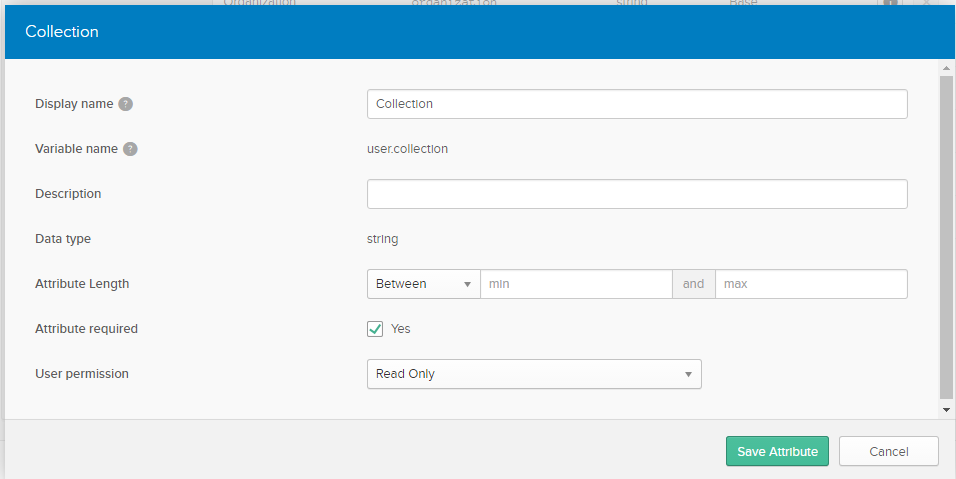
- Edit The OKTA profile and add a new attribute named “collection”, or any other name. This is a user profile so whenever a user is created you will be able to see the collection attribute.
Limiting collections based on users
- Once the attribute is set, you can provide access to collections based on user access.
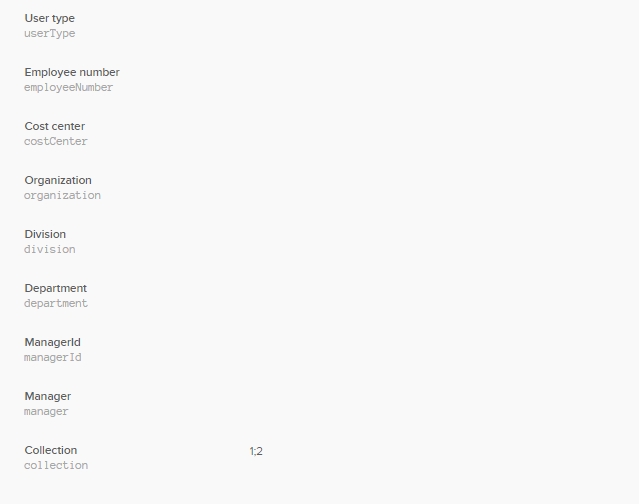
- If you want user1 to have access to collections 1 & 2, then you can limit the same by going to Directory > People > click the user > go to the Profile tab.
- In the user profile, you can limit the collections that can be accessed by the user.
- If you give the collections attribute as 1:2, only collections 1 and 2 would be accessible by the user, where ":" is the attribute separator given in Searchblox OKTA secure search settings.
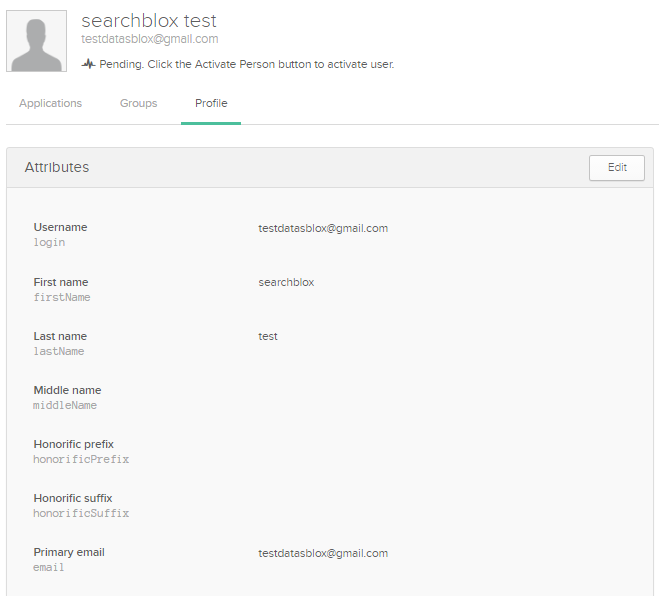
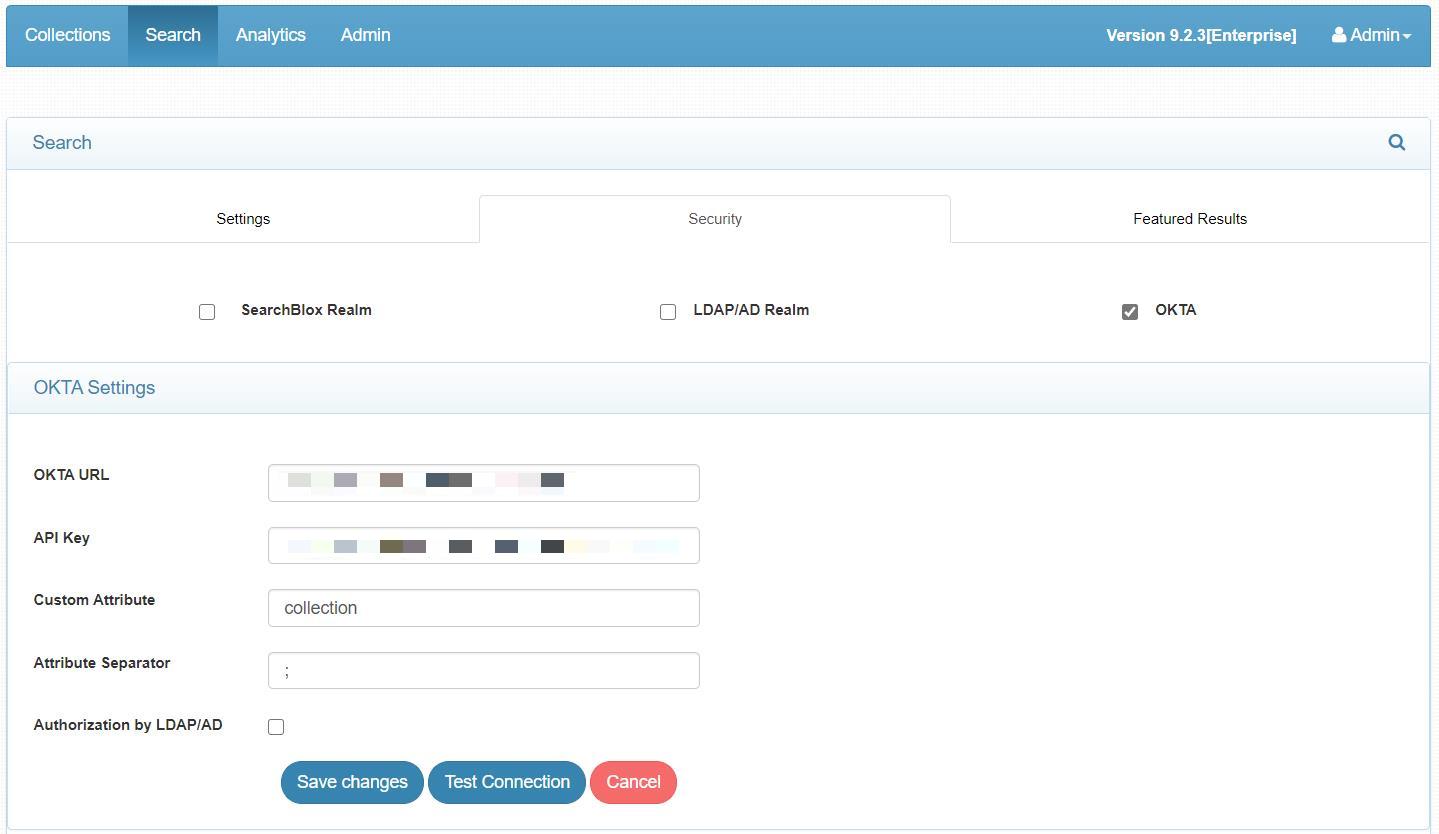
- In the SearchBlox Settings for OTKA, custom attributes and attribute separators work as follows:
Custom Attribute: The collection attribute created previously to filter the collections based on users.
Custom Attribute Separator: This is used to separate the collection IDs. For example, if you give the value of the collection as “1:2:3:”, the attribute separator is “:” Use this format for collections that are to be accessible by the user.
Accessing Secure Search using OKTA
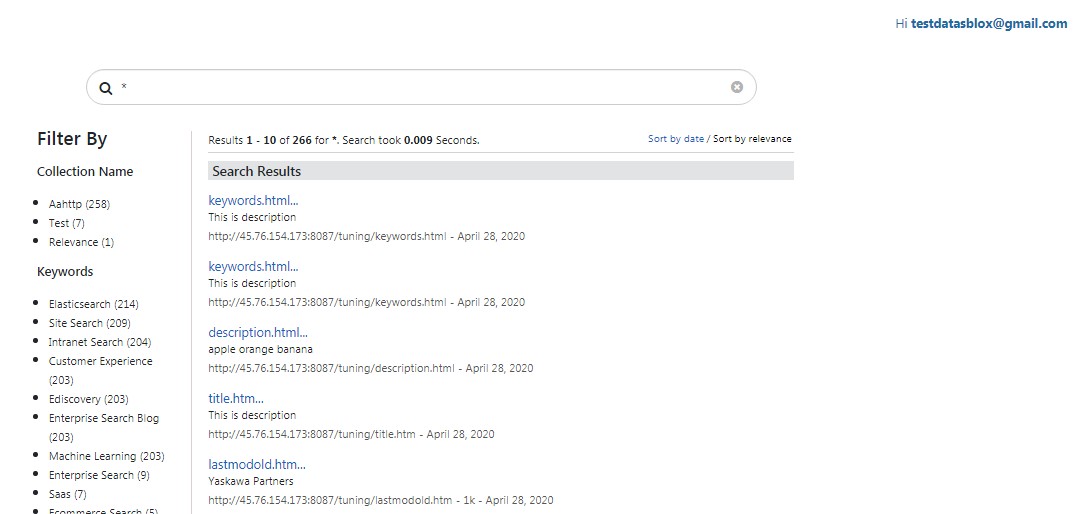
You can log in using OKTA credentials and perform a secure search from this link:
https://localhost:8443/searchblox/plugin/index.html.
OKTA SSO with LDAP Authorization
Create an OKTA SSO
- Signup for OKTA (https://developer.okta.com/signup/) using React Stack for SearchBlox (If you have an OKTA account ready, please skip this step and login to your OKTA account)
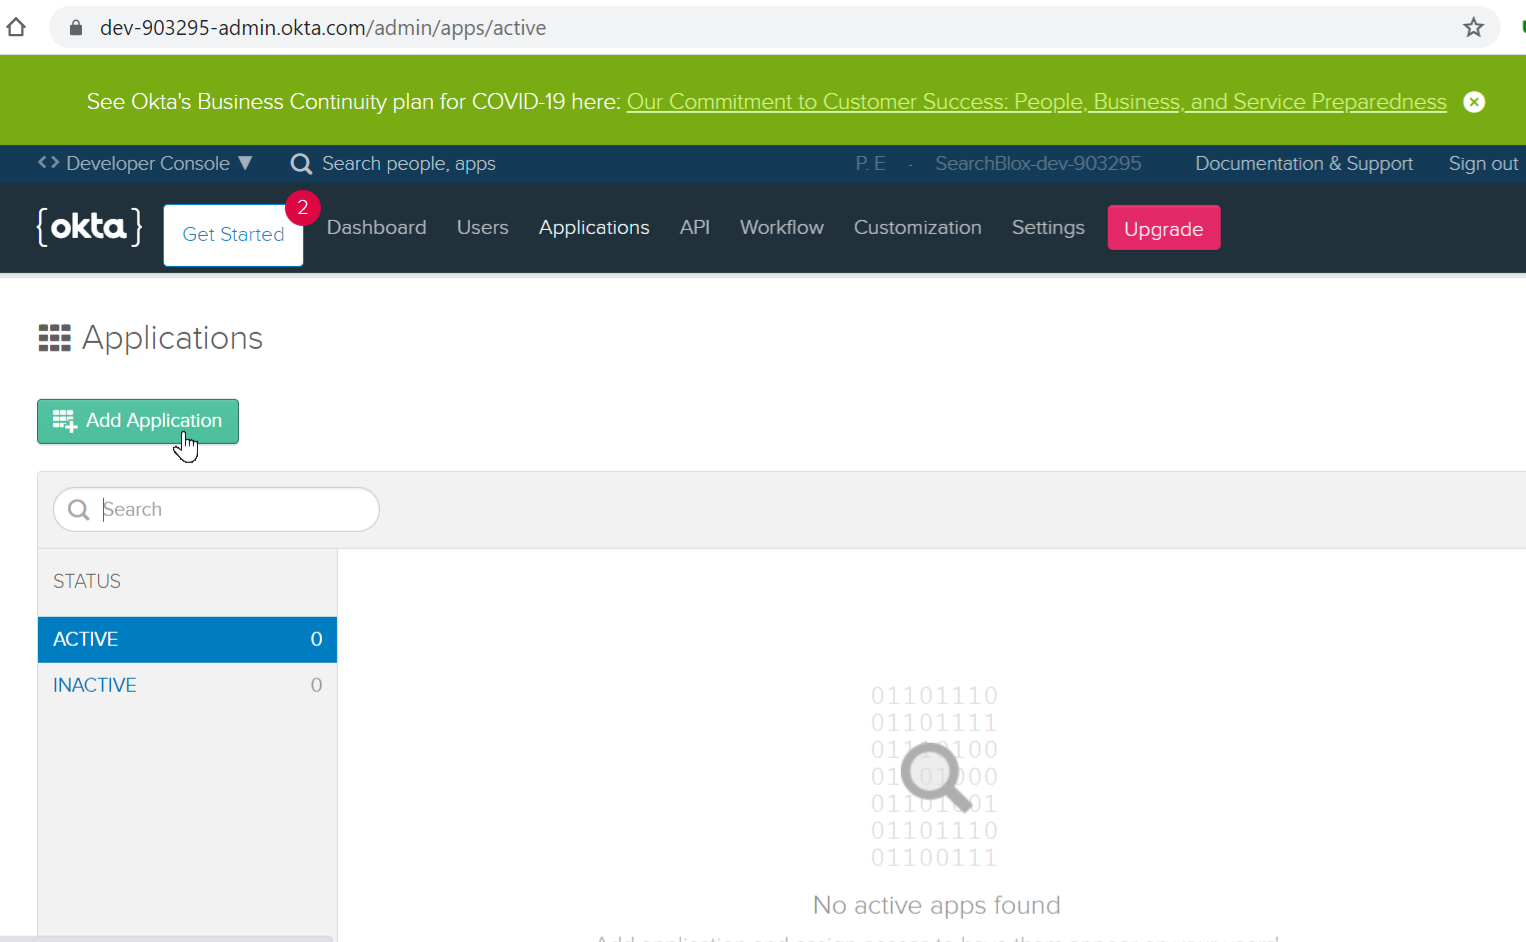
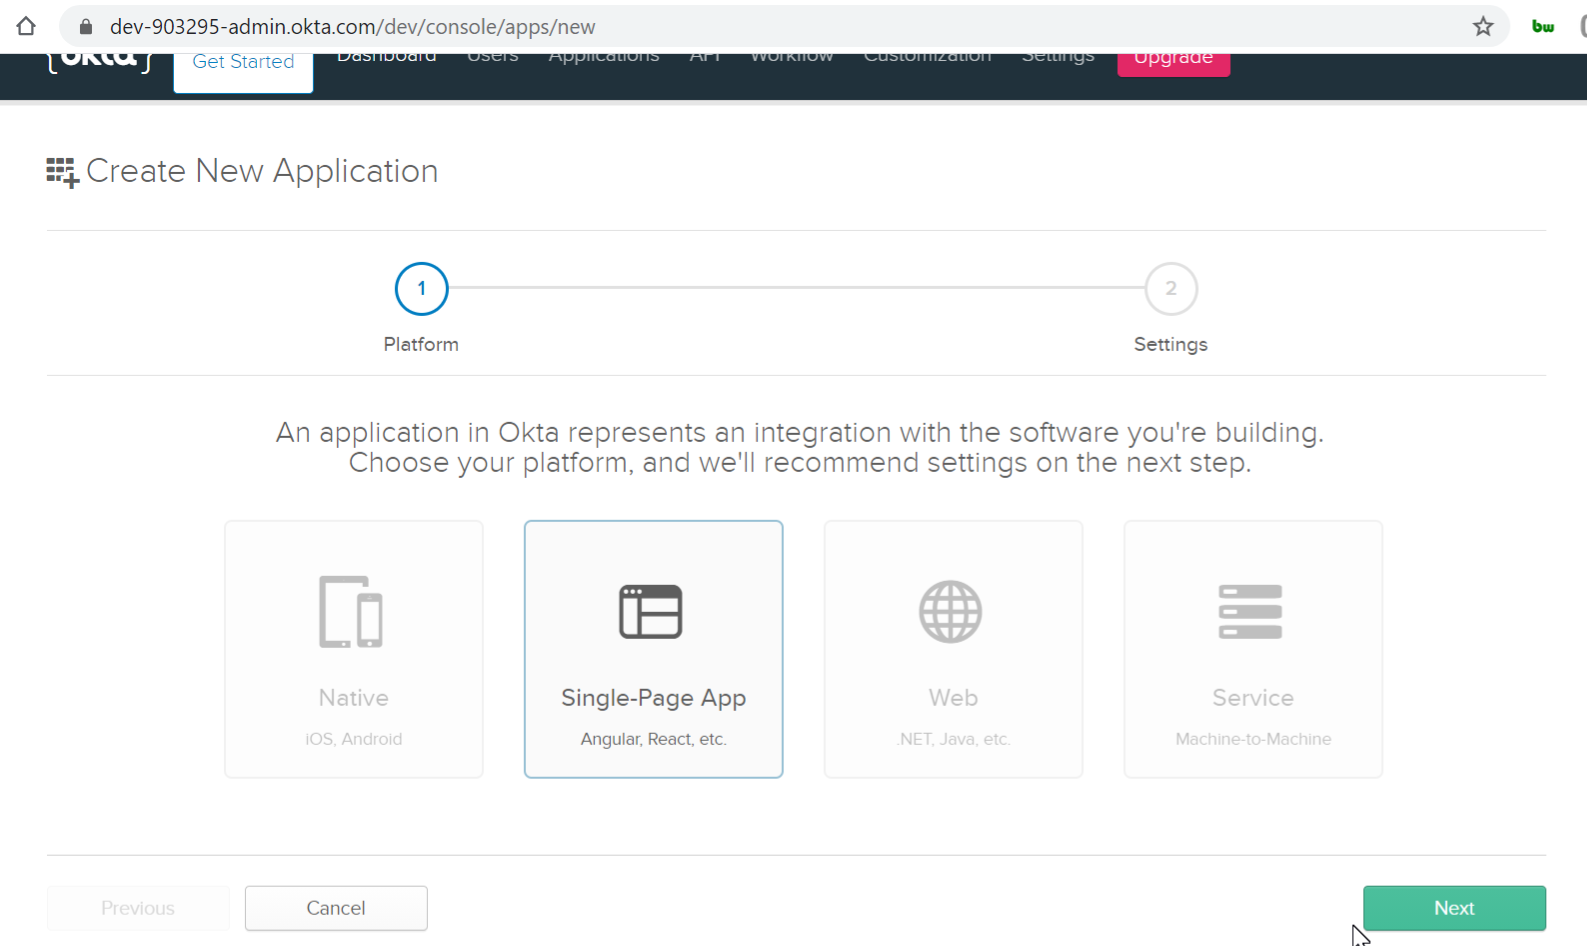
- Go to Applications tab and then click on the Add Application button. Choose Single Page App and click Next.
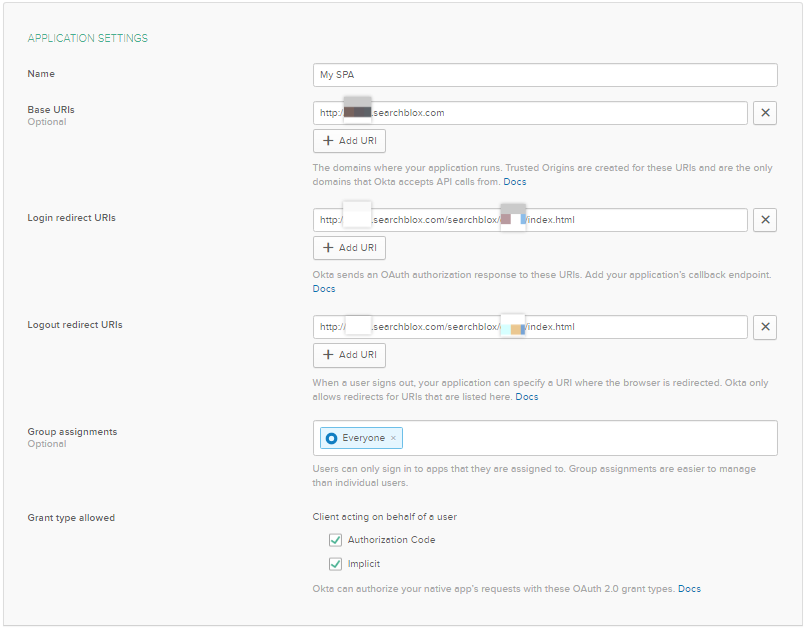
- In the Application Settings, fill in the Name of the Application, Base URIs, Login Redirect URIs and Logout Redirect URIs. Click on the “Implicit” checkbox and click Done. “Authorization Code” is checked by default.
For example:
Base URI - https://test.searchblox.com
Login redirect URI - https://test.searchblox.com/searchblox/test/index.html
Logout redirect URI - https://test.searchblox.com/searchblox/test/index.html
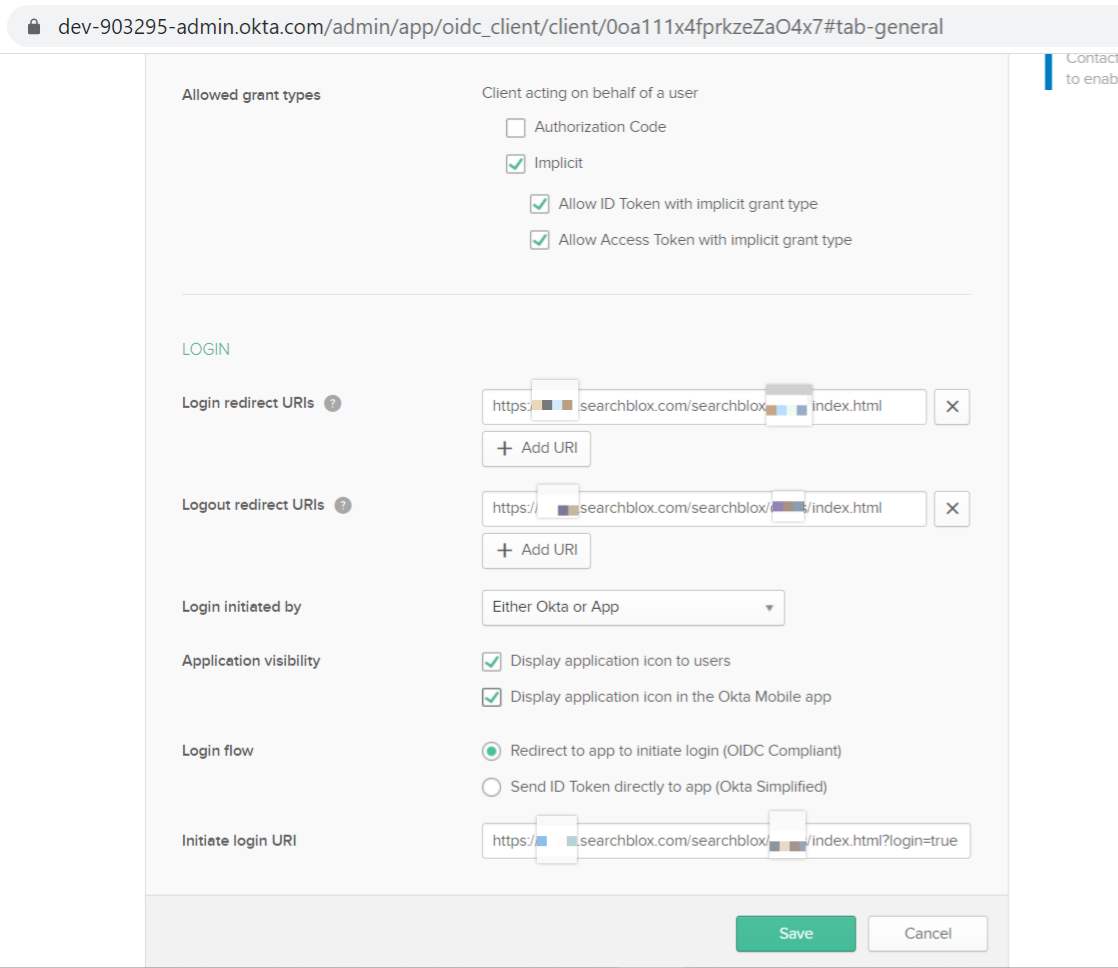
- Click on Edit in General Settings and configure Initiate Login URI. Check Allow ID token and Allow Access token. Select Login Initiated By Either OKTA or APP. Once completed, click on Save.
For example:
Initiate Login URI - https://test.searchblox.com/searchblox/test/index.html?login=true
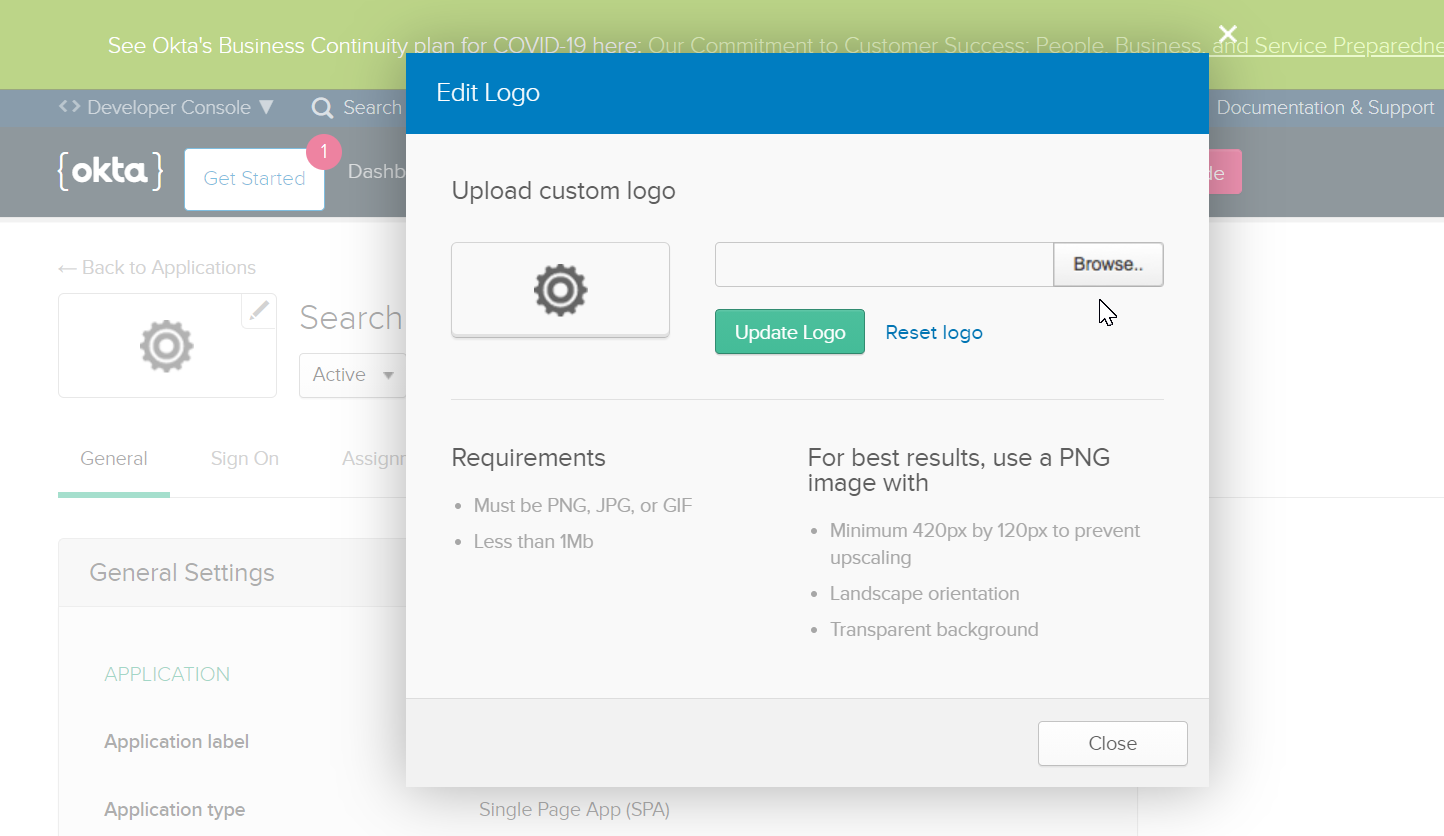
- You can also add a logo for the application you created. Click on the edit icon, click on browse, choose the necessary file and click on Update Logo.
Click HERE to download the SearchBlox logo as shown below.
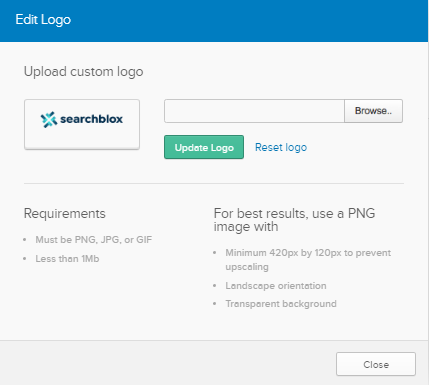
- Once you update the logo for SearchBlox, the chiclet will look as shown below.
Add Users/Group Claims
- Once the application is successfully configured, you can add Users/Group Claims.
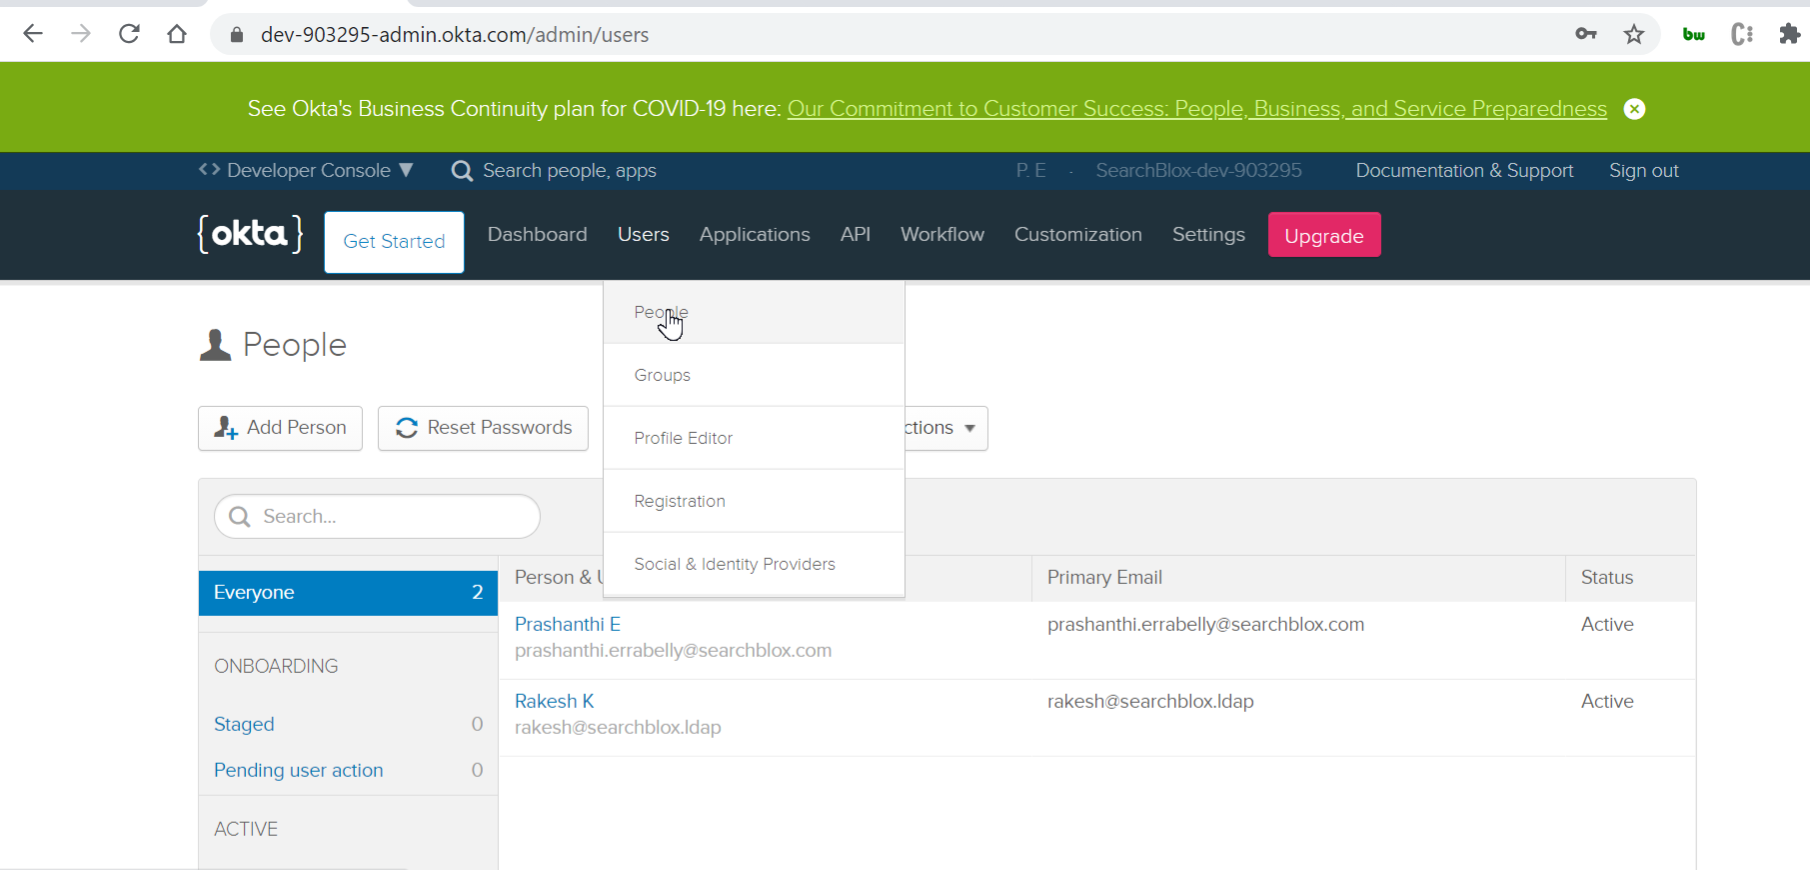
- To add a new User, click on People under the Users tab. Click on Add Person and enter the necessary details. You can choose to set a password by admin or allow the user to set a new password for themself.
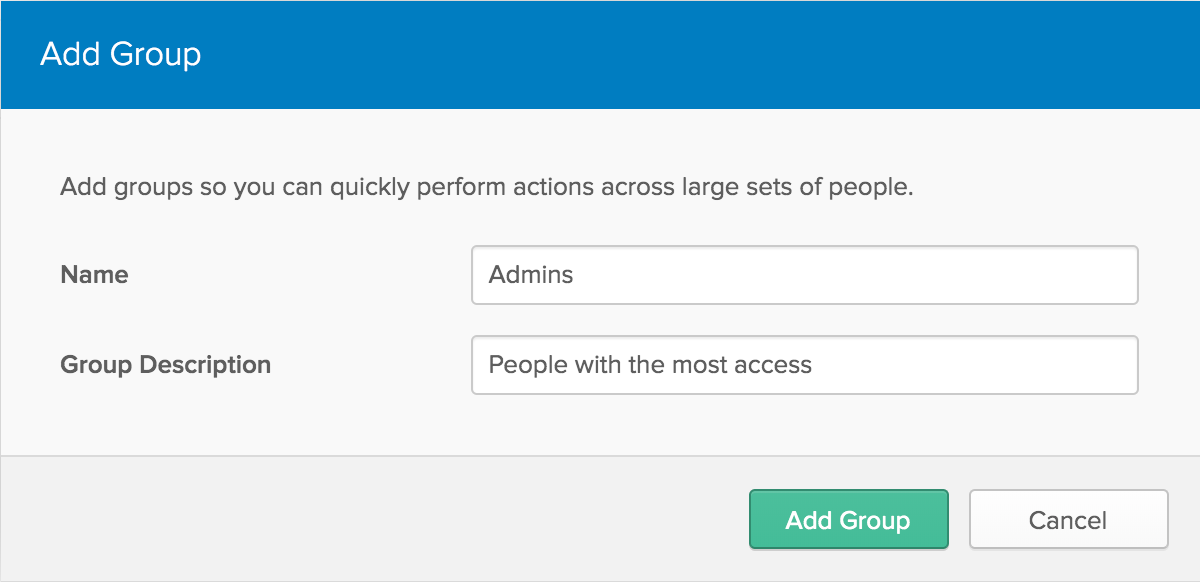
- To create a new Group, click on Groups under the Users tab. Click on Add Group, give a name and description. Now you can add Users to the created Groups.
- Add your SearchBlox OKTA Users to the created group.
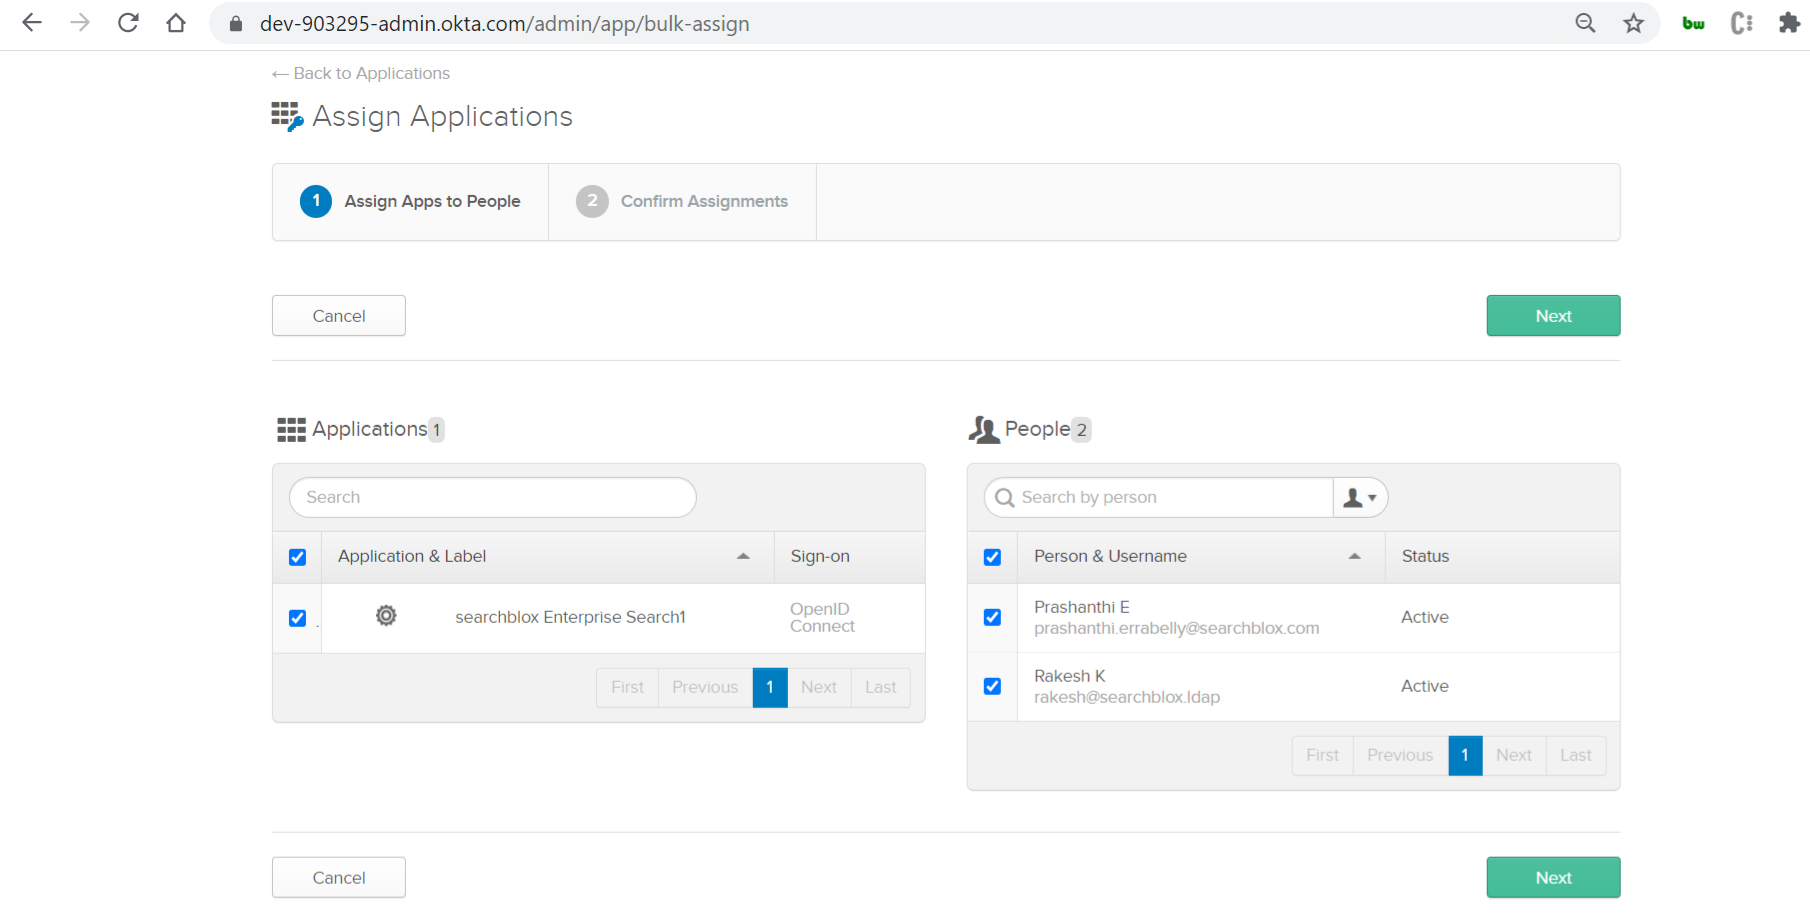
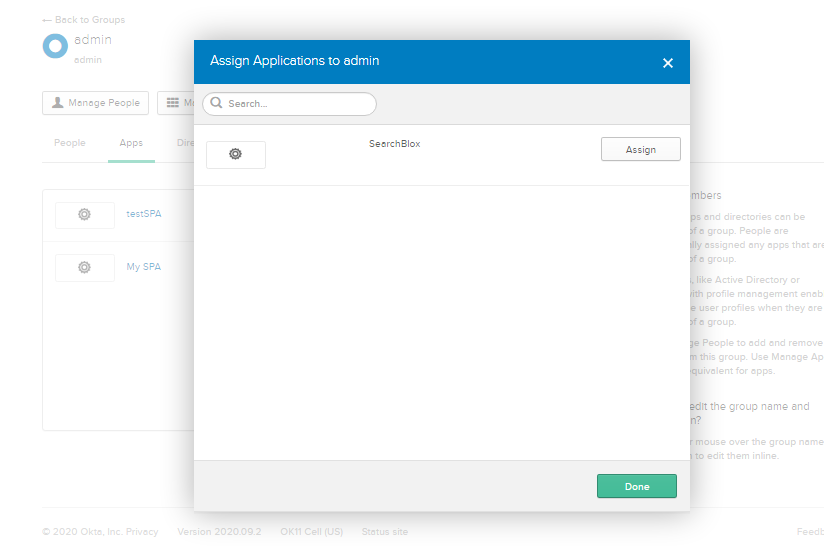
- To assign the application to the created group, click on the group name, click on Manage Apps and then click Assign on the app. Click Done.
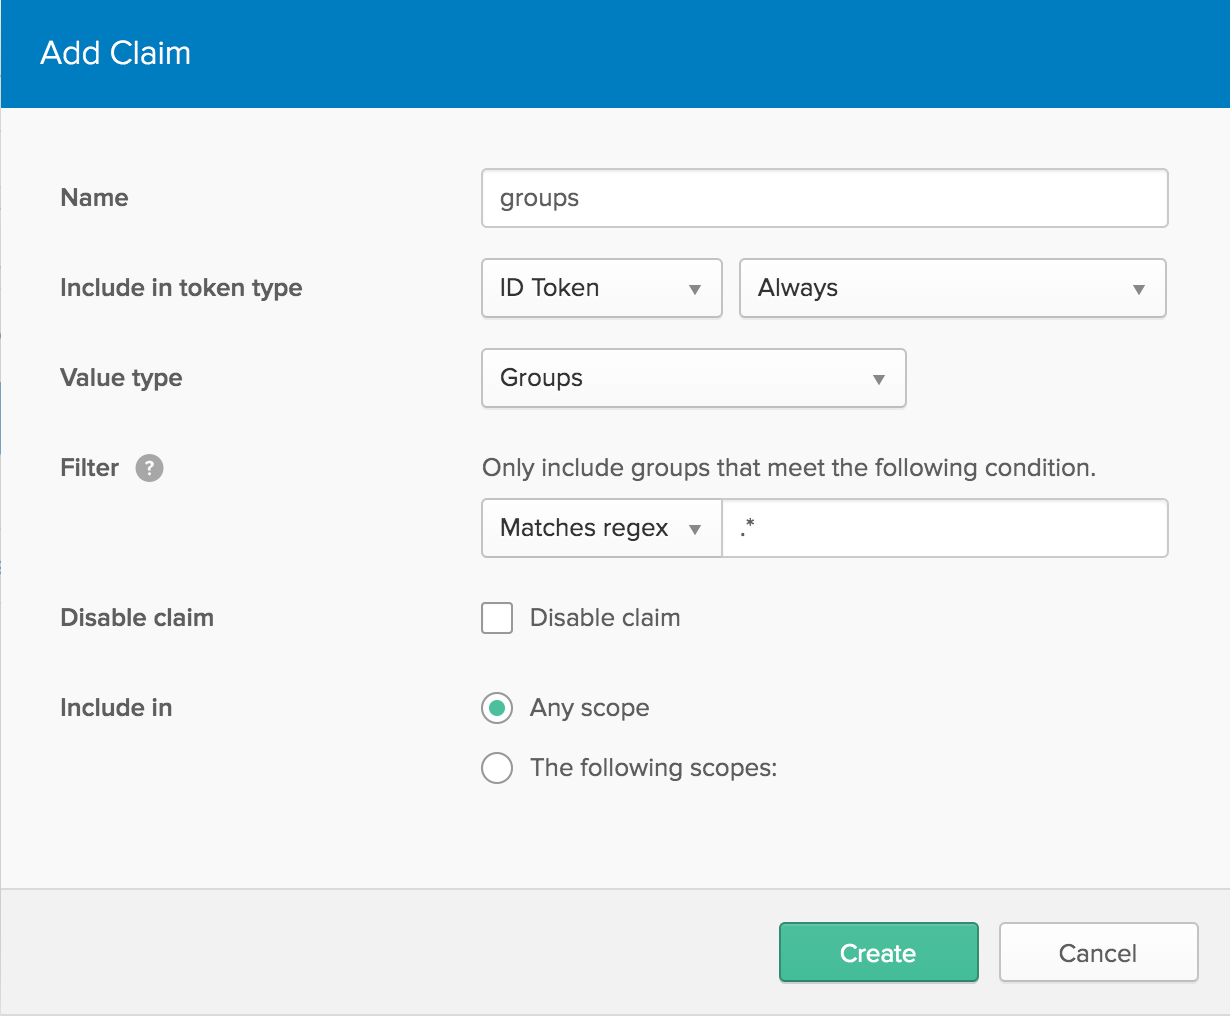
- To add Claims, go to Authorization Servers under the API tab. Click on the default server and the click on the Claims section.
- Click on Add Claim. Give a name, change “Include in token type” to “ID Token”, change Value type to “Groups” and change filter to Matches regex and give value as “.*”. Once complete, click on Create.
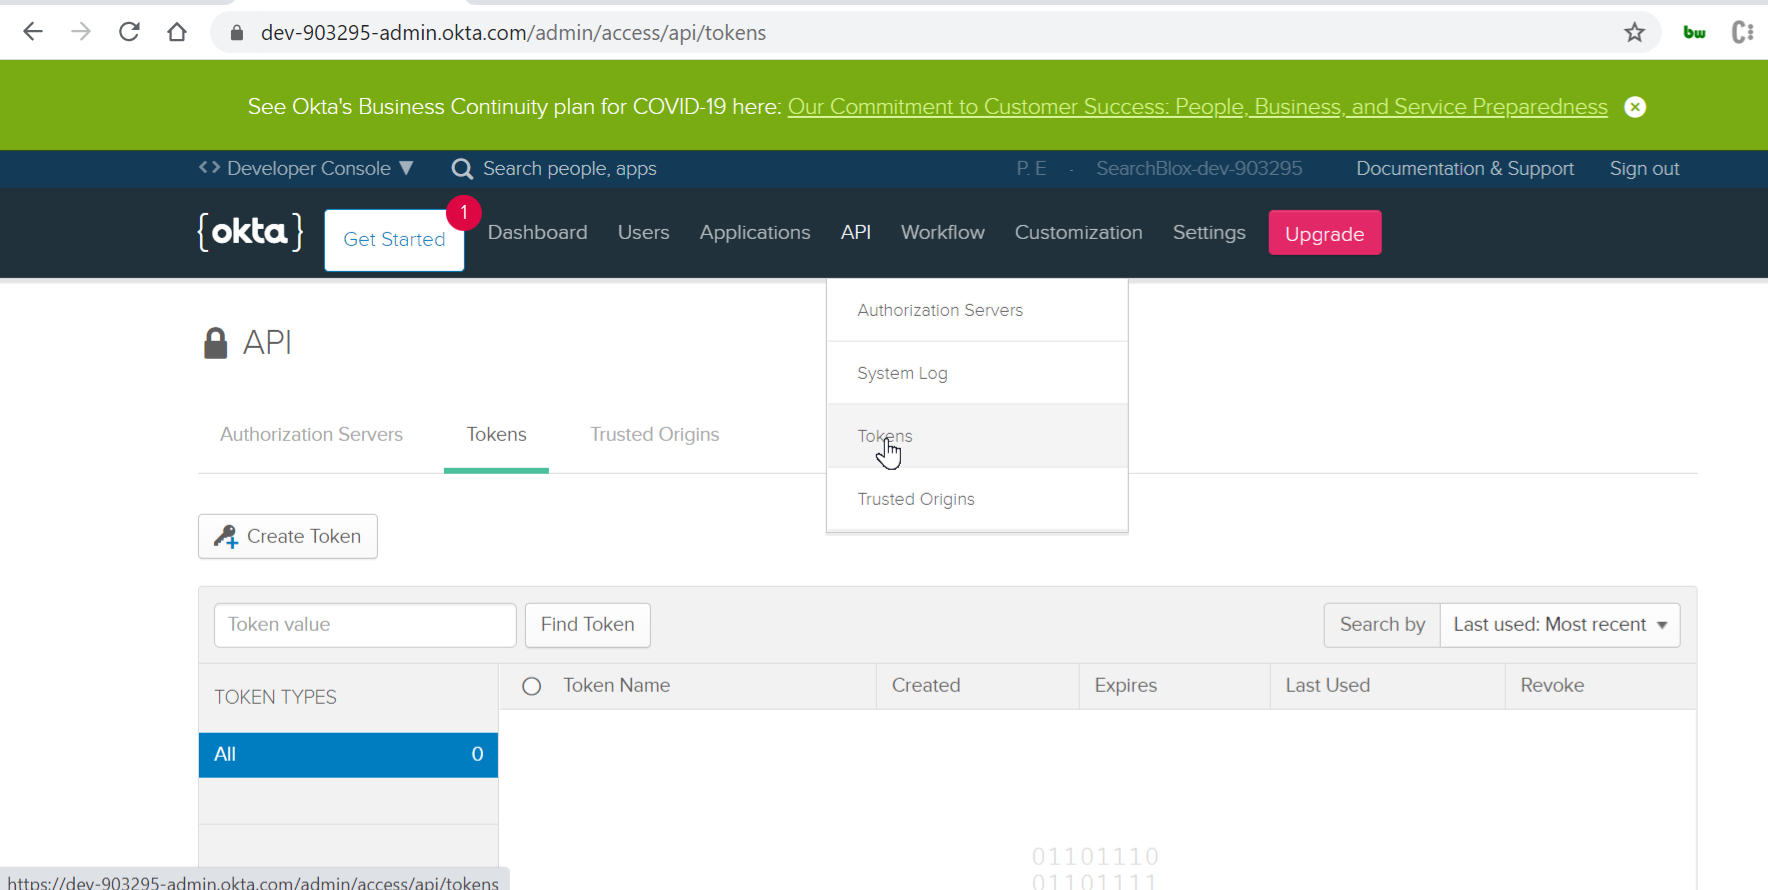
- Login to your SearchBlox Admin Console and configure your LDAP settings and security groups. Then, you can configure your OKTA settings. For the OKTA API, go to Tokens under the API section and click on Create Token.
- Configure OKTA in SearchBlox Admin Dashboard > Search > Security > OKTA as shown.
- Click on Test Connection in both LDAP and OKTA to verify if the configurations were successful
Configure Custom UI
- Download the SearchBlox Custom UI plugin, which is given on request. Extract the file and edit the facet.js file.
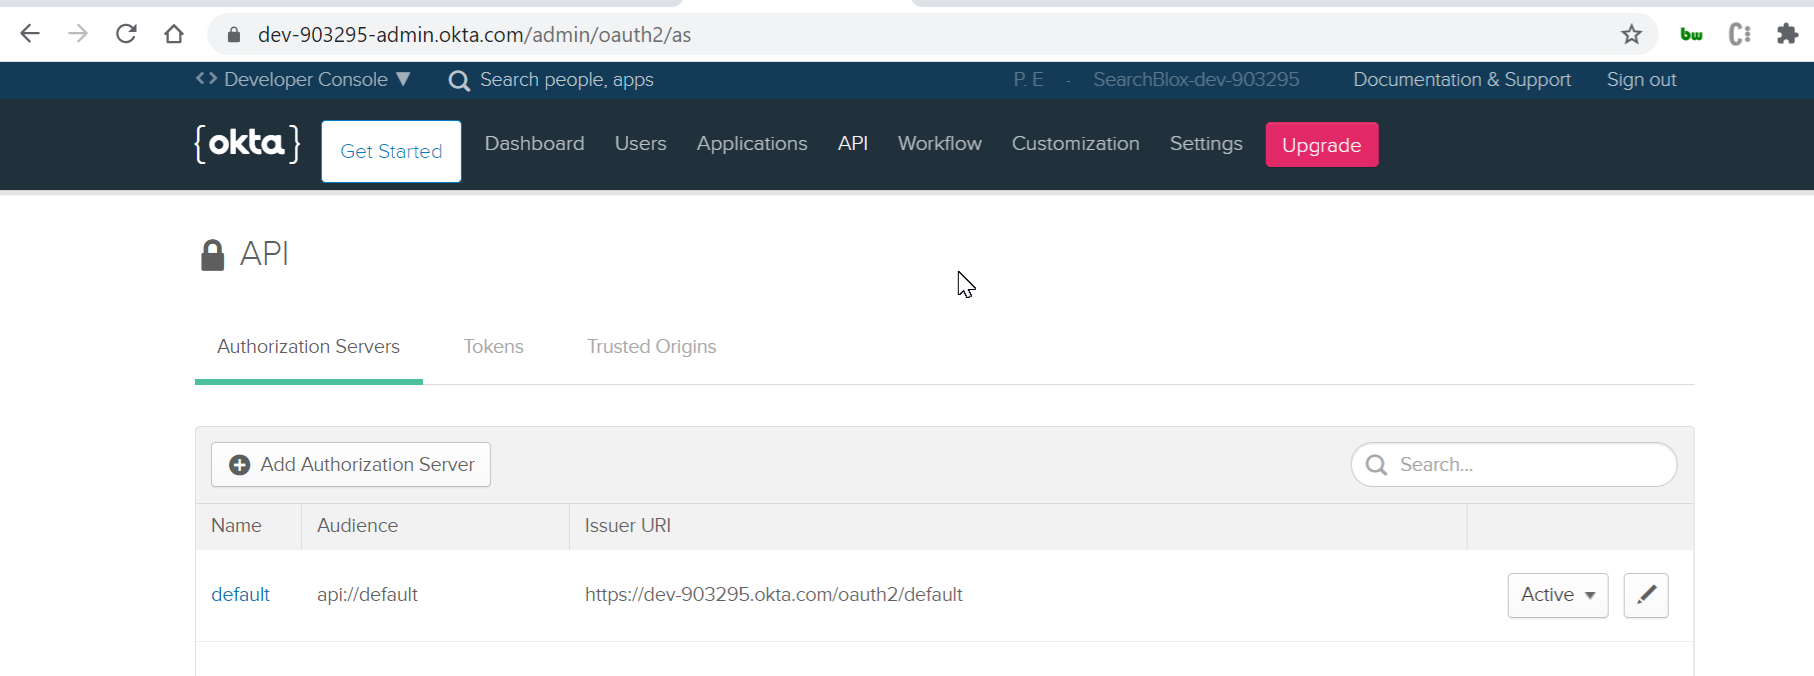
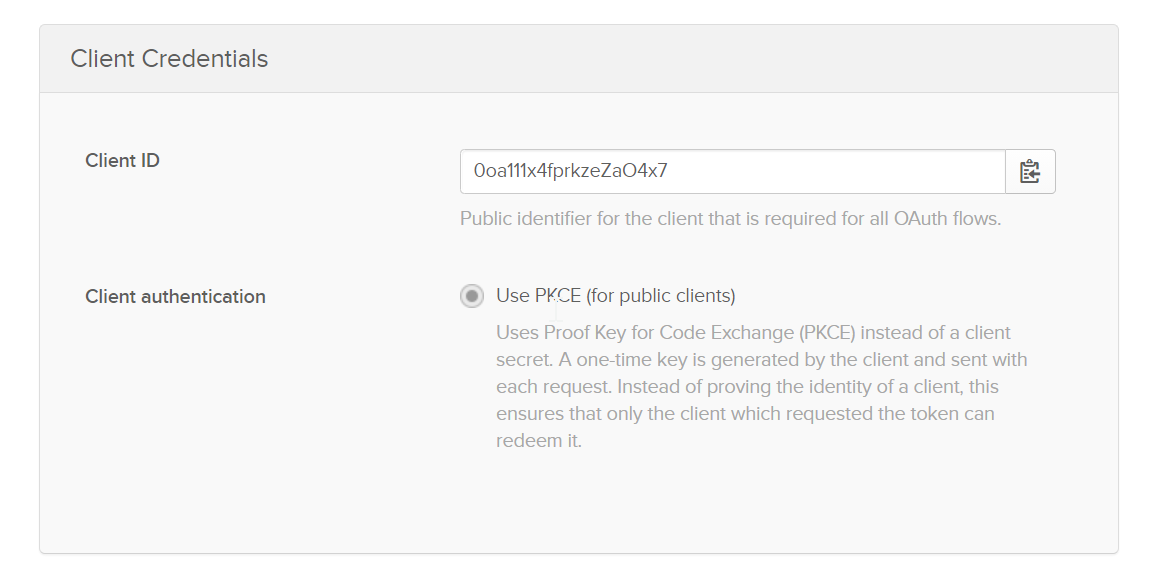
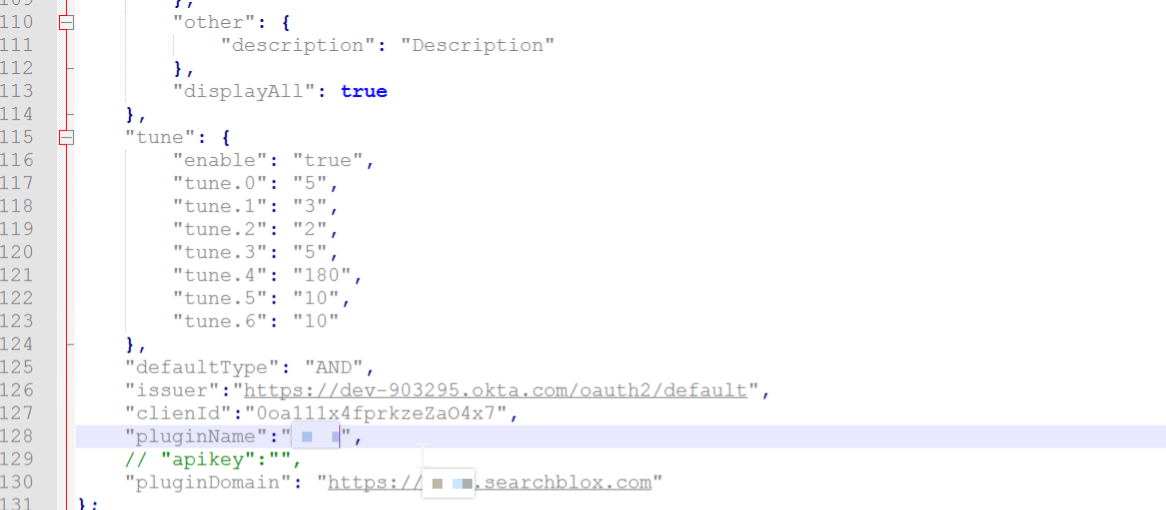
- Update the Issuer URI, ClientID, Plugin Name and Plugin Domain values, according to your OKTA setup, in the Custom UI facet.js file.
- To get the Issuer URI, click on Authorization Servers under the API tab.
- To get the ClientID, go to your OKTA SearchBlox application. Under the General tab, you’ll find it in Client Credentials.
- Make the necessary changes as shown below. Save the new facet.js file and copy and paste the new CustomUI folder into the filepath:
<SearchBlox-Installation-Directory>/webapps/searchblox/<custom-ui-name>/
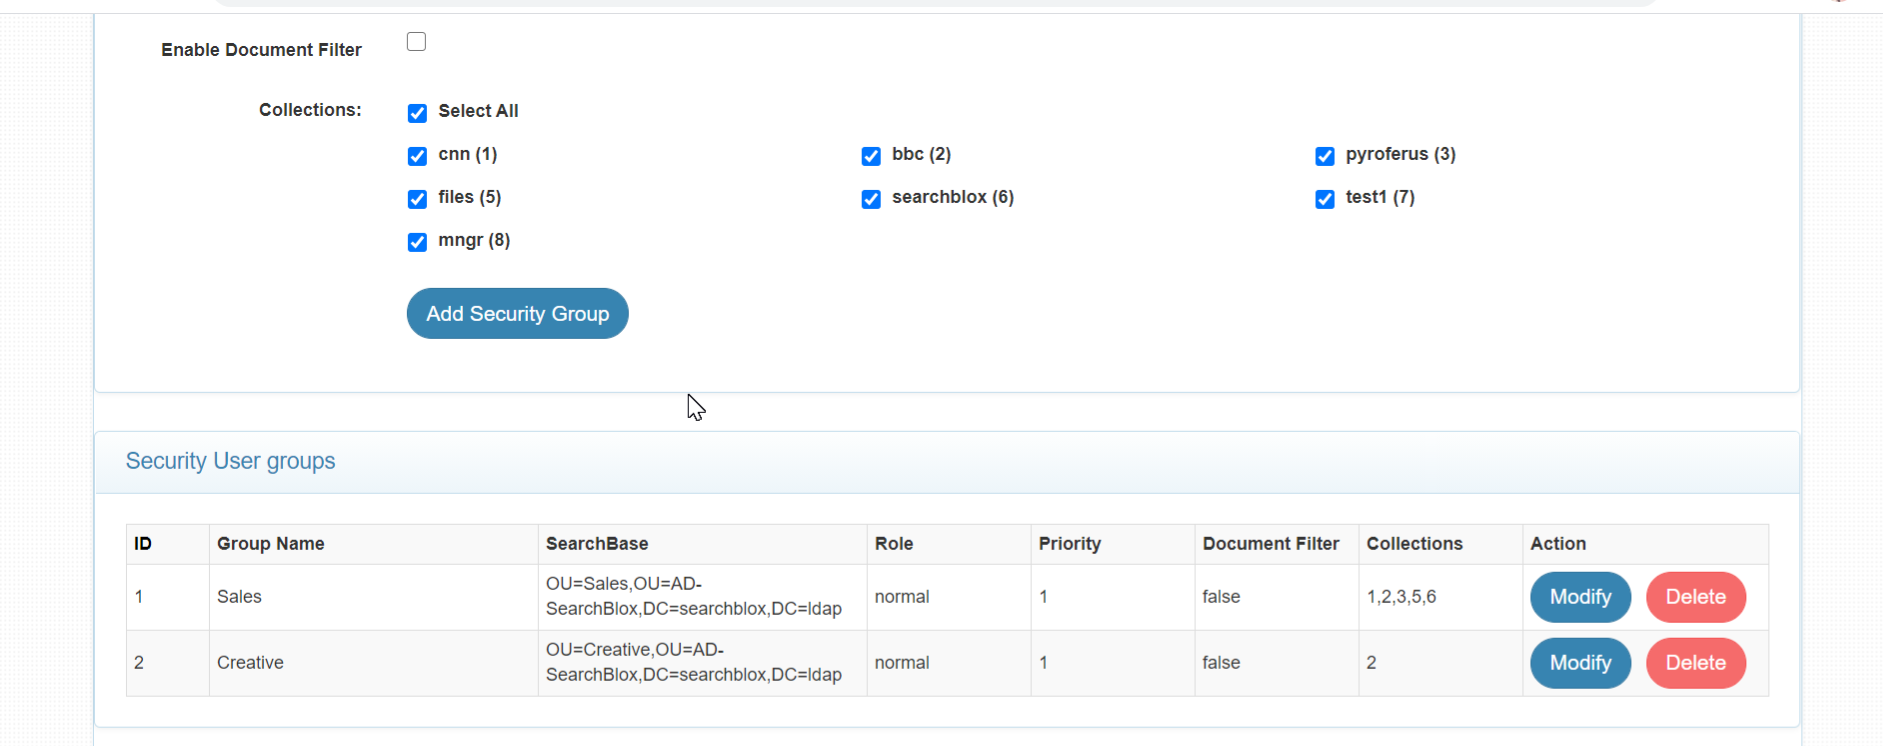
- Now you can access SearchBlox's custom UI with valid users to test the OKTA SSO. You’ll see that a valid user can only access the private collection assigned by the LDAP security groups along with any public collections (if any).
Note:
- Private collections can be accessible only through secure search authentication.
- Public collections are accessible with/without secure search authentication.
- Make sure to whitelist your SearchBlox domain to prevent CORS errors and access the Custom UI. Click HERE to see how to enable CORS.
- Secure search logging is performed in the file
securesearch.logfile found inwebapps/searchblox/logsfilepath.- Configure the LDAP/AD Realm Security groups before integrating it with OKTA set up. OKTA can be configured by enabling "Authorization by LDAP/AD".
- When an OKTA user tries to login, secure search authentication will be done for the OKTA user and the authorization will be done by the LDAP/AD security group searchbase.
Updated over 4 years ago
