Network Connector
Configuring SearchBlox
Before installing a network crawler, install SearchBlox successfully, then create a Custom Collection.

Installing the Network Crawler
Contact [email protected] to get the download link for SearchBlox-network-crawler.
Download the latest version of SearchBlox-network-crawler. Extract the downloaded zip to /opt/searchblox-network in Linux, and C: /searchblox-network in Windows.
Configuring SMB
The extracted folder will contain a folder named /conf, which contains all the configurations needed for the crawler.
Config.yml
This is the configuration file that is used to map SearchBlox to the network crawler. Edit the file in your favorite editor.
apikey: This is the API Key of your SearchBlox instance. You can find it in the Admin tab of the SearchBlox instance.
colname: Name of the collection which you created.
colid: The Collection ID of the collection you created. It can be found in the Collections tab near the collection name from the SearchBlox instance.
url: The URL of SearchBlox instance.
apikey: 267BACD0F31A74F557426DD2A552ECDD
colname: custom
colid: 2
url: https://localhost:8443/searchblox/
Windowsshare.yml
Enter the details of the domain server, authentication domain, username, password, folder path, disallow path, allowed format and recrawl interval in C:/searchblox-network/conf/Windowsshare.yml. You can also enter details of more than one server, or more than one path in same server, in Windowsshare.yml file.
You can find the details in the content of the file as shown here.
//The recrawl interval in days.
recrawl : 12
servers:
//The IP or domain of the Server.
  - server: 89.107.56.109
//The authentication domain if available it can be optional
    authentication-domain:
//The Administrator Username
    username: administrator
//The Administrator password
    password: may@2016
//The Folder path where the data need to be indexed.
    shared-folder-path: [/test/jason/pencil/]
//The disallow path inside the path that needed to be indexer.
    disallow-path: [/admin/,/js/]
//The file formats that need to be allowed for indexing
    allowed-format: [ txt,doc,docx,xls,xlsx,xltm,ppt,pptx,html,htm,pdf,odt,ods,rtf,vsd,xlsm,mpp,pps,one,potx,pub,pptm,odp,dotx,csv,docm,pot ]
//Details of another server or another AD path to crawl
  - server: 89.107.56.109
    authentication-domain:
    username: administrator
    password: may@2016
    shared-folder-path: [/test/jason/newone/]
    disallow-path: [/admin/,/js/]
    allowed-format: [ txt,doc,docx,xls,xlsx,xltm,ppt,pptx,html,htm,pdf,odt,ods,rtf,vsd,xlsm,mpp,pps,one,potx,pub,pptm,odp,dotx,csv,docm,pot ]
Starting the Crawler
The crawler can be started with start.sh in Linux and start.bat in Windows. The crawler starts in the background, but you can see the logs in the logs folder.
Note:
You can only run one network crawler at a time. If you need to run the crawler for different paths or different servers, enter the details in the same network crawler in the Windowsshare.yml file.
To re-run the crawler in another collection, delete sb_network index using a tool that can communicate with Elasticsearch.
Note:
If plain passwords are not allowed in your server, enable the plain password using the following line in start.bat of the network connector:
-Djcifs.smb.client.disablePlainTextPasswords=false
Searching Securely Using SearchBlox
Enable Active Directory secure search under Search → Security settings as shown in the following.
Secure Search can be used based on Active Directory configuration by enabling the checkbox for Secured Search and entering the required settings.
- Select Enable Secured Search
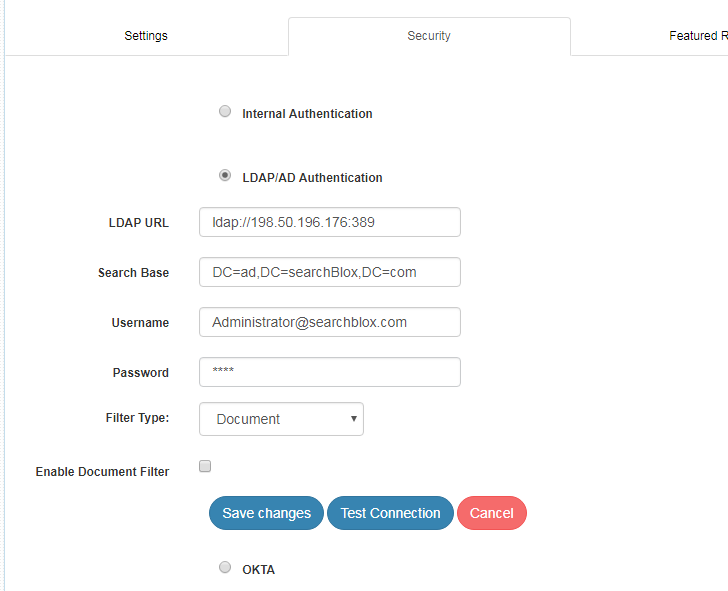
- Enter the Active Directory details
| LDAP URL | LDAP URL that specifies base search for the entries |
| Search Base | Search Base for the active directory |
| Username | Admin username |
| Password | Password for the username |
| Filter-Type | Filter type could be default or document |
| Enable document filter | Enable this option to filter search results based on users |
- Test the connection.
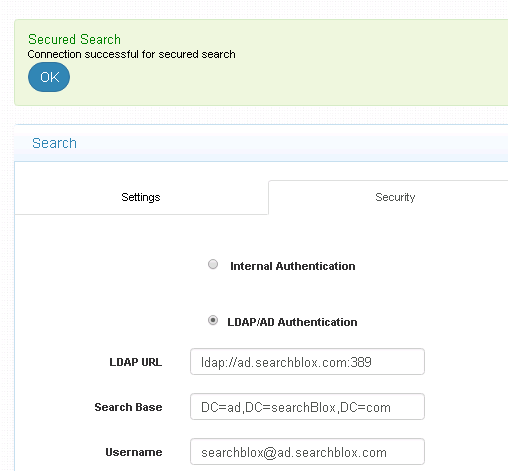
- Log in using AD credentials here:
https://localhost:8443/searchblox/search/login_securesearch.jsp
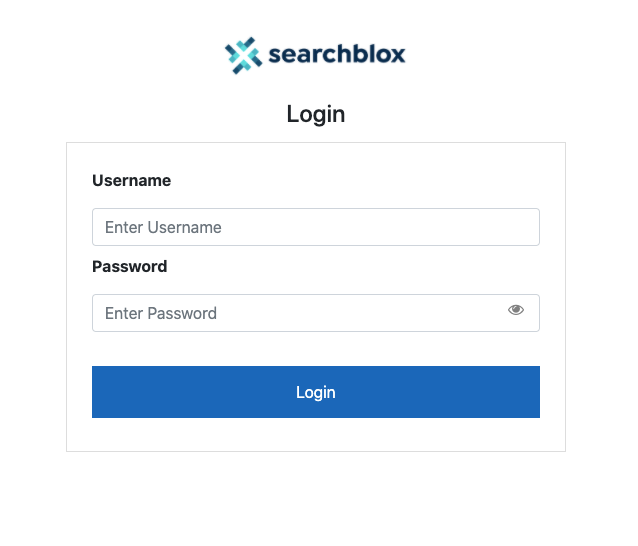
Perform secure search.
Important:
These instructions are applicable for versions 8.5 and onwards.
For versions prior to 8.5, go to ../webapps/searchblox/WEB-INF/secured.yml and enter your credentials as shown in the following.
url: ldap://198.50.196.176:389
search-base : "DC=ad,DC=searchBlox,DC=com"
username: [email protected]
password: Domain@2016
#There are two types 1. Default 2. document
type: document
#Filter search result with SSID,
document-filter: true
Note:
If you need to filter search results based on users, then enter true for document-filter.
Restart the server once changes are made.
For help with configuration details, contact the system administrator.
Navigate to the following URL and log in with a username and password. Then search the accessible files. https://localhost:8443/searchblox/search/login_securesearch.jsp
Admin Access to File Share
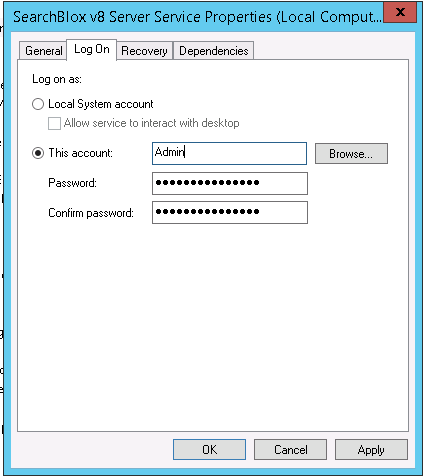
If the SMB file share is available on another server on the same network and requires permission, run the SearchBlox server service with Admin access and enter your credentials. Running as Admin account or account with access to files only will help successfully index files from the share.
Make sure to run the network crawler service as Admin in a similar manner.
How to increase memory in Network Connector
For Windows
Go to
<network_crawler_installationPath>/start.bat
and allocate more RAM by making changes in the following line
rem set JAVA_OPTS=%JAVA_OPTS% -Xms1G -Xmx1G
instead of 1G, enter 2G or 3G.
For Linux
Go to
<network_crawler_installationPath>/start.sh
uncomment the following line and allocate more memory.
JAVA_OPTS="$JAVA_OPTS -Xms1G -Xmx1G"
Delete sb_network to rerun the crawler in another collection.
To rerun the network crawler in another collection, delete the sb_network index using a tool that can communicate with Elasticsearch.
Go to http://localhost:9200/_cat/indices and check whether you can view the sb_network index.
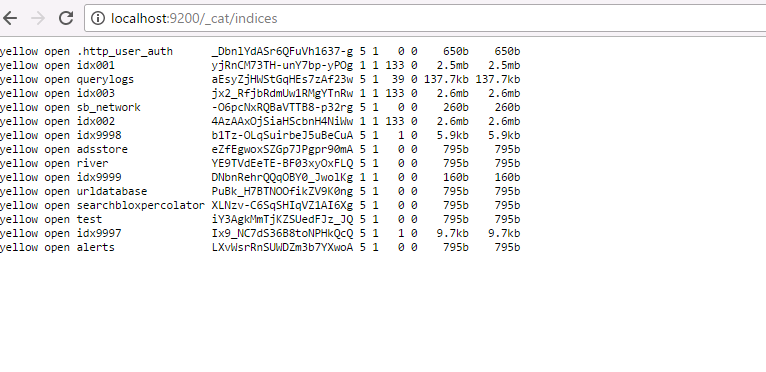
Kibana can also be used with Elasticsearch. Click here to learn how to start and run Kibana.
Start Kibana and access Dev Tools from the lefthand menu.
To delete an index, use the DELETE command as shown here:
DELETE sb_network
Look for the "acknowledged": "true" message.
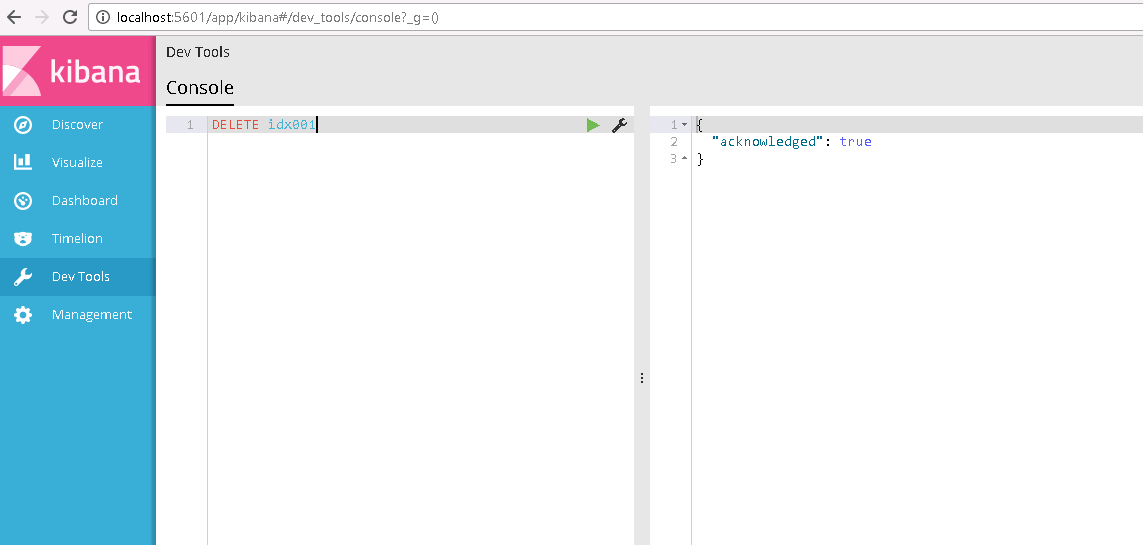
Check http://localhost:9200/_cat/indices; sb_network index should not be available among the indices.
Rerun the crawler after making necessary changes to your config.yml.
Scheduling Network Connector in Windows
It is possible to schedule the Network connector in Windows by using Task Scheduler in Windows.
Create a bat file with the following contents in the folder containing the connector exe file.
cd C:\folderpath
START connector.exe
The bat file with preceding contents can be scheduled in Task Scheduler to run at regular intervals as per your requirement.
Updated over 4 years ago
