
Generate Titles, Descriptions and Keywords For Text
SearchBlox provides two ways to generate Titles, Descriptions and Keywords for Text using LLM based on Llama-2-based model:
Using Python
Prerequisite:
- Download Python source-code using the following link:
Python codeIDEto execute the Python source-code.
Steps to Execute Python
-
Create a virtual environment using the following steps:
- Open the downloaded source-code on the
IDEand in terminal typepython -m venv .venv - Activate the virtual environment using the following command:
.venv\\Scripts\\activate - Install all the required libraries using the following command:
pip install -r requirements.txt
- Open the downloaded source-code on the
-
Run the following command on the virtual environment to run the FastAPI.
uvicorn main:app --reload -
Once the FastAPI is running, the following message will be shown in the terminal:

-
Click on the IP-Address or the link as shown in previous step (
http://127.0.0.1:8000) to start the FastAPI UI on the browser. -
Add
/docsto the end of the URL ashttp://127.0.0.1:8000/docsin the browser to use the FastAPI UI.
-
In the FastAPI UI, click on the
POSTmethod for APIpretext_updateand click onTry it out. -
After clicking on the
Try it outbutton, find theRequest body. In the request body, replace theindexname,host(IP Address),port,usernameandpasswordwith the corresponding server credentials (for theindexname, addidxas prefix. If the collection has only two digits as the collection id, add a0in front of thecollection idfor Exampleidx056).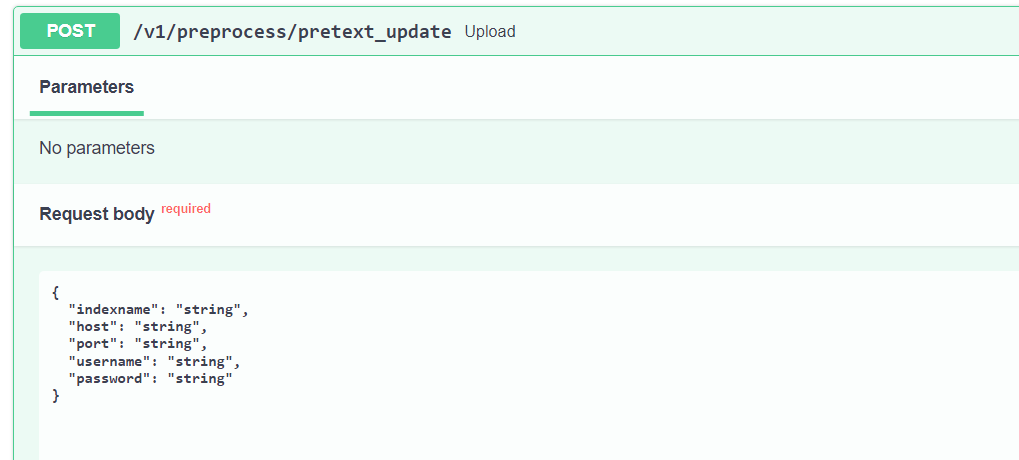
-
Let the
POSTmethod run. Logs about the entity generated and the corresponding results can be seen on the terminal. -
Once the
POSTmethod has completed executing, find the list of JSON objects for the title, description and keywords as shown in the following example.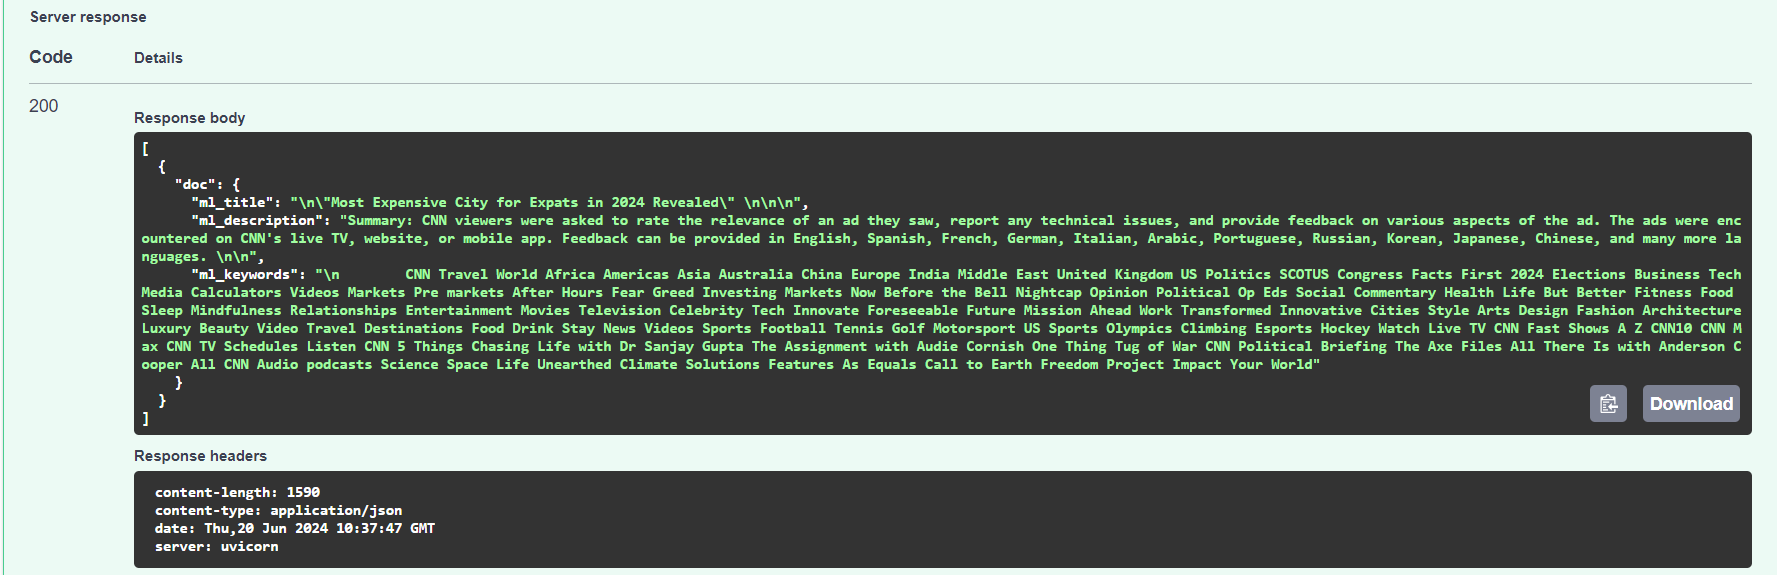
-
After completing the execution of previous step , go to the
SearchBlox Console > Manage Collection, look for the Collection which was used instep 7and click on thesearch iconon that collection as show in the following example.
-
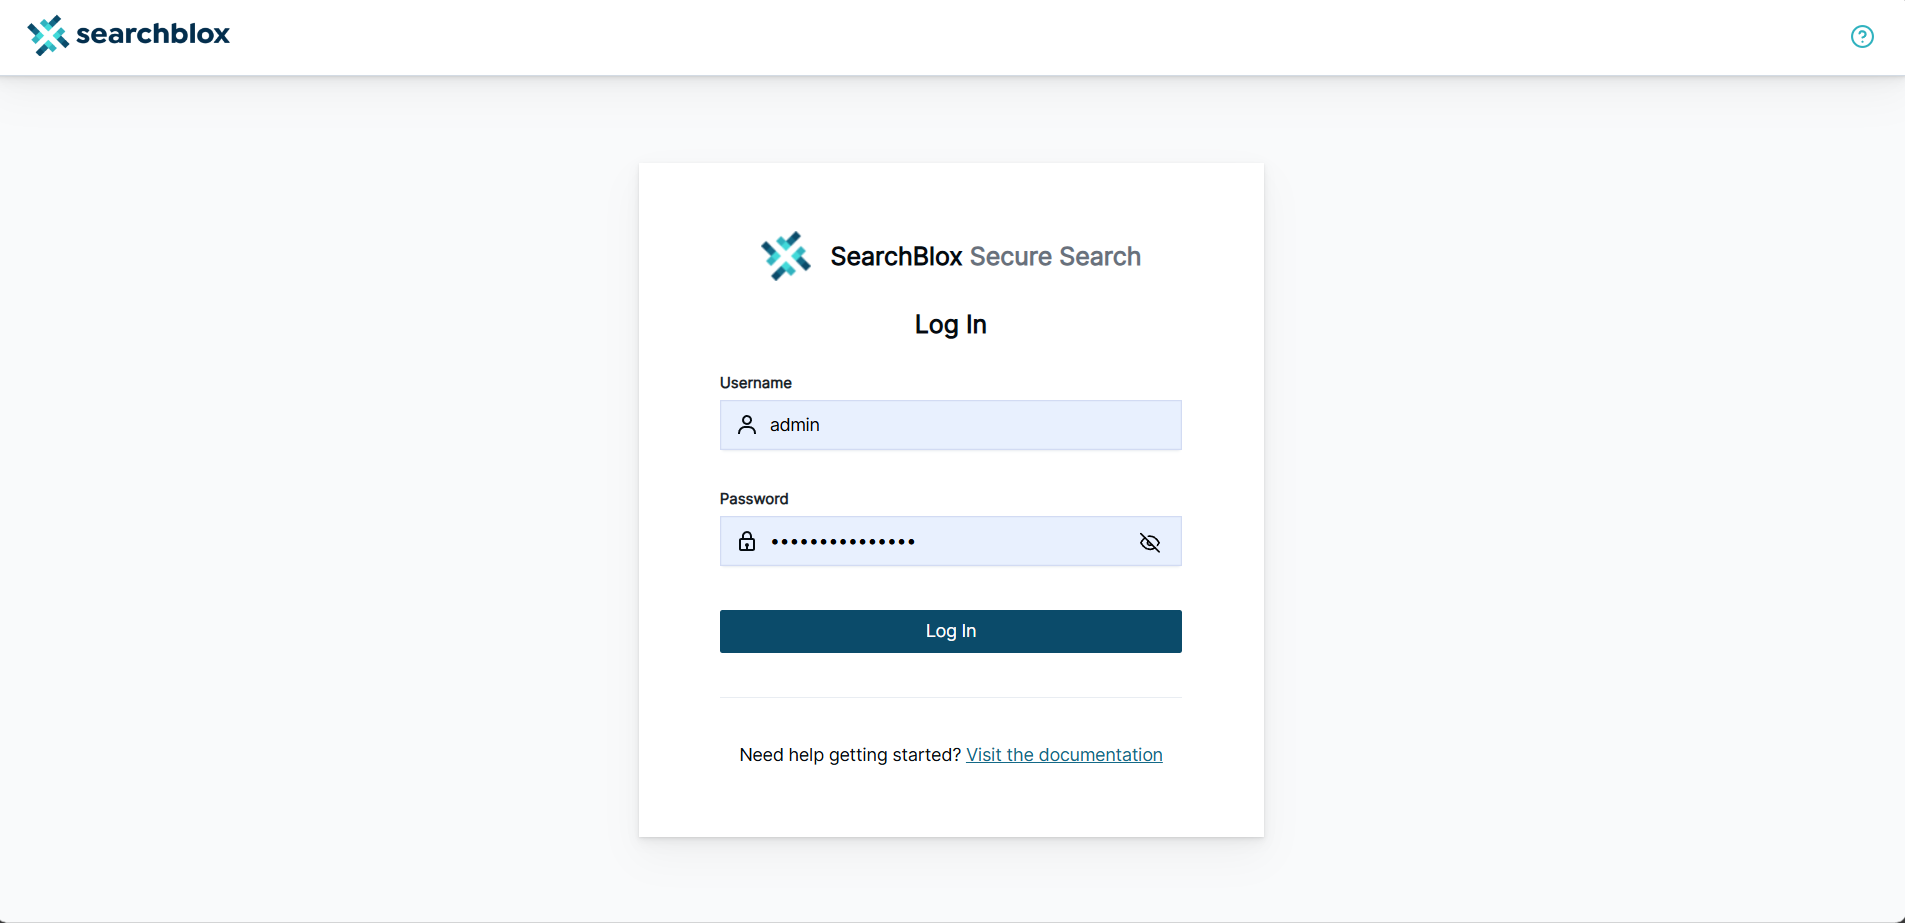
Login into the search page as shown below:
-
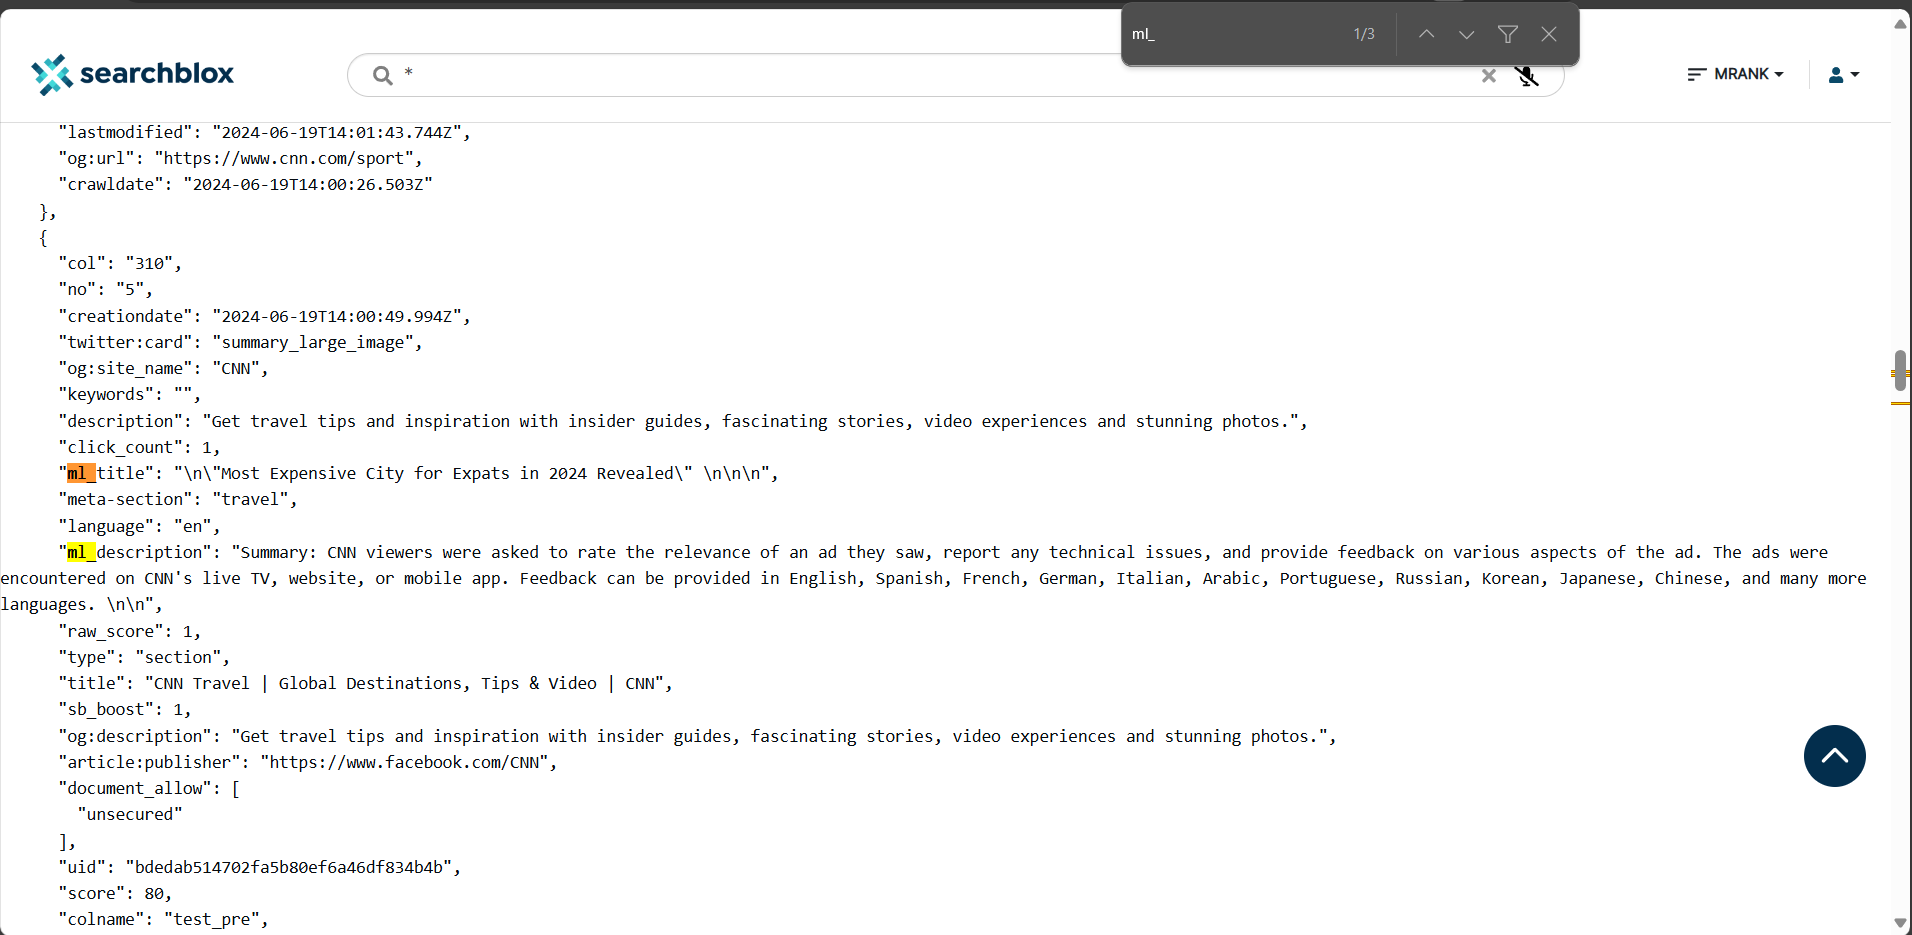
At the end of the search URL, add
&debug=TRUEto open the metadata section. -
Search for the term
ml_and you will find the three entities as shown in the following example:
Using Google Colab Notebook
To use Google Colab Notebook click on the following link:
SearchBlox_LLM
Steps to run the Google Colab Notebook
-
To connect to a runtime, click on the
connectbutton on the upper-right corner as shown in the following:
-
Choose the preferred runtime by clicking
Runtime>Change runtimetype. -
After connecting to your runtime, there are two ways to continue:
- You can connect to the normal runtime, which is free and consumes the least amount of Google-provided resources.
- You can connect to the GPU-accelerated runtime, which comes with certain limitations and has a time limit (if using the free version of Google Colab).
-
Run the first code block under the
install the required librariessection, by clicking theplay buttonmarked in red to execute the code block, as shown in the following screenshot:
-
After selecting your preferred runtime and executing the first code block, there are two options:
-
If
normal runtimeis selected, execute the following code block:
-
If
GPU accelerated runtimeis selected, execute the following code block:
NOTE: Depending on your preferred runtime, you can run only one of these code blocks.
-
-
Using the GPU runtime can decrease the time taken to generate the description, title or keywords.
-
Execute the
import the librariescode block similar to the above. -
Execute the
downloading and loading the modelcode blocks similar to the above. -
Under
user credentialscode block, input yourhost address,port numberandusernameandpasswordinside theauth()variable. Enter the desiredcollection idfor theindex_namevariable as shown in the following example:
-
Execute the
checking cluster healthcode block. -
Execute the
retrieving and cleaning the datacode block. -
Execute the
prompts for the desired outputscode block. -
Execute the
Generating the relevant output and pushing it onto the metadatacode block.
NOTE:
To check the results of the above mentioned code blocks, follow steps 10-13 from the section Using Python .
Updated almost 2 years ago